

15 Cute Letter R Crafts for a Fun Craft Session
Letter crafts give children a hands-on way to look at a letter’s shape and say its sound. Each idea here turns a large paper R into something that starts with R, from a rainbow and a rocket to a raccoon and a rhino, so children can say the word and hear the /r/ at the start while they glue.
Below are 15 letter R crafts for preschoolers, each with what you need, how to make it and one practical note. Most need only paper, glue and crayons. For practice with the letters in a child’s own name, try the name train in these train crafts for preschoolers.
Before you start
Start with a big, clear letter
Draw or print a large capital R, close to the height of the page, on cardstock. For children who are ready, add a lowercase r as well, since they will see both in books. The curve of an R is hard to cut, so precut the letter for younger children and let older preschoolers cut the straight lines with child-safe scissors.
Watch for small parts
Googly eyes, pom-poms, buttons, beads, gems and bottle caps are choking hazards for children under 3. The CPSC small parts rule bans toys for under-3s with pieces that fit inside a test cylinder about the size of a young child’s throat. Draw eyes and use stickers or paper shapes for younger siblings, and for any child who still puts things in their mouth.
Choose child-safe supplies
Look for the ACMI AP seal on crayons, markers, paint and glue: it means a toxicologist has reviewed the product, and ACMI recommends AP-seal products for children in sixth grade and younger. Glue sticks are easier for small hands than liquid glue and wrinkle paper less.
Talk as you go
Say the R word together, point to the letter, and ask what else starts with R. Let the child decide how the rabbit or robot looks; the letter and the talk matter more than a neat result.
The 15 letter R crafts at a glance
| Craft | Main materials | Mess level | Swap for children under 3 |
|---|---|---|---|
| R is for rainbow | Paper strips, cotton balls | Low | Stay close with cotton balls |
| R is for rabbit | Paper, cotton ball tail | Low | Drawn eyes |
| R is for rocket | Paper, precut foil, cotton | Low | Paper flames, no foil |
| R is for robot | Paper shapes, foil, pipe cleaners | Low | Drawn buttons and dials |
| R is for rose | Tissue paper, paper leaves | Medium | Flat paper petals |
| R is for rain cloud | Cotton, paper raindrops | Low | Stay close with cotton |
| R is for race car | Paper circles, markers | Low | Paper wheels, not bottle caps |
| R is for raccoon | Gray and black paper | Low | Drawn eyes |
| R is for rooster | Paper, fringed paper feathers | Medium | Paper feathers, not craft feathers |
| R is for rhino | Gray paper, crayons | Low | Flat paper horn |
| R is for reindeer | Brown paper, twigs or hand tracings | Medium | Red paper nose, not a pom-pom |
| R is for ring | Round stickers, glitter glue | Medium | Stickers, not gems or beads |
| R is for ribbon | Short ribbon pieces, white glue | Medium | Short pieces only |
| R is for rocking horse | Paper, short yarn pieces | Low | Short yarn pieces |
| R is for red apple | Paper or apple stamps | Medium | Paper apple |
1. R is for Rainbow
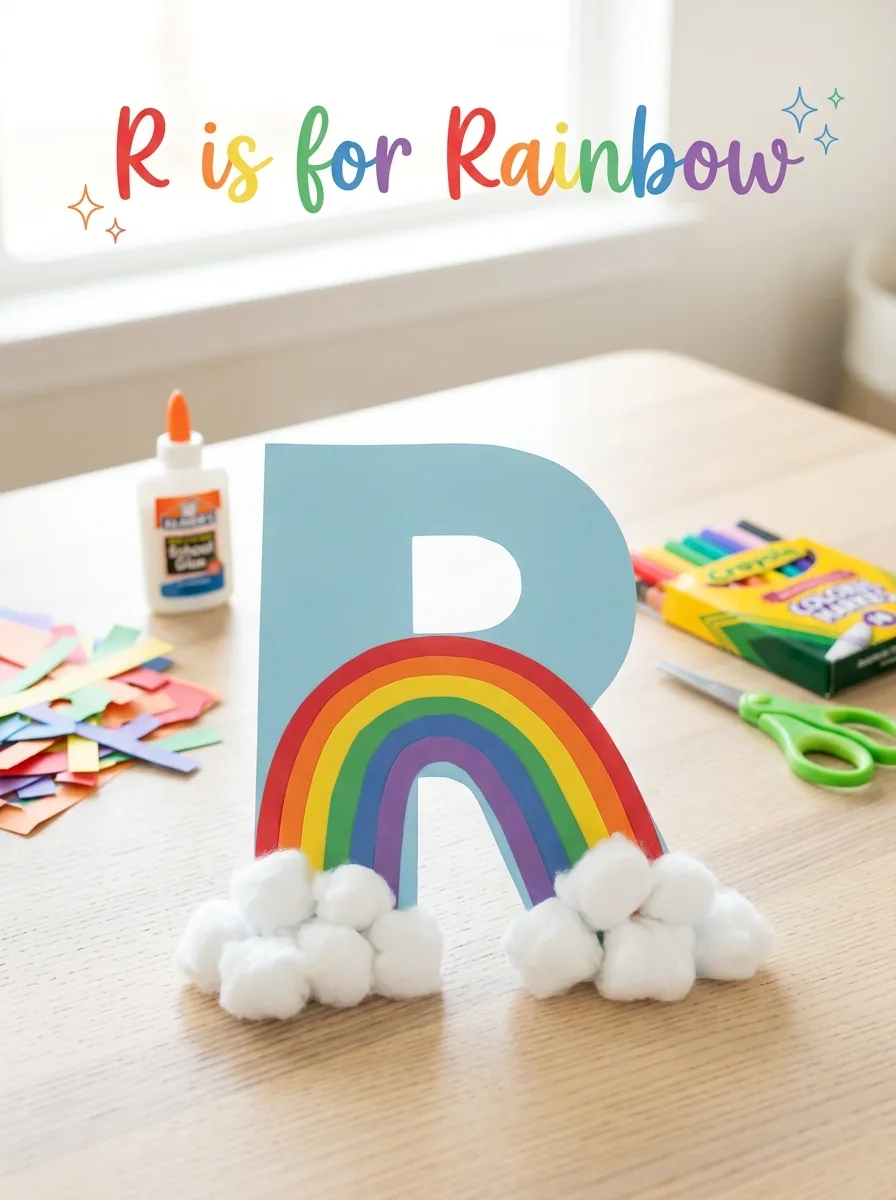
Cut a large letter R from white cardstock. Kids glue strips of colored paper across it in rainbow order, red at the top, then orange, yellow, green, blue and purple, and you trim any ends that stick out. Glue a cotton ball cloud at the foot of each leg of the R. Name each color as it goes on, and point out that red and rainbow both start with R.
Good to know: precut the strips for younger children and lay them out in order before gluing. Cotton balls are easy to pull apart and put in mouths, so stay close to children who still mouth things.
2. R is for Rabbit
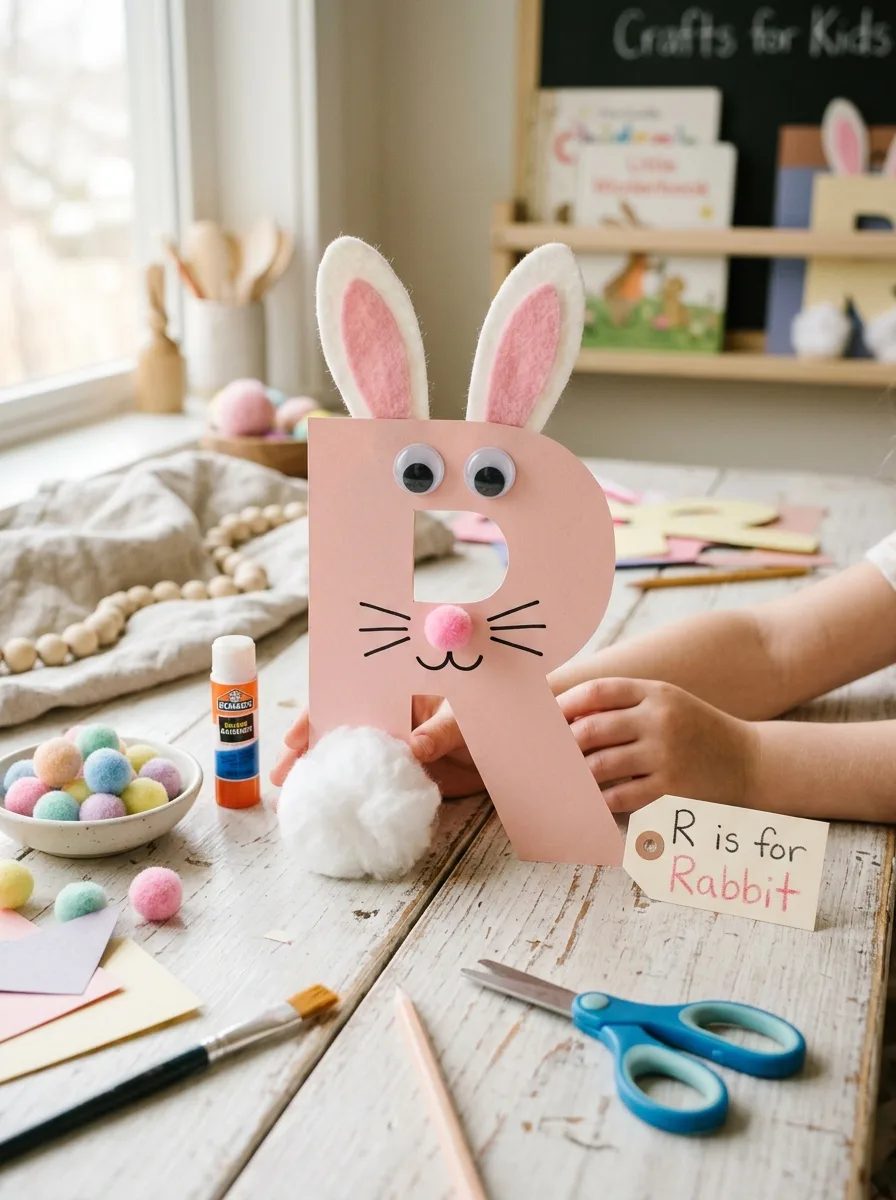
Cut a letter R from white or gray paper. Glue two long paper ears to the top, a cotton ball tail near the bottom and a round paper face with a pink nose, then draw eyes and whiskers with marker. Say “rabbit” together, stretching out the first sound so the child hears the /r/.
Good to know: googly eyes are a choking hazard for children under 3, so draw the eyes for younger kids. A small pink paper heart turned upside down makes an easy nose.
3. R is for Rocket
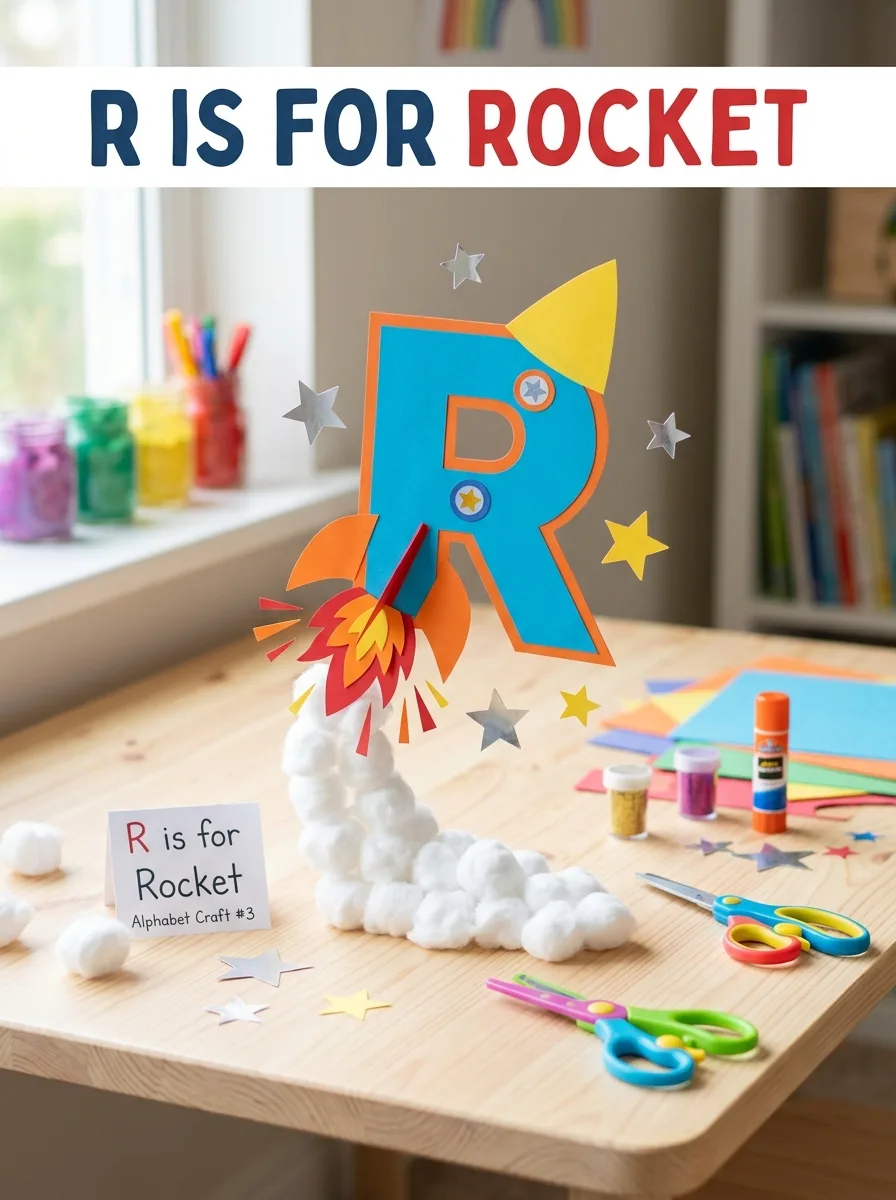
Turn a tall letter R into a rocket: glue a paper triangle on top as the nose cone, add round windows, and stick red, orange and yellow paper flames under the legs. Kids decorate it with markers, foil shapes or star stickers, and glue a little stretched-out cotton below the flames as smoke. Count down from ten together before a pretend launch. For a starry background, borrow a design from these star pattern painting ideas.
Good to know: torn foil has sharp, fiddly edges, so cut it into simple shapes with scissors ahead of time, and use paper flames and drawn stars for children under 3.
4. R is for Robot
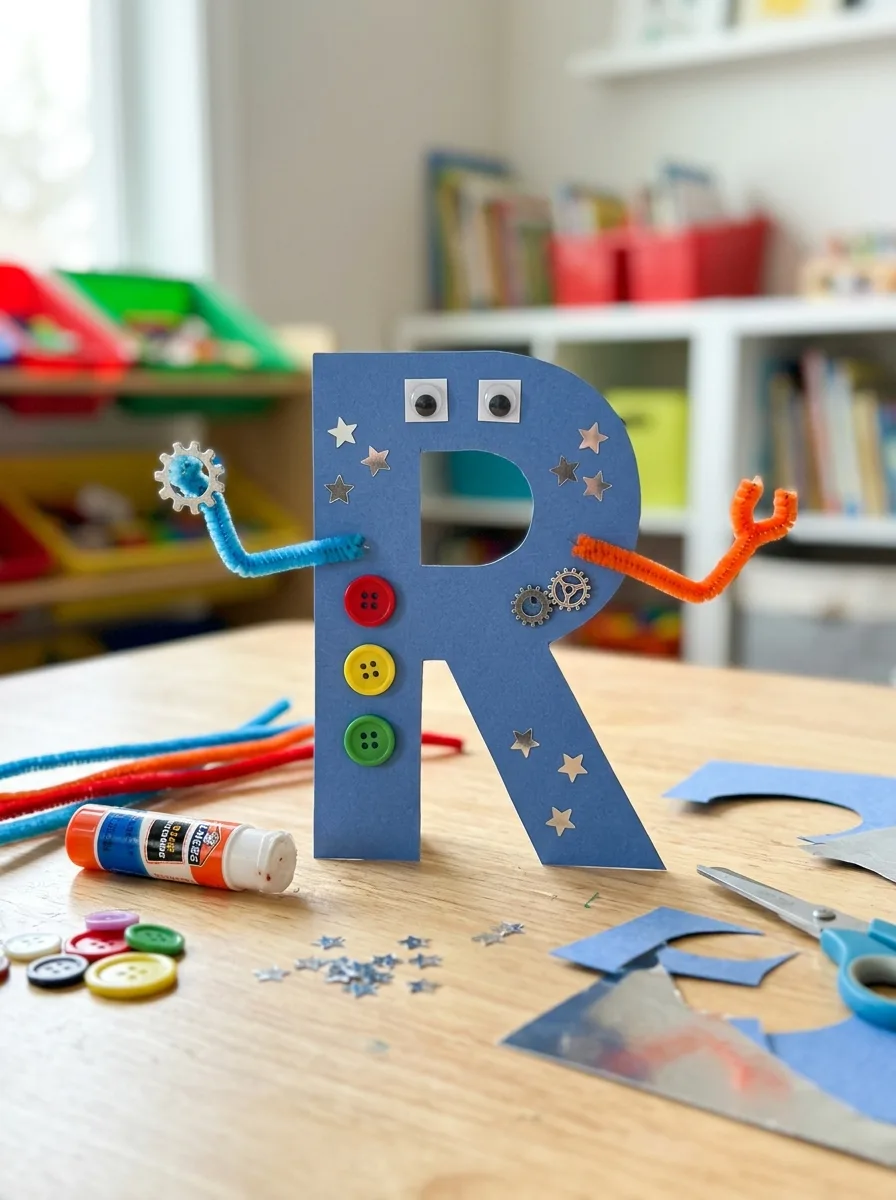
Glue paper squares and rectangles onto a letter R to build a robot: a square head with eyes, a body panel with dials and buttons drawn in marker, and pipe cleaner arms bent at the elbows. Foil squares and shiny stickers give it a metal look. Talk about other R words as you work, such as round, red and run.
Good to know: bottle caps and real buttons are choking hazards for children under 3, so draw them or use stickers. Pipe cleaners have a wire core, so an adult should fold over the cut ends, which can be sharp.
5. R is for Rose
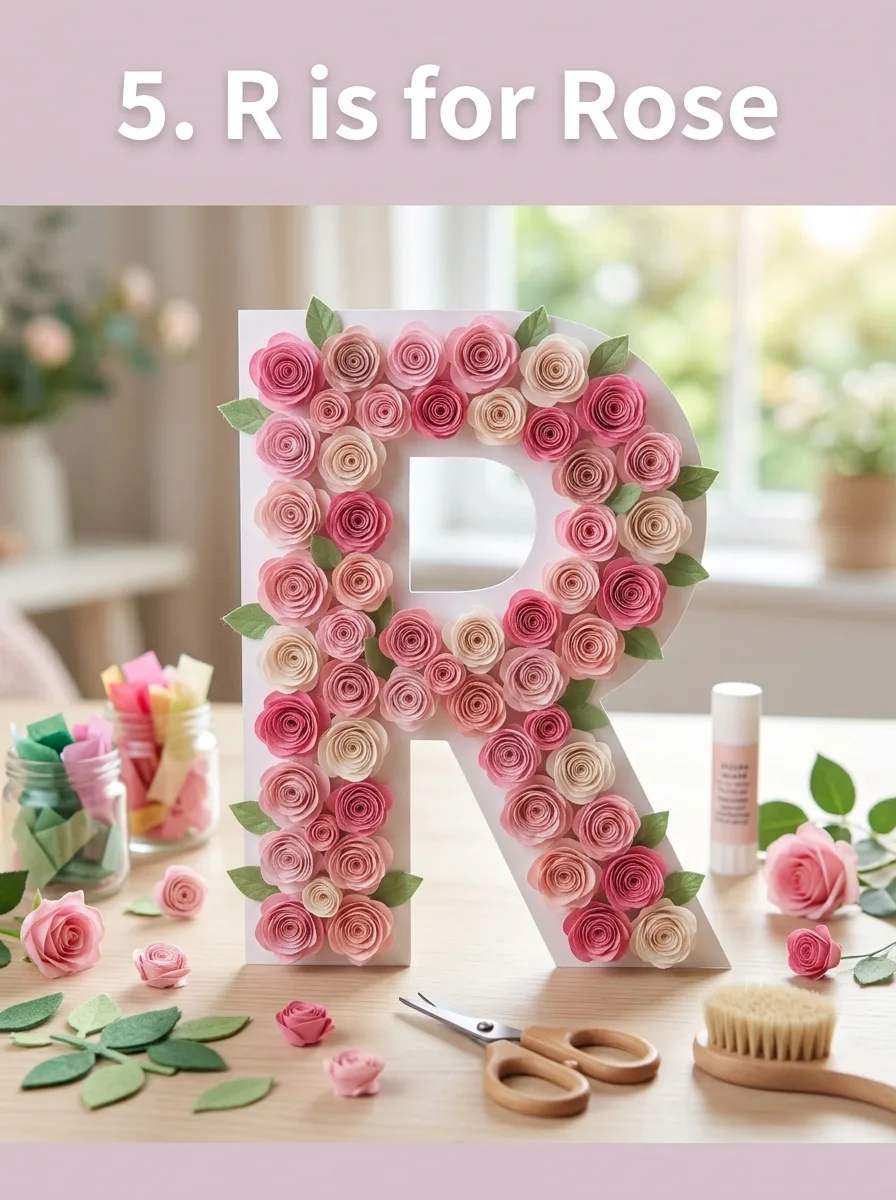
Cut a letter R and a few green paper leaves. Kids scrunch squares of red or pink tissue paper into balls, or roll strips into little buds, and glue them along the letter with white glue. Add the leaves along the sides. Younger children can glue on flat paper petals or draw swirl roses with crayon instead.
Good to know: tissue paper colors can run when wet and stain hands and clothes, so use only a little glue. If you bring in a real rose to smell, choose one with the thorns removed.
6. R is for Rain Cloud
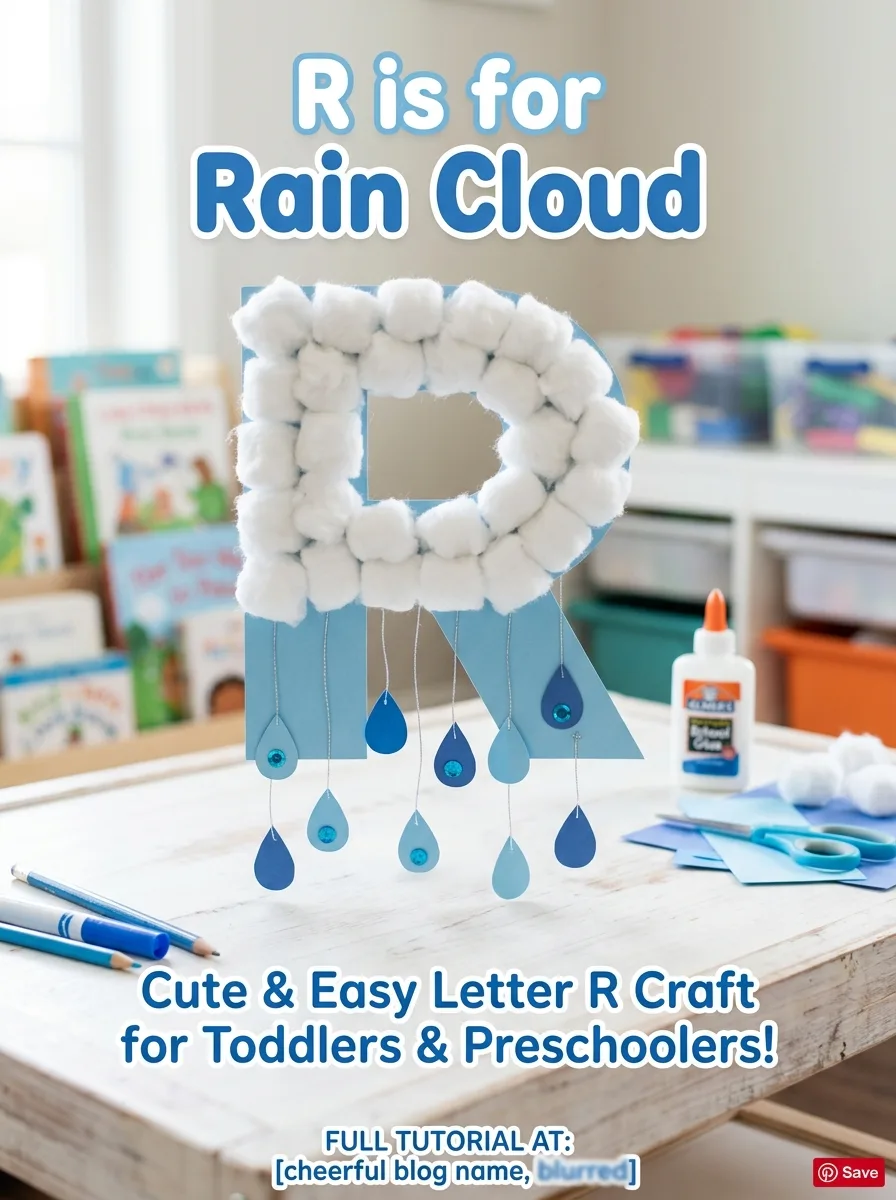
Glue stretched-out cotton balls along the top of a letter R to make a fluffy cloud, then glue blue paper raindrops down the legs and below. Kids count the raindrops as they add them. A small paper umbrella or a pair of rain boots at the bottom finishes the picture, and rain, rainbow and rabbit make good R words to practice.
Good to know: gently stretch the cotton before gluing; thin, flat puffs stick better than whole balls. Precut the raindrops so the counting doesn’t wait on scissors.
7. R is for Race Car
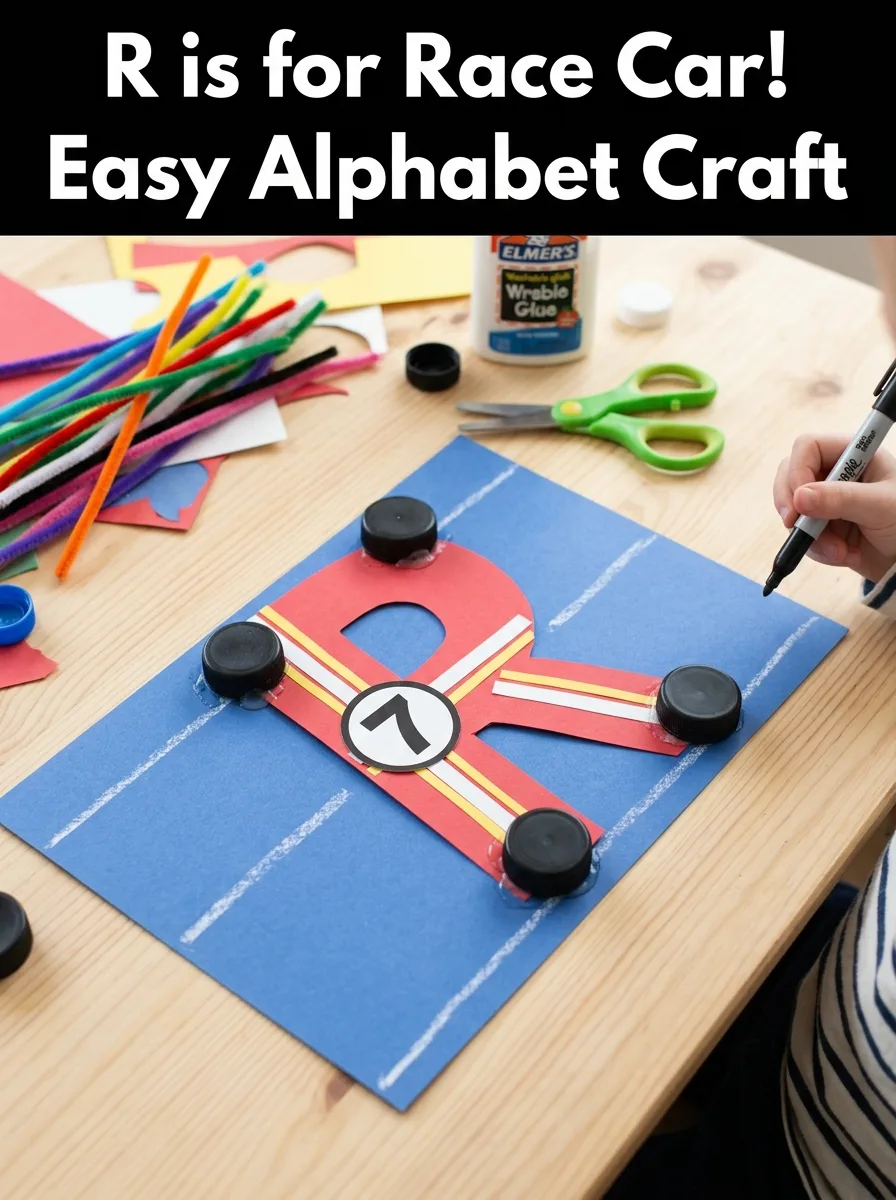
Lay a letter R on its side, or glue it onto a paper car body, and add two black paper circles as wheels. Kids color racing stripes, write a number on the side and glue on a small checkered flag drawn on paper. Make engine noises together, then say race, road and red, listening for the R at the start of each word.
Good to know: bottle cap wheels look good, but caps are a choking hazard for children under 3. Black paper circles or round stickers work just as well.
8. R is for Raccoon
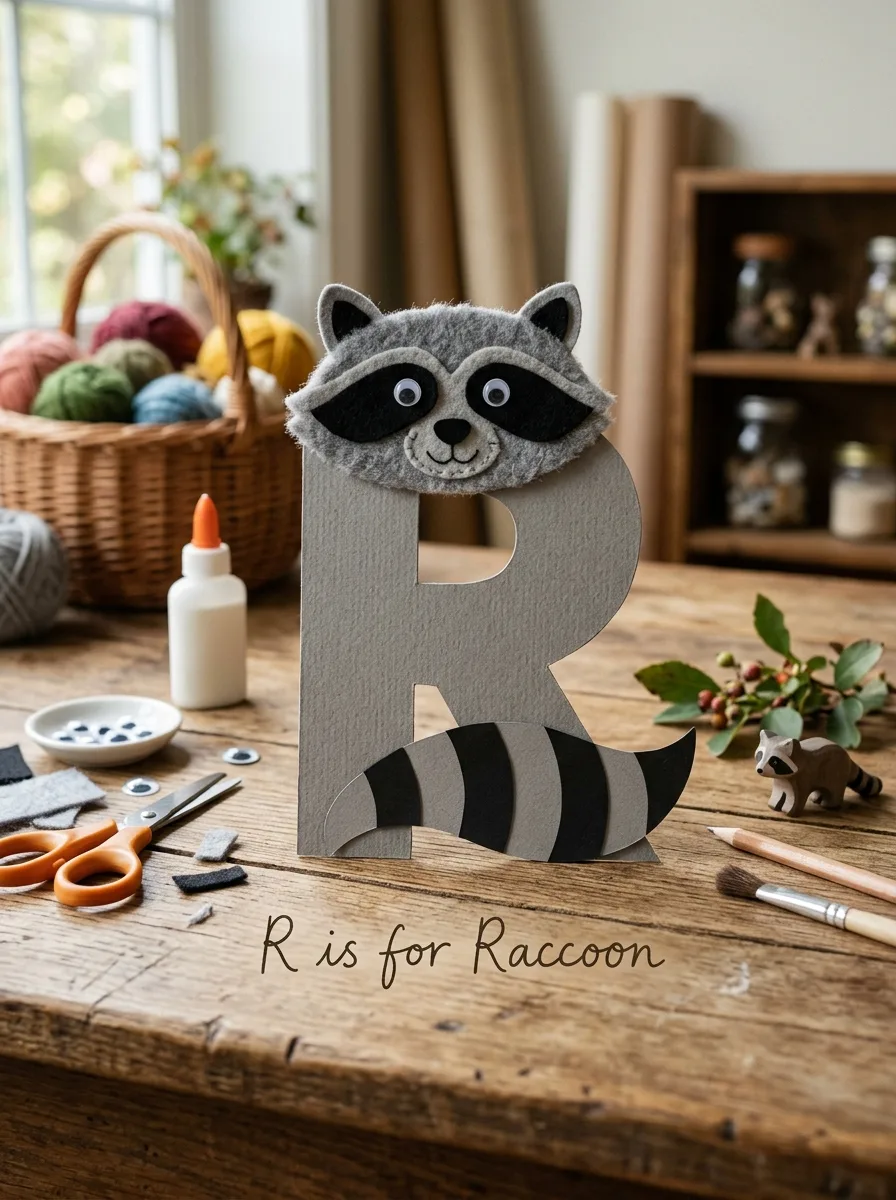
Cut a letter R from gray paper. Glue a round gray face to the top with a black paper mask across the eyes, two small pointed ears and a black nose. Add a bushy tail along one leg and draw dark rings around it. Raccoons are mostly nocturnal, which means they are active at night, a fact to share as you work.
Good to know: precut the mask, since small curves are hard for preschoolers to cut, and draw the eyes on it for children under 3 rather than gluing on googly eyes.
9. R is for Rooster
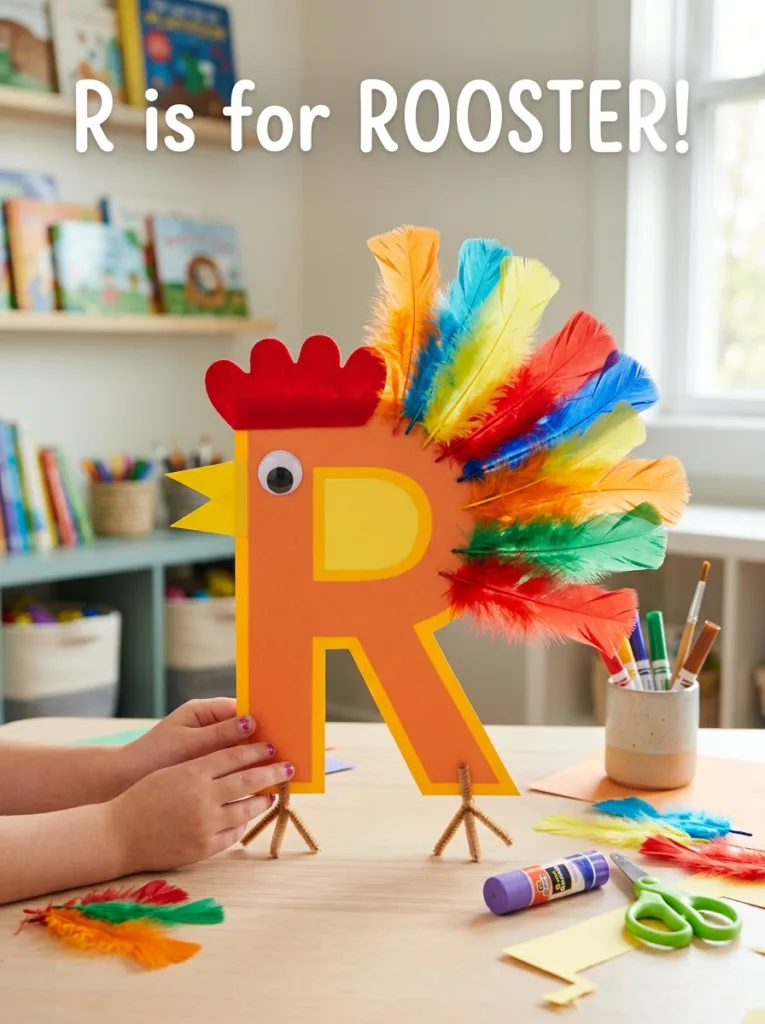
Use the letter R as a rooster’s body. Glue a red comb on top of the head, a red wattle under a yellow paper beak, and a big tail of feathers in bright colors. Kids can snip fringes along paper strips to make the feathers. Practice a loud rooster call together, then say “rooster” and listen for the R.
Good to know: real craft feathers shed and are easy to put in mouths, so use paper feathers for children under 3. Glue the tail on last, once the body has set, so it doesn’t slide.
10. R is for Rhino
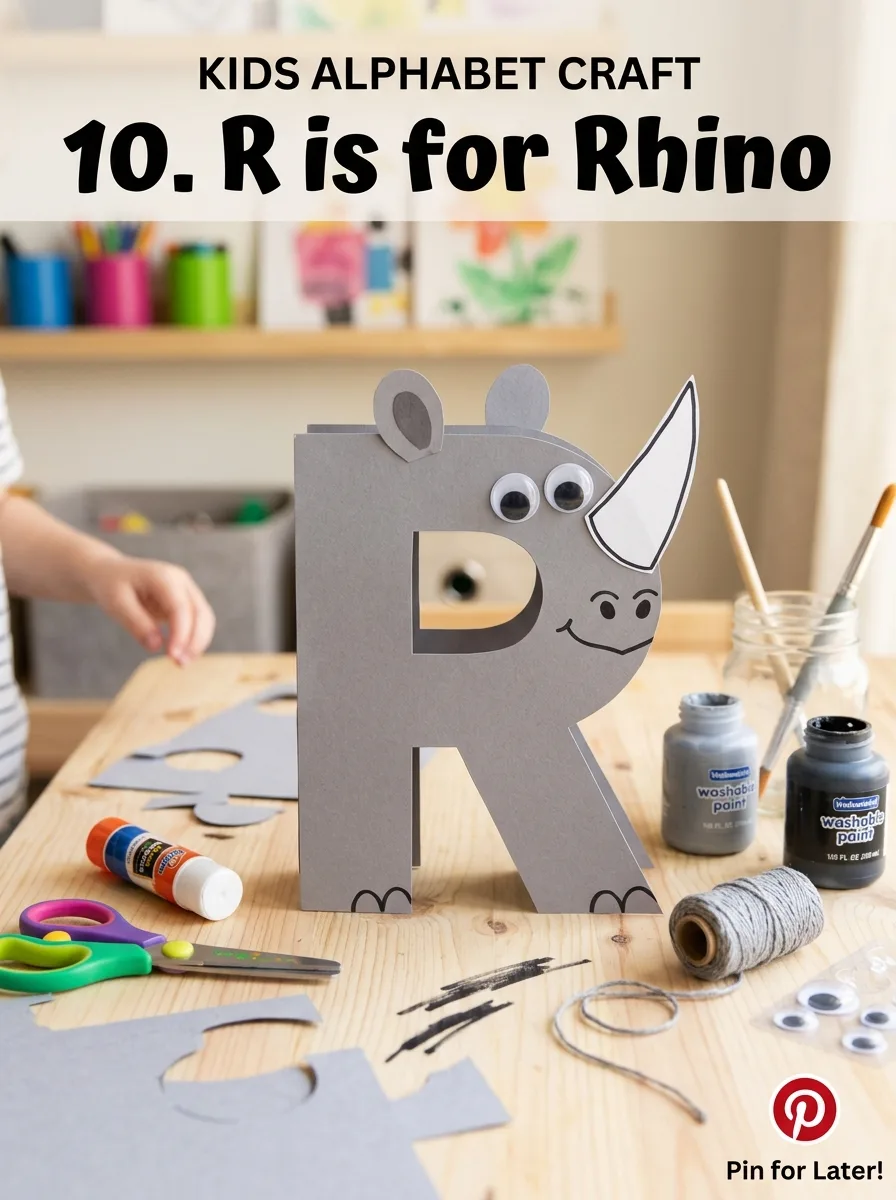
Cut a letter R from gray paper and glue it onto a large gray oval body with four short legs. Add a head with a pointed horn, small ears and an eye, and let kids draw wrinkles on the skin with a darker crayon. Rhinos live in parts of Africa and Asia: African rhinos have two horns, while some Asian rhinos have just one.
Good to know: rolling a small paper triangle into a cone makes a raised horn for older children; a flat paper triangle is easier for younger ones.
11. R is for Reindeer
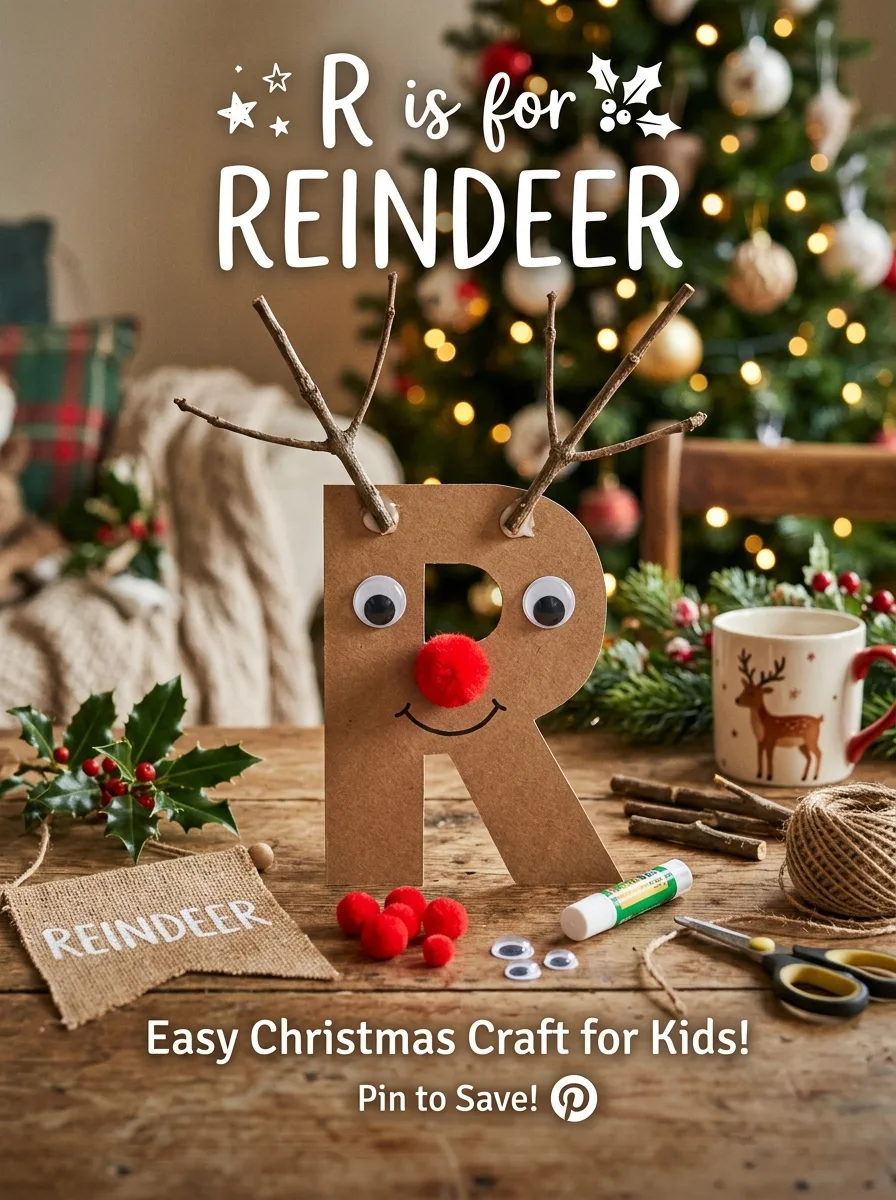
Cut a letter R from brown paper. Glue a brown head at the top with two antlers, a red paper nose and drawn eyes. For the antlers, use clean twigs or trace the child’s hands on brown paper and cut them out. Both male and female reindeer grow antlers, an R fact worth sharing.
Good to know: a red pom-pom nose is a choking hazard for children under 3, so use a red paper circle for them. Check twigs for sharp ends and wipe them clean before gluing.
12. R is for Ring
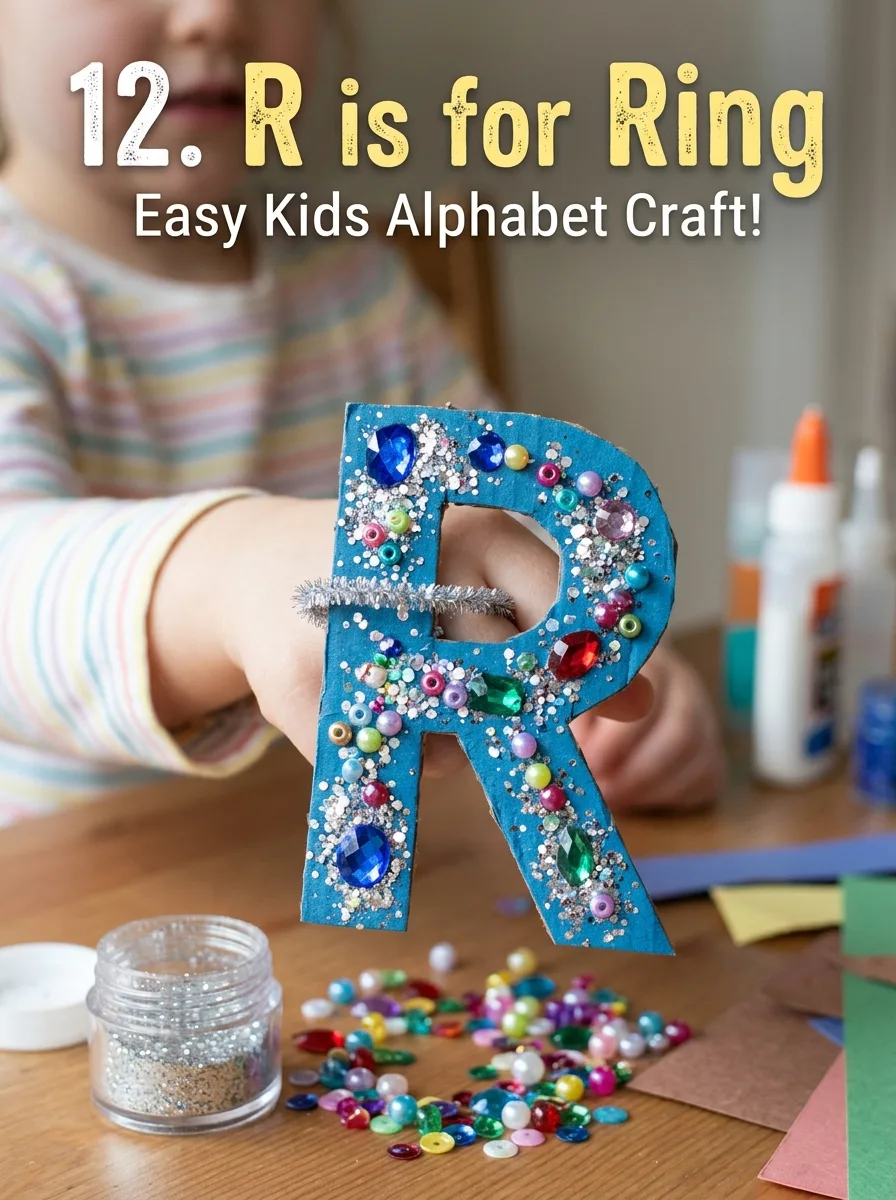
Cut a letter R and draw circles along it to look like rings. Kids fill each circle with round stickers or glitter glue, or glue a shiny paper “jewel” in the middle. Older children can add a few craft gems. Count the rings together and practice other R words, such as round and red.
Good to know: gems and beads are choking hazards for children under 3, so stick to stickers and glitter glue for them. Glitter glue needs time to dry, so leave the letter flat until it sets.
13. R is for Ribbon
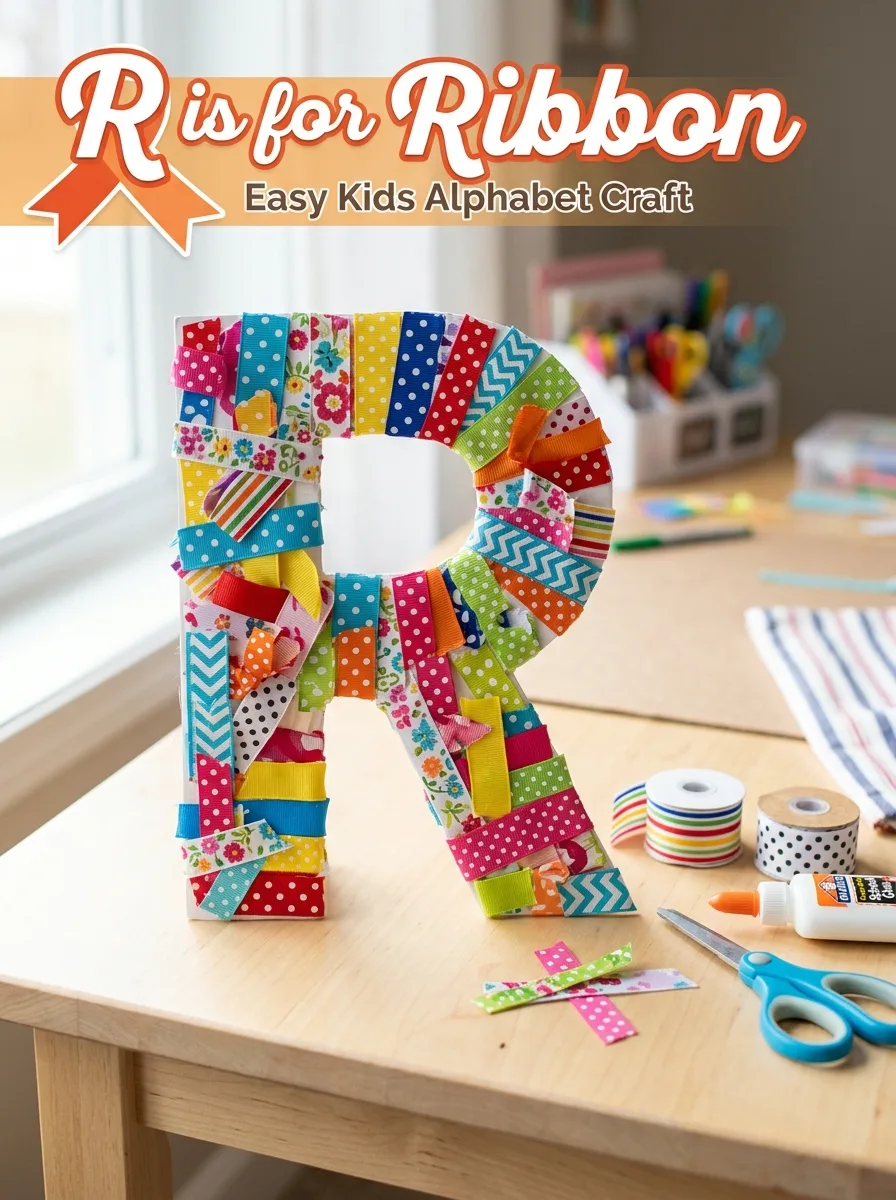
Cut a large letter R from cardstock and gather ribbon scraps in different colors, widths and textures, cut into short pieces. Kids brush white glue onto one part of the letter at a time and press the ribbon pieces across it until the whole R is covered. Talk about how each ribbon feels: smooth, bumpy, shiny or soft.
Good to know: cut the ribbon into short pieces before you start so it lies flat and stays on, and keep the long lengths away from babies and toddlers.
14. R is for Rocking Horse
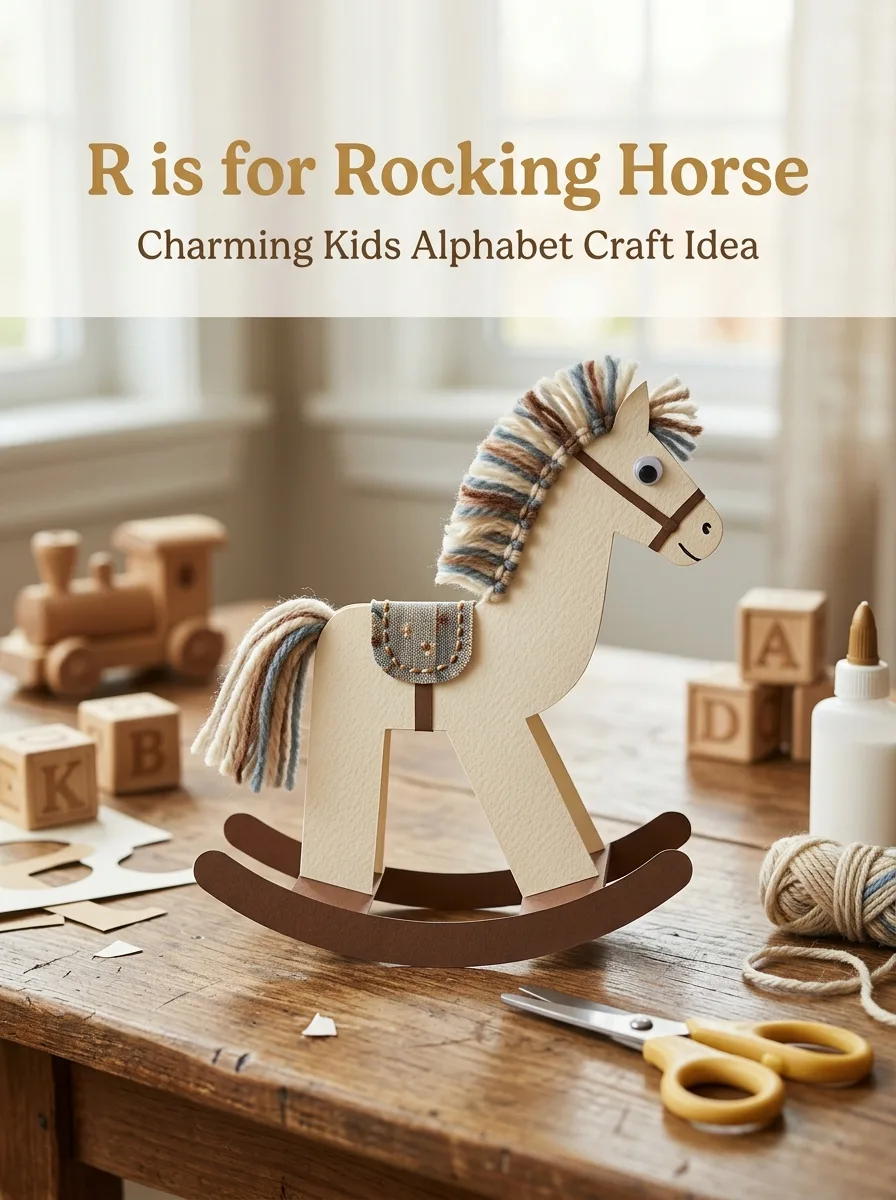
Shape a letter R into a horse: glue a paper head at the top, a curved paper rocker under the legs and a saddle in the middle. Kids glue short pieces of yarn on for the mane and tail and decorate the saddle with dots, stars or stripes. Rock the finished picture gently on the table to show how a rocking horse moves.
Good to know: cut the yarn in advance and spread white glue on the paper first, so children press the yarn into it instead of trying to glue each strand.
15. R is for Red Apple
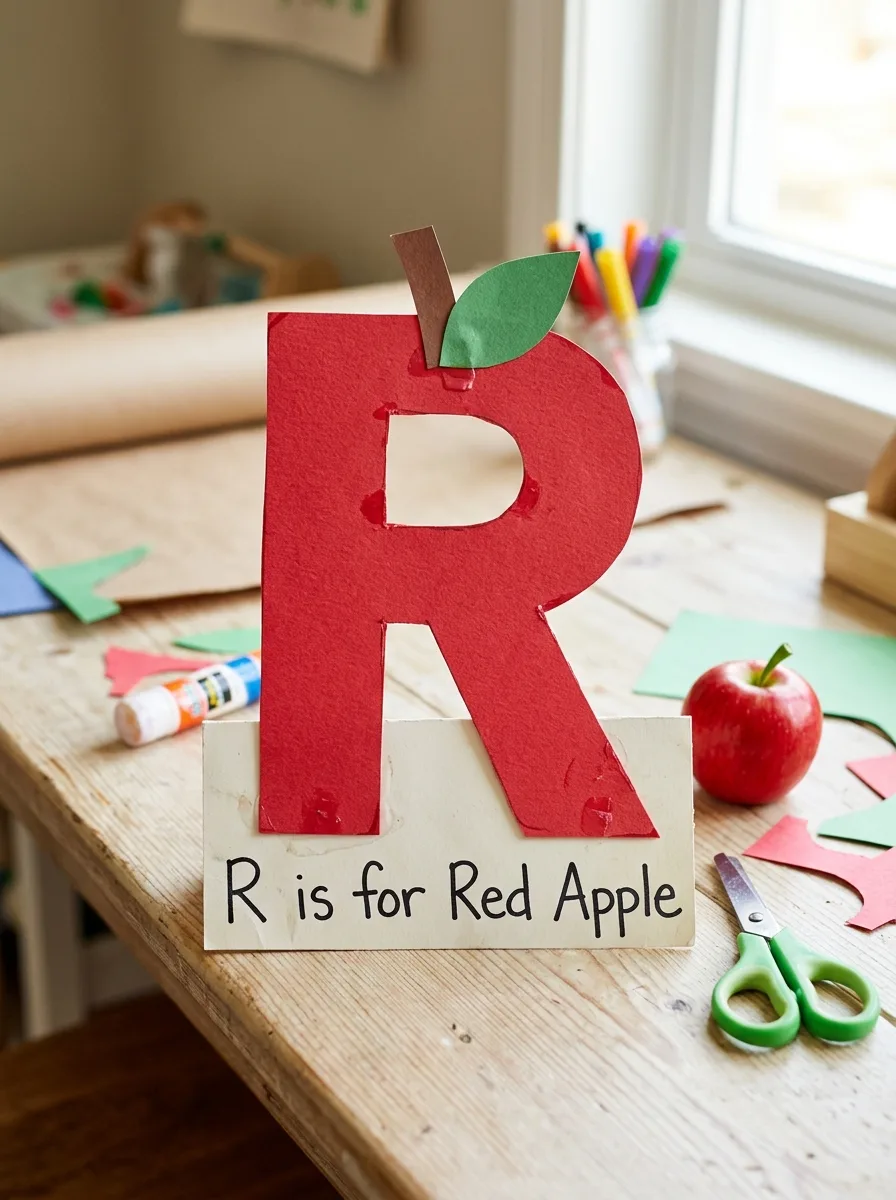
Cut a letter R and glue a red paper apple onto it, or print apples with half an apple dipped in red washable paint. Add a brown stem, a green leaf and, if the child likes, a paper worm peeking out. Say “red” and “round” as you go, and talk about apples of other colors.
Good to know: an adult cuts the apple for stamping, and painted halves go in the trash. If you share an apple snack afterward, the AAP lists raw apple chunks among choking hazards for children under 4, so cut it into thin slices or pieces no larger than half an inch.
Common mistakes to avoid
- Gluing googly eyes, pom-poms, gems, buttons or bottle caps onto crafts for children under 3.
- Leaving the cut wire ends of pipe cleaners sharp.
- Expecting young preschoolers to cut out the curve of an R on their own.
- Doing the craft for the child instead of letting them choose colors and place the pieces.
- Forgetting to say the R word and its sound, so the craft has nothing to do with the letter.
- Serving chunks of raw apple to young children after the red apple craft.
Letter R craft FAQs
What age are these letter R crafts for?
Most suit children around 3 to 5. Two-year-olds can join the rainbow, rain cloud and paper apple crafts with an adult helping, as long as small parts are kept away from them.
What R words go with these crafts?
Rainbow, rabbit, rocket, robot, rose, rain, race car, raccoon, rooster, rhino, reindeer, ring, ribbon, rocking horse and red apple. Red, round, run and road are easy extras to use while you talk.
How can I make the letter R easier to cut?
Use a thick block letter drawn with a bold line. Precut it for younger children, and let older preschoolers cut the straight lines while you cut the curve.
How do I keep the mess down?
Use glue sticks for paper, put white glue in a shallow dish with a brush for ribbon and yarn, cover the table, and precut pieces before the child sits down.


