

25 Cheerful First Day of Summer Crafts for Kids
In the Northern Hemisphere, the first day of summer falls on the June solstice, June 20 or 21 depending on the year, and it makes a good excuse for a craft afternoon. These projects use paper, paint, paper plates and recycled jars and bottles, and several are made to be used outside, such as a windsock, bubble bottles and a ribbon wand.
Below are 25 ideas for preschool and school-age kids, each with what you need, how to make it and one practical note. Read the basics first, since a few involve small parts, glass jars or time in the sun. For more painting projects, see these summer window painting ideas.
Before you start
Match the job to the age
Preschoolers can glue, paint, stamp and peel stickers, but many still need help with scissors, so precut shapes for younger children and use child-safe scissors. Hot glue, craft knives, glass jars and cutting fruit are adult jobs: do those steps yourself and stay at the table while kids work.
Keep small parts from young children
Beads, gems, buttons, googly eyes, pom-poms, small shells and paper fasteners are choking hazards for children under 3. The CPSC small parts rule bans toys for under-3s with pieces that fit inside a test cylinder about the size of a young child’s throat. Use paper, paint and markers for younger siblings and for any child who still puts things in their mouth.
Choose non-toxic supplies
Look for the ACMI AP seal on paint, glue and markers: it means a toxicologist has reviewed the product, and ACMI recommends AP-seal products for children in sixth grade and younger. Glitter glue spreads less than loose glitter, which gets everywhere and can get into eyes.
Plan for sun on outdoor crafts
For the windsock, bubbles, ribbon wand and lemonade stand, the AAP advises finding shade and limiting sun exposure between 10 a.m. and 4 p.m., when UV rays are strongest. Use a broad-spectrum sunscreen with an SPF of at least 15, reapply it every 2 hours and after swimming or sweating, and keep babies younger than 6 months out of direct sunlight.
The 25 crafts at a glance
| Craft | Best ages | Mess level | Adult help or safety note |
|---|---|---|---|
| Hello summer banner | Preschool and up | Low | Punch holes; hang out of reach |
| Summer bucket list poster | Preschool and up | Low | Write words for non-writers |
| Summer memory jar | All ages, with help | Low | Plastic jar for young kids |
| Paper sun hat | Preschool and up | Low | Not real sun protection |
| Ice cream paper garland | Preschool and up | Low | Precut shapes for younger kids |
| Ocean sensory bottle | All ages, with an adult | Medium | Adult glues the cap; no water beads |
| Painted flower pot | Preschool and up | High | Acrylic paint stains clothes |
| Paper sunglasses | Preschool and up | Low | No UV protection |
| Paper flip flops | Preschool and up | Low | Gems are small parts |
| Summer windsock | Preschool and up | Medium | Hang out of reach |
| Lemonade stand sign | Preschool and up | Medium | Shade and sunscreen |
| Fruit stamp art | Toddlers and up, with an adult | High | Adult cuts the fruit |
| Summer photo frame | Preschool and up | Medium | Adult handles hot glue |
| Beach ball paper craft | Preschool and up | Low | Precut wedges for younger kids |
| Salt painting sunshine | Preschool and up | Medium | Dries overnight; keep from dogs |
| Sunny face mask | Preschool and up | Medium | Adult cuts large eye holes |
| Welcome summer door hanger | Preschool and up | Medium | Adult cuts the cardboard |
| Popsicle stick sunshine | Preschool and up | Medium | Drawn eyes for under 3 |
| Summer vocabulary book | Preschool and up | Low | Tape over staples |
| Paper fan | Preschool and up | Low | Start folds for younger kids |
| Bubble solution labels | Preschool and up, with an adult | Medium | Hand dish soap only; store out of reach |
| Sand art board | Preschool and up | High | Work over a tray |
| Paper plate clock | Preschool and up | Low | Adult attaches the fastener |
| Summer goal jars | All ages, with help | Low | Plastic jars for young kids |
| Rainbow ribbon wand | Preschool and up | Low | Smooth, short stick |
1. Hello Summer Banner
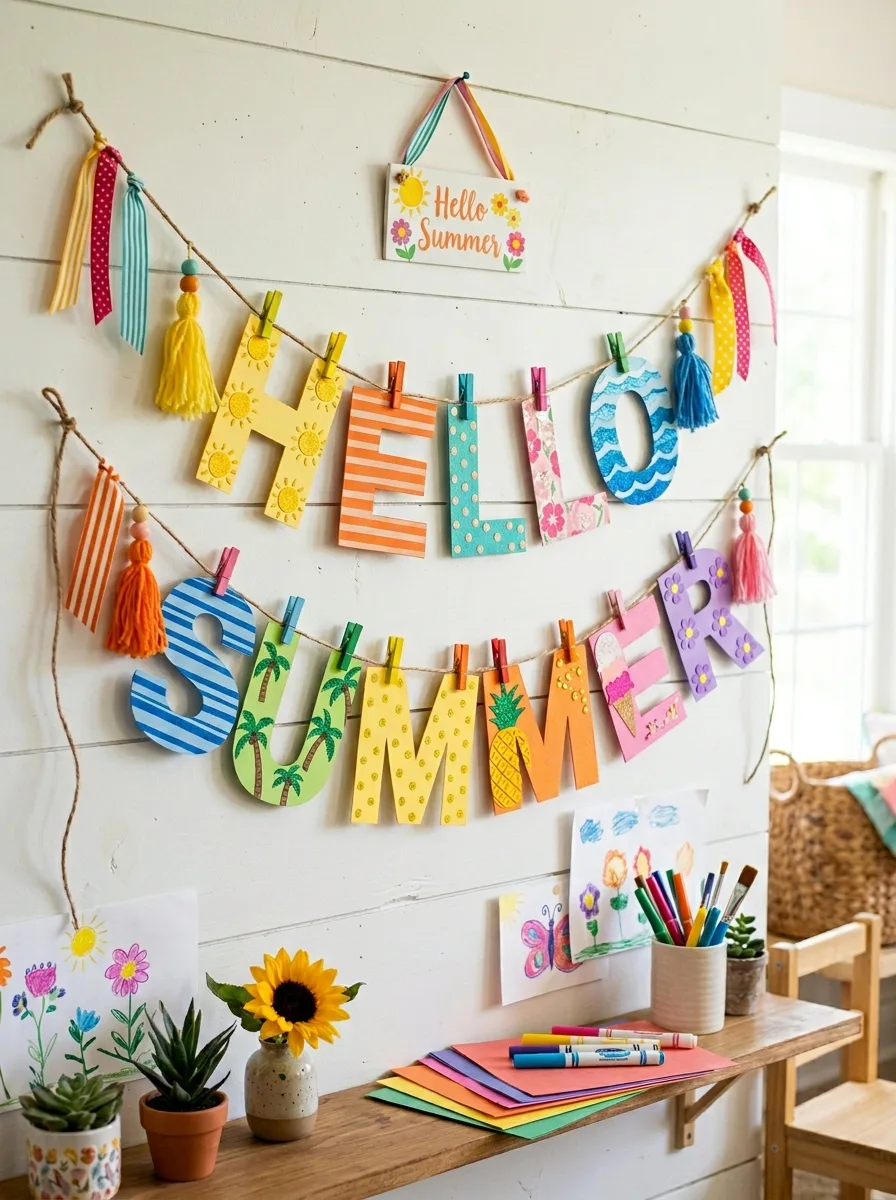
Cut triangle flags or rectangles from bright cardstock, one for each letter of “Hello Summer”. Write or trace a large letter on each flag and let kids decorate around it with markers, stickers and glitter glue. Punch two holes at the top of each flag, lay the flags out in order, then thread them onto yarn or ribbon and tie a loop at each end for hanging.
Good to know: number the backs lightly in pencil before threading so no letter ends up out of place. Hang the banner out of reach of babies and toddlers, and never over a crib, since a long string can wrap around a small child’s neck.
2. Summer Bucket List Poster
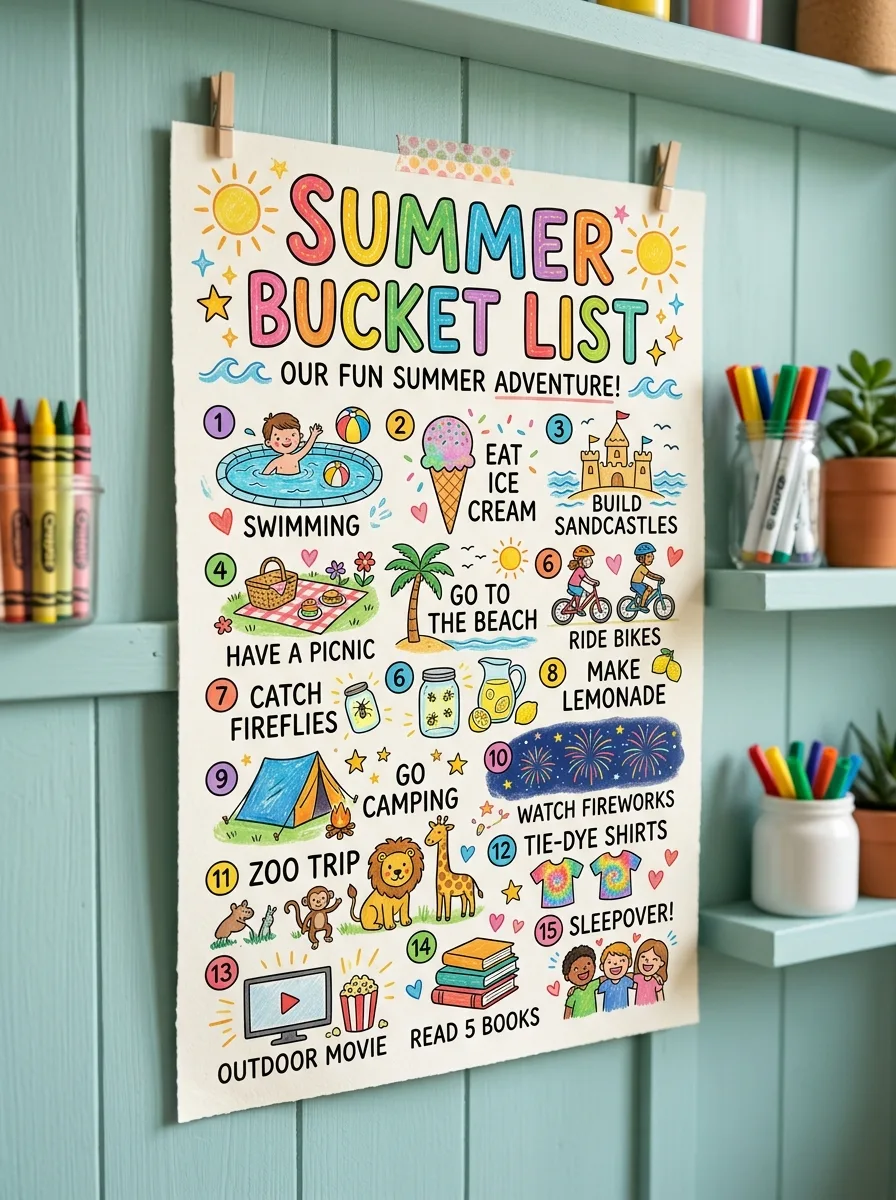
Give kids a sheet of poster board and markers. Together, list 10 to 20 things to do this summer, such as a library visit, a picnic, a bike ride or making ice pops. Children who can write add the words; younger ones draw a picture next to words you write for them. Decorate the border with suns and waves, and draw a box beside each item to check off.
Good to know: mix a few big plans with free, everyday ones, like a backyard picnic or a walk to the park, so the list stays doable and kids can check things off all summer.
3. Summer Memory Jar
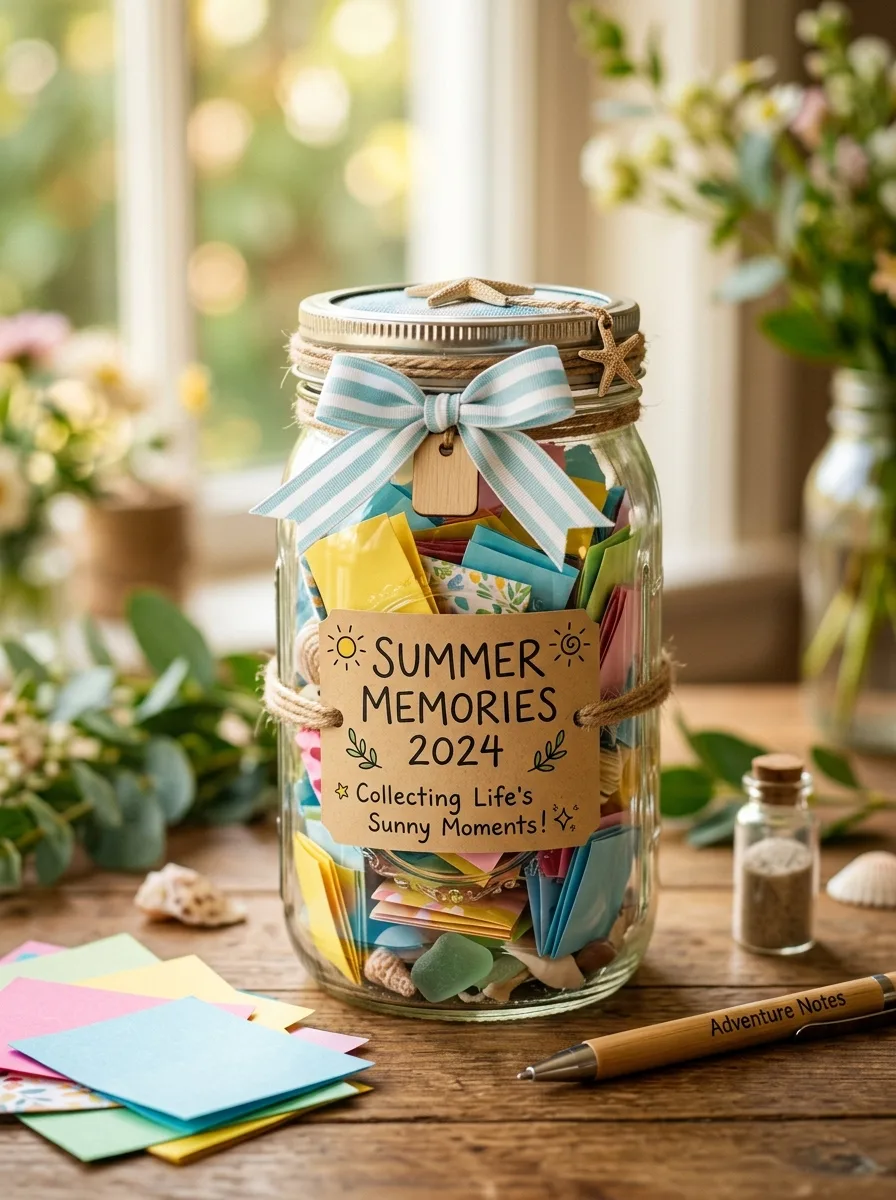
Use a clean, dry jar, plastic for young children. Kids decorate the outside with paint pens, stickers or ribbon and add a label with the year. Keep a pad of small paper strips and a pen next to it. Through the summer, write down a favorite moment each day or week, fold it and drop it in, then read the notes together at the end of the season.
Good to know: paint pens hold better on glass and plastic than washable markers, which rub off. Use a plastic jar with young children and leave glass to adults and older kids.
4. Paper Sun Hat
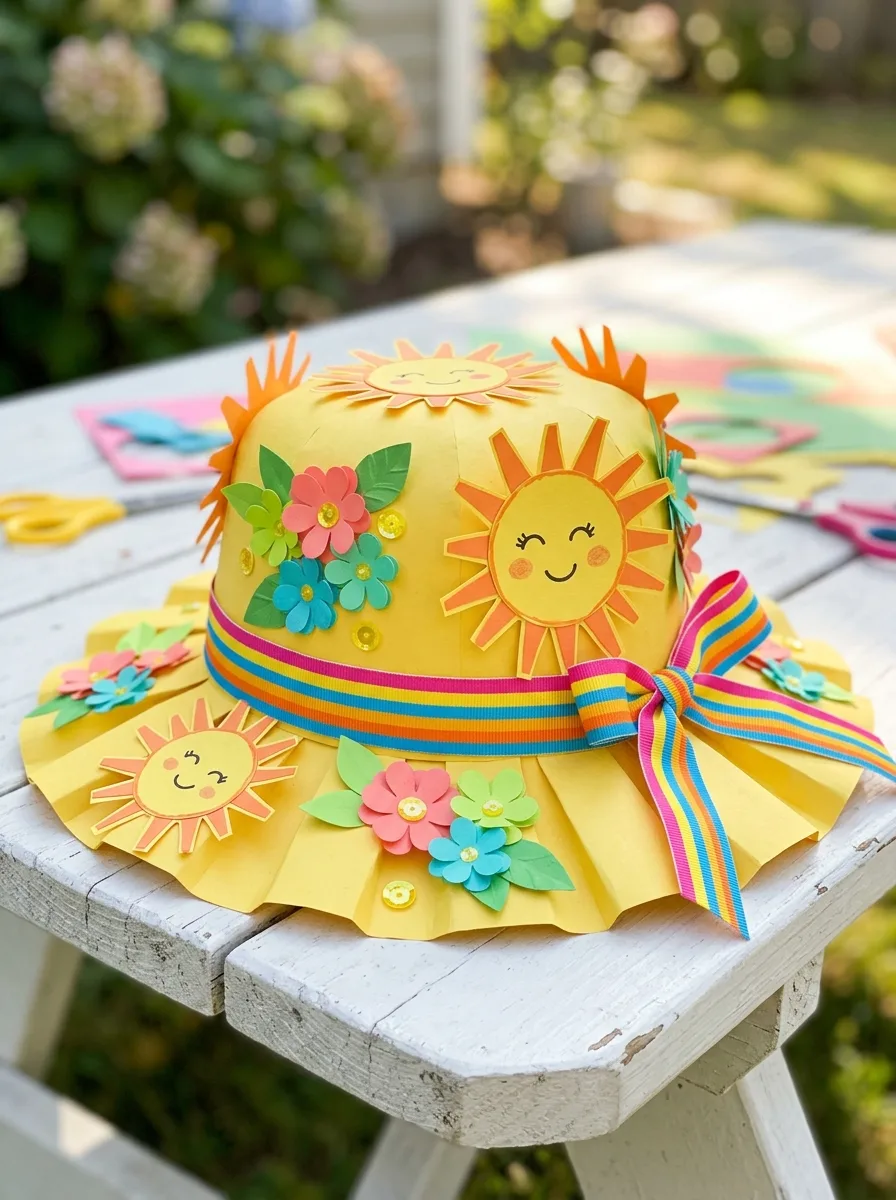
Cut a band of cardstock long enough to wrap around the child’s head with a little overlap, or cut a large paper circle with a head-sized hole in the middle for a brim. Kids decorate it with paper suns, flowers and markers. Fit the band on the child, then tape or staple the ends together.
Good to know: a paper hat is a party prop, not sun protection. For time outdoors, the AAP recommends a hat with a brim of about 3 inches all around to shade the face, ears and back of the neck. Cover staples on the inside with tape, and skip pom-poms for children under 3.
5. Ice Cream Paper Garland
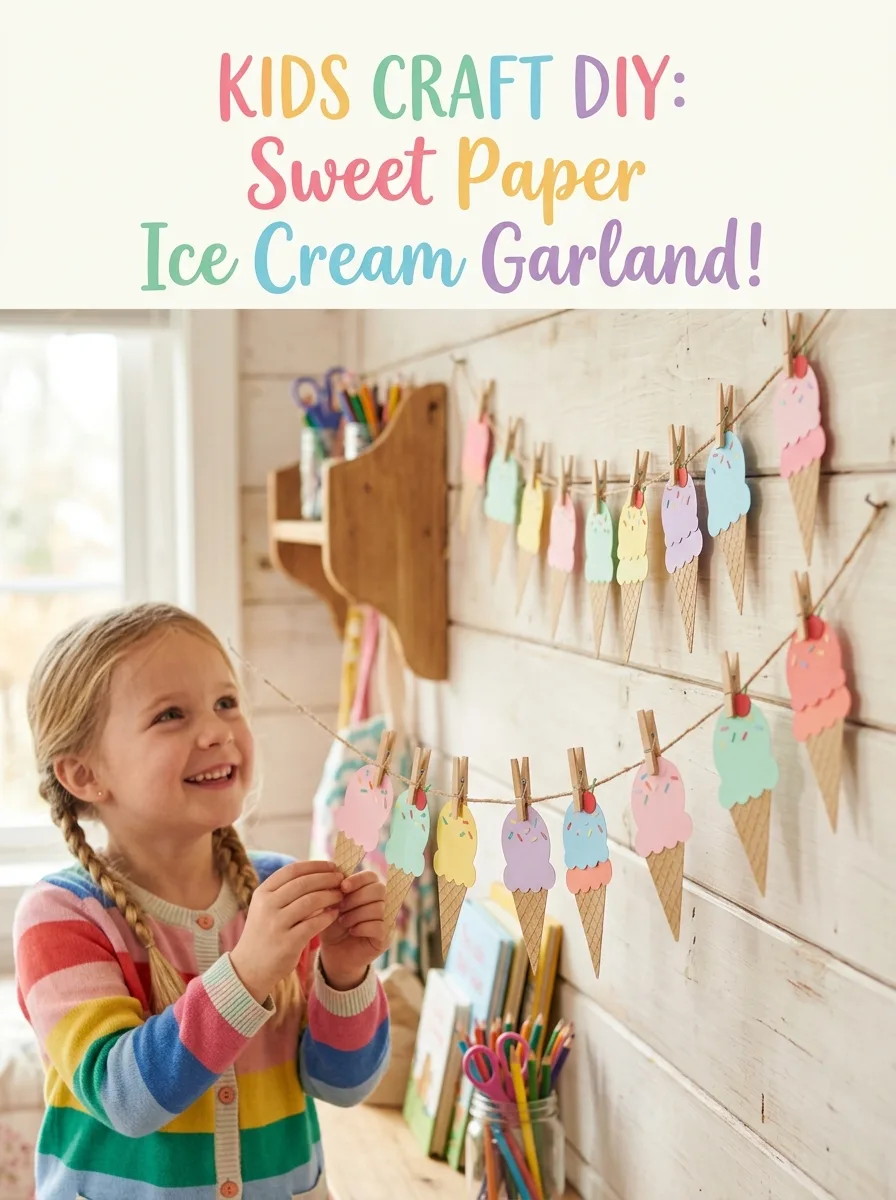
Cut cone shapes from tan or brown paper and round scoops in pink, mint, yellow and brown. Kids draw a crisscross waffle pattern on each cone, glue one or two scoops on top, and add sprinkles with markers or dot stickers. Once the glue is dry, tape or clip the cones along a length of string or yarn.
Good to know: glue sticks are easier for small hands to control than liquid glue and wrinkle paper less. Clipping the cones on with clothespins lets you move them along the string or swap in new ones.
6. Ocean Sensory Bottle
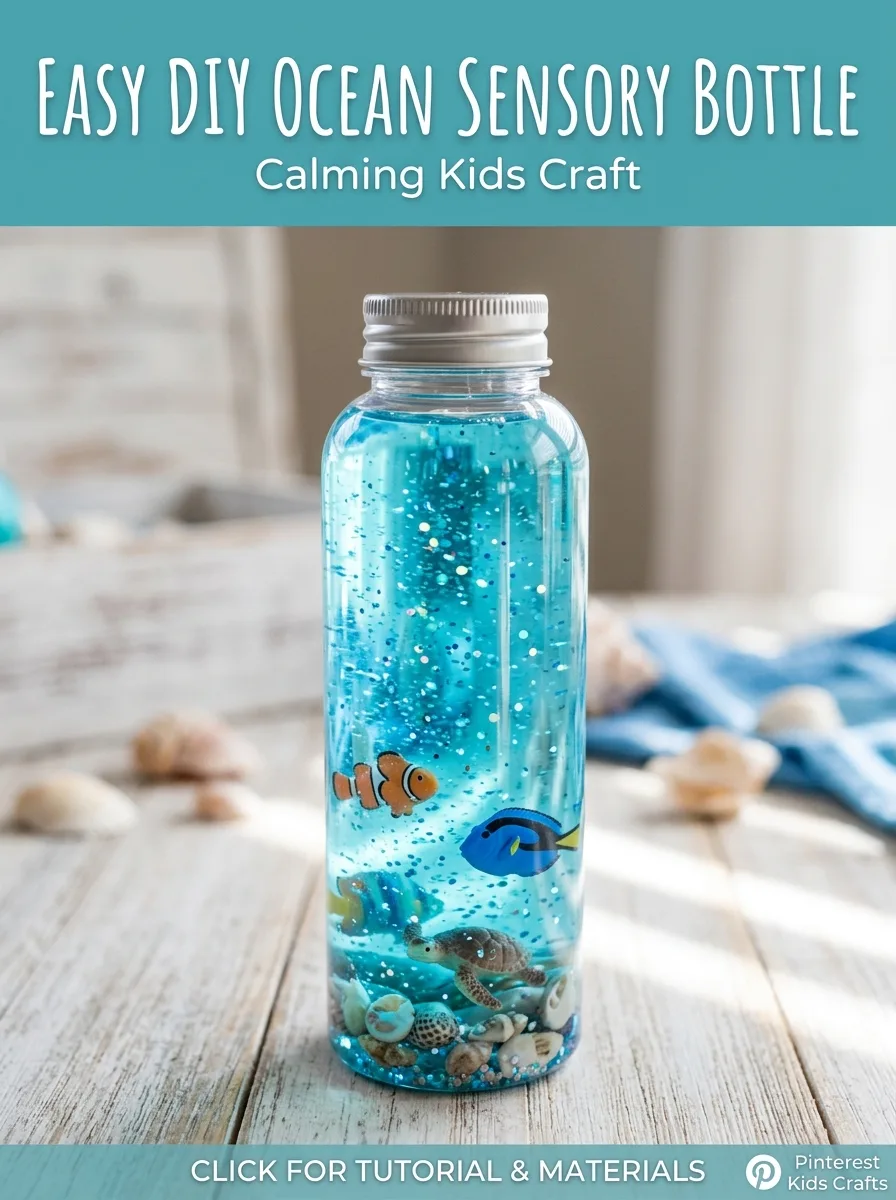
Use a clean, sturdy plastic bottle with a screw cap. Fill it about two-thirds with water, add a drop of blue food coloring and a little glitter, then pour in a layer of vegetable oil, which floats on top and makes waves when the bottle tips. Drop in a few plastic sea animals or shells, and an adult glues the cap shut with strong glue. For more hands-on sensory play outside, see these mud kitchen ideas.
Good to know: the small pieces inside are only safe while the bottle stays sealed, so check the cap now and then and supervise young children. Skip water beads, which the CPSC warns can expand inside the body if swallowed, and use vegetable oil rather than baby oil, which Poison Control warns can get into the lungs if a child swallows it.
7. Painted Flower Pot
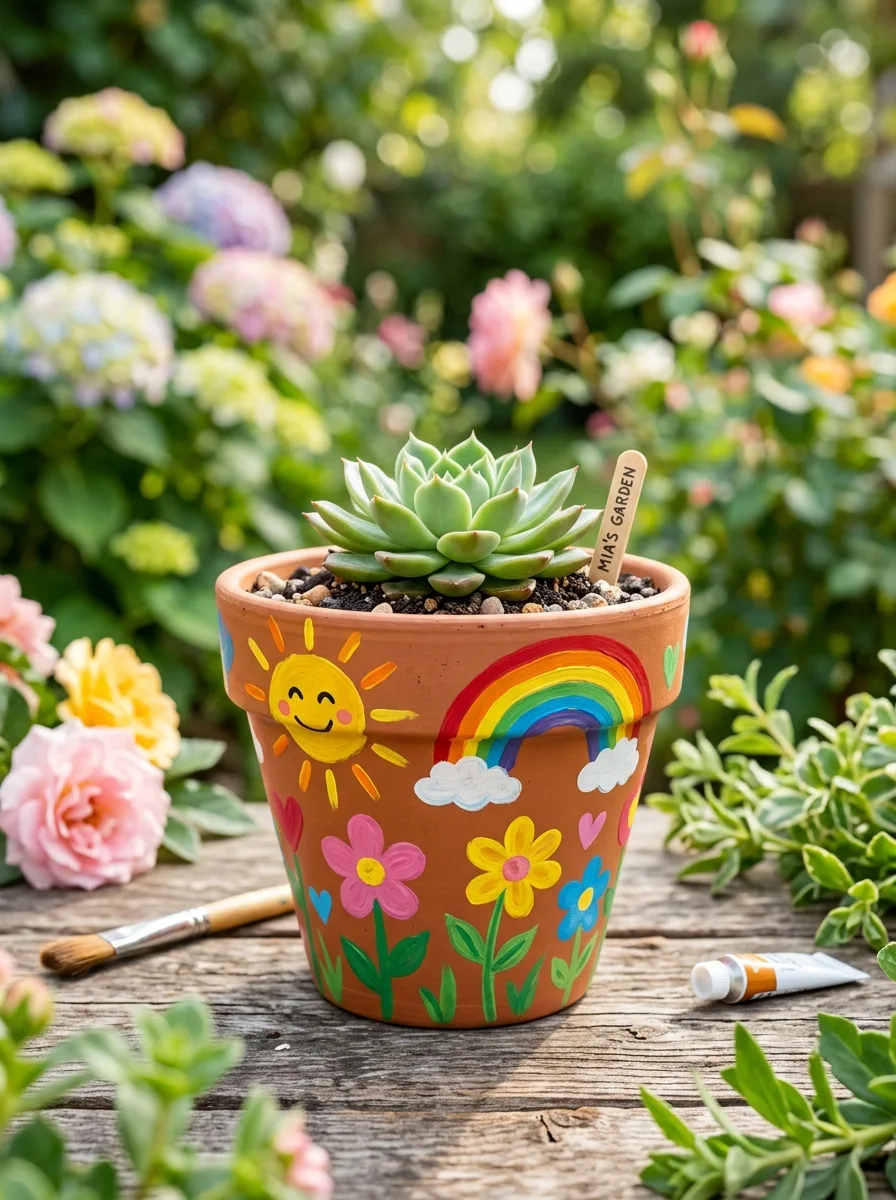
Wipe a terracotta pot clean and let it dry. Kids paint the outside with acrylic craft paint or paint pens, adding suns, flowers, stripes or dots one color at a time and letting each dry so the colors don’t mix. When the paint is dry, an adult can brush on a clear outdoor sealer. Fill the pot with potting mix and plant an herb or flower together.
Good to know: acrylic paint doesn’t wash out of clothes once it dries, so use a smock and cover the table. Choose a pot with a drainage hole, and if you have pets, check the plant on the ASPCA’s toxic plant list before you buy it.
8. DIY Paper Sunglasses
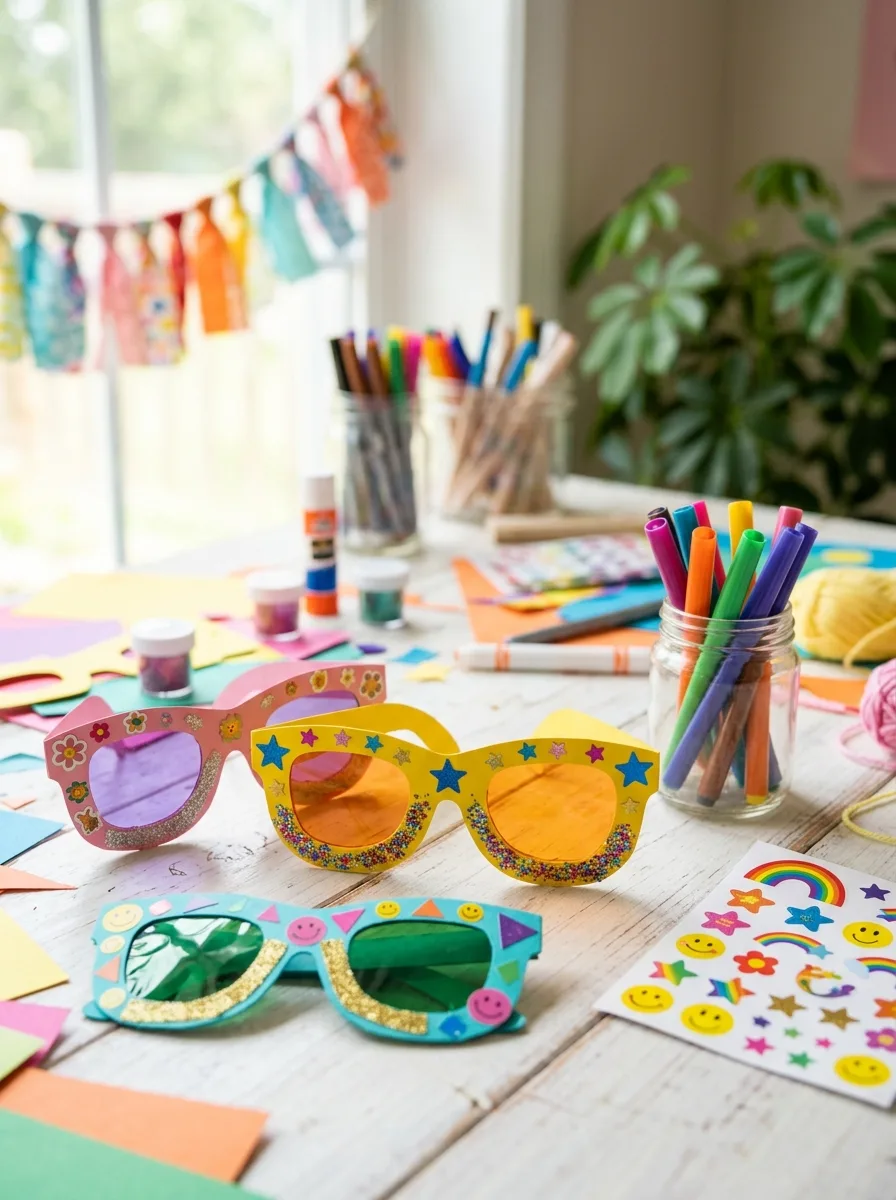
Draw a pair of sunglasses on cardstock, with two frames, a bridge and two arms, or print a template. An adult or older child cuts it out, including the lens holes. Kids decorate the frames with markers, stickers and paint. Tape colored cellophane behind the lens holes, then fold the arms back at the hinges.
Good to know: cellophane doesn’t block UV light, so these are for pretend play and photos, never for looking at the sun. For real sunny days, the AAP recommends sunglasses with at least 99% UV protection.
9. Paper Flip Flops
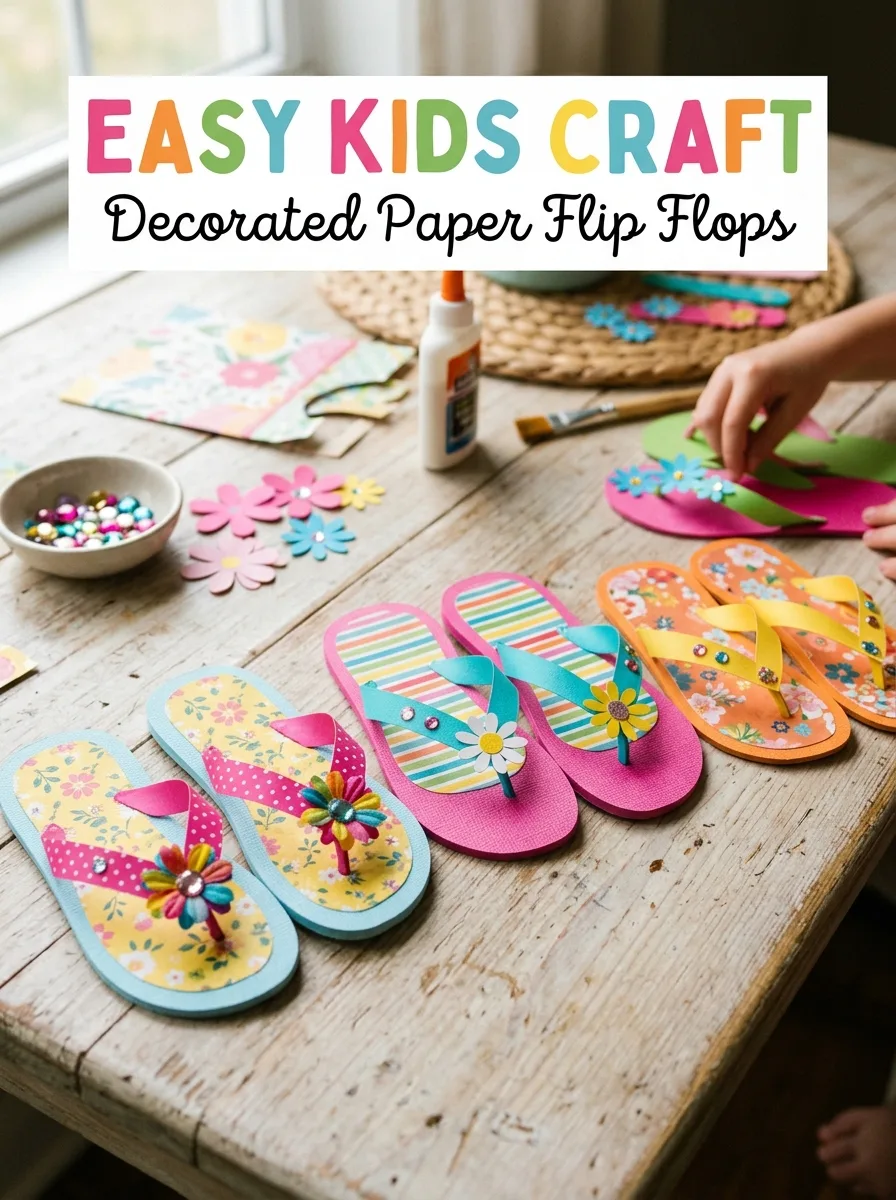
Have the child stand on craft foam or cardstock while you trace around each foot, or draw two flip-flop soles freehand. Cut them out, then glue or staple a ribbon or paper strip from the toe to each side to make the straps. Kids decorate the soles and straps with markers, paper flowers or stickers.
Good to know: stick-on gems are a choking hazard for children under 3, so use stickers or drawn flowers for them. Tracing the child’s own feet makes a keepsake; write their name and the date on the back.
10. Summer Windsock
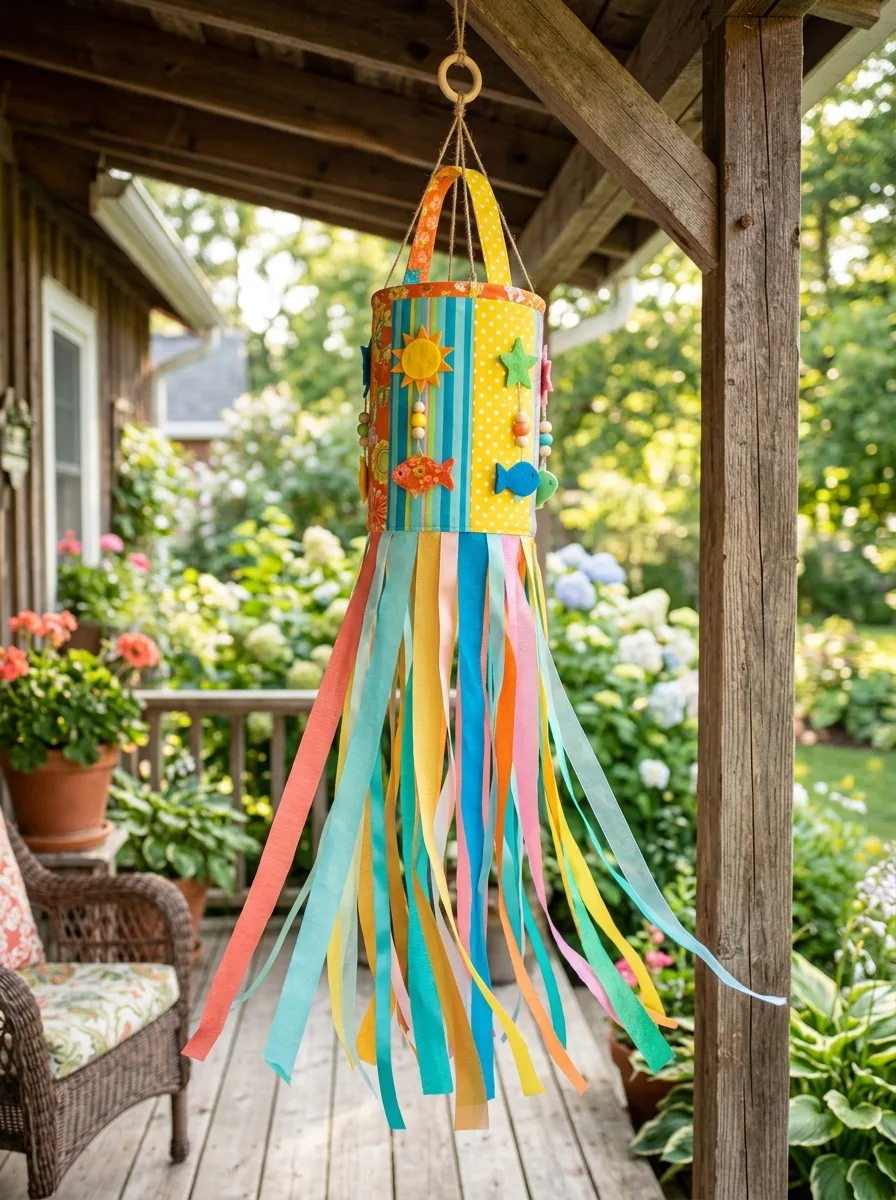
Wrap a paper towel tube or a rolled sheet of cardstock in colored paper, or let kids paint it, and decorate it with summer shapes. Glue or tape long strips of crepe paper or ribbon around the bottom edge. Punch two holes on opposite sides at the top, tie on a loop of string, and hang it from a porch hook or a branch.
Good to know: crepe paper and tissue paper colors run when wet, so bring a paper windsock in before rain, or use ribbon or strips cut from a plastic tablecloth for one that stays outside. Hang it well out of young children’s reach.
11. Lemonade Stand Sign
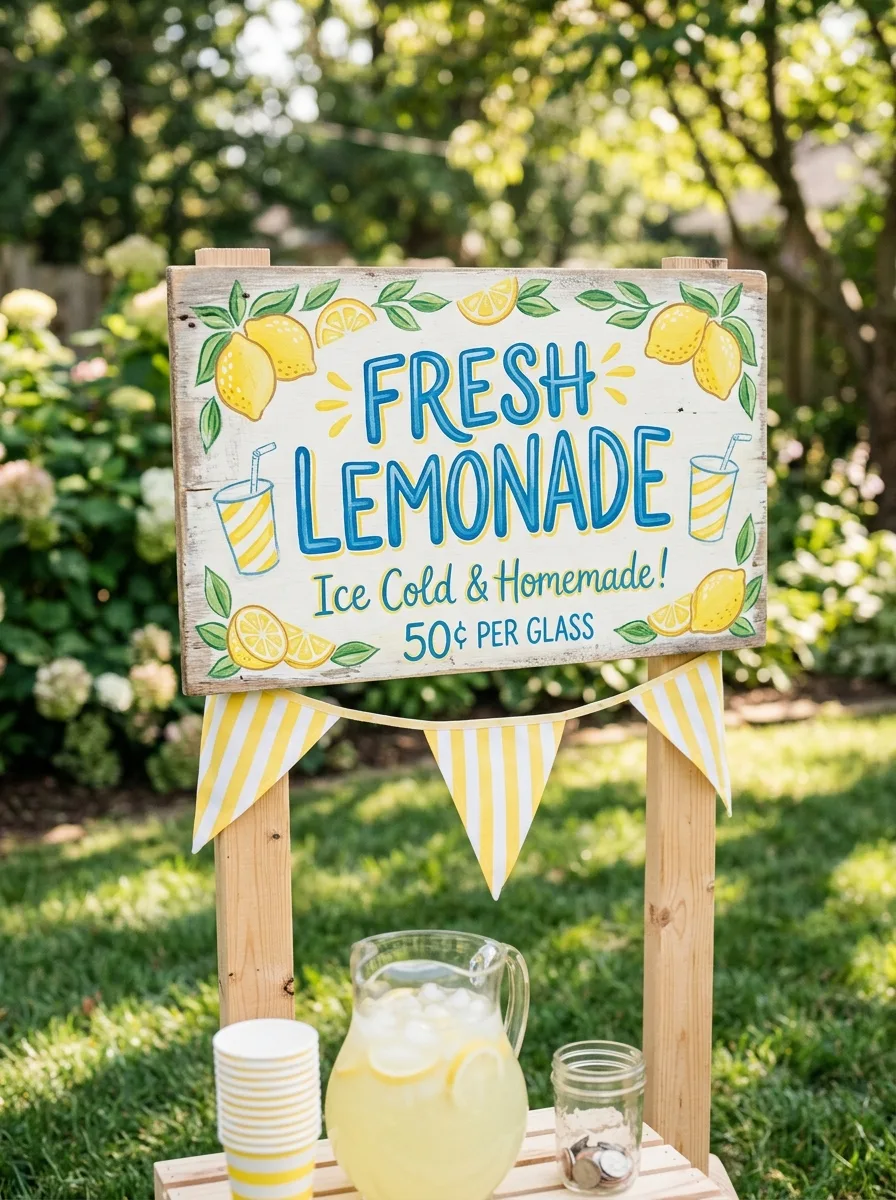
Use poster board or the side of a cardboard box. Pencil in the words first, such as “Lemonade” and the price, in large letters, then kids trace over them in thick marker or paint and add lemons, cups and suns. Tape the sign to the front of the table or prop it up where people walking by can read it.
Good to know: set up the stand in the shade and give the sellers water, hats and sunscreen, reapplied every 2 hours as the AAP advises. Covering the sign with clear packing tape lets you wipe off spills.
12. Fruit Stamp Art
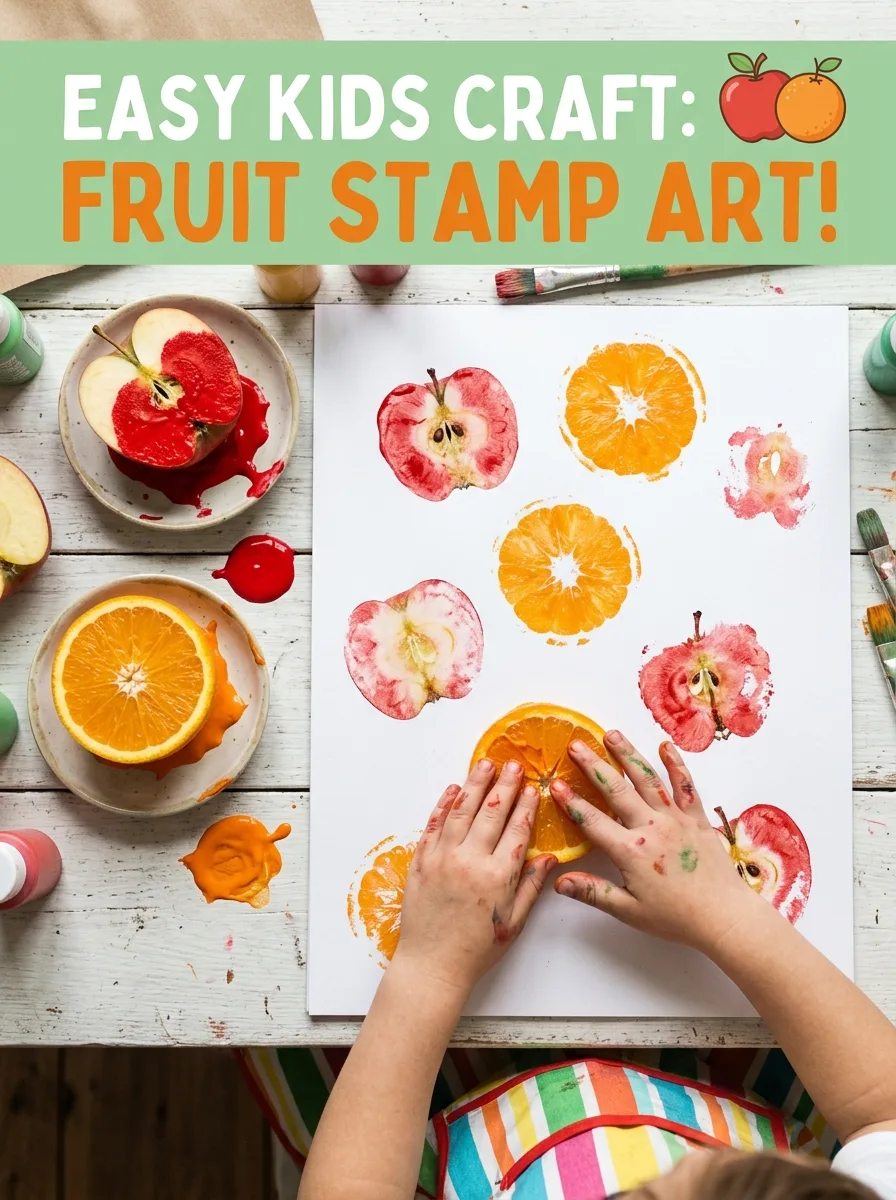
An adult cuts firm fruit in half, such as apples, lemons and oranges, and blots the cut sides dry with a paper towel. Pour a thin layer of washable paint onto paper plates. Kids press the cut side into the paint, then onto paper, and lift straight up. An apple cut across the middle shows a star of seeds, and citrus shows its segments.
Good to know: blot the fruit again before each new color for crisp prints. Painted fruit is no longer food, so throw it away afterward, and watch toddlers so they don’t bite the stamps.
13. Summer Photo Frame
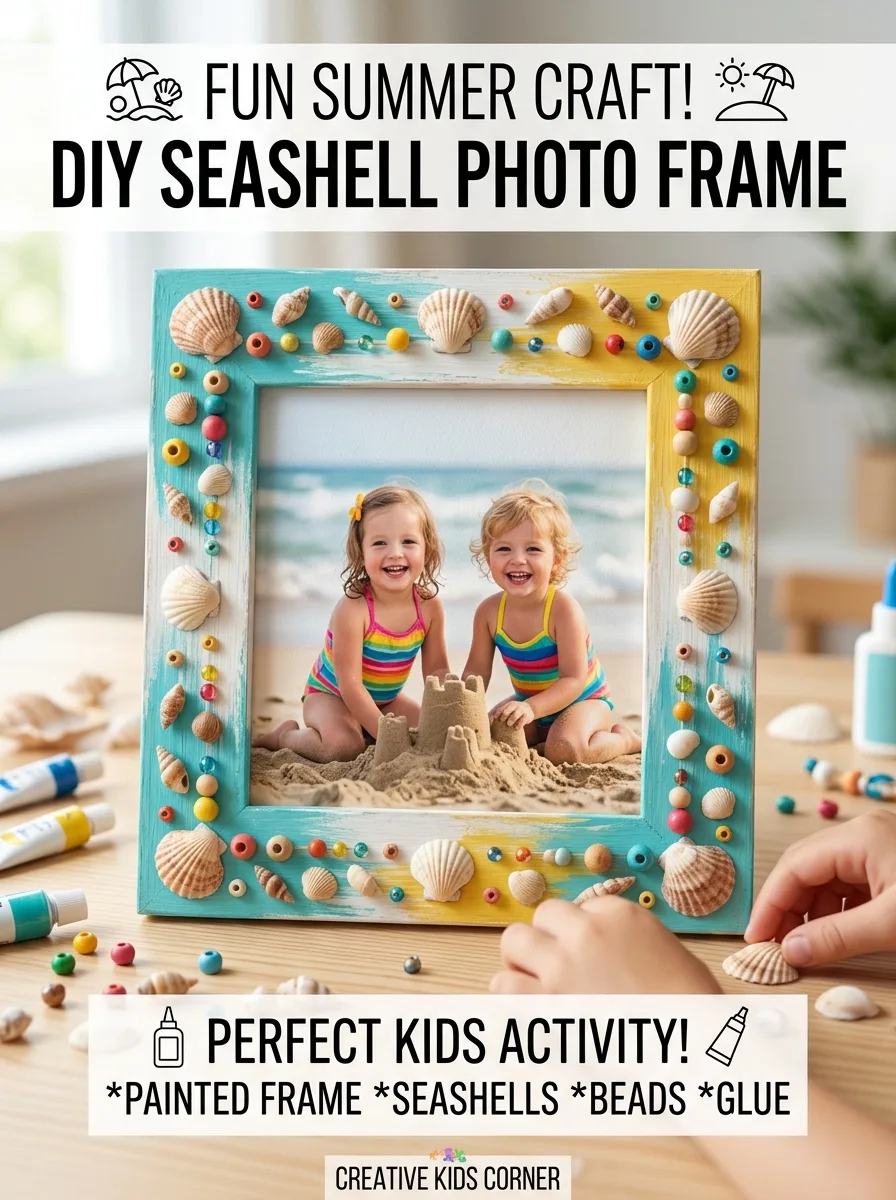
Start with a plain wooden frame or one cut from sturdy cardboard. Kids paint it and let it dry, then glue on paper suns, waves and fish, or small shells for older children. Slip a photo from the first day of summer behind the opening and tape it in place.
Good to know: shells and other heavy pieces hold best with white craft glue left to dry overnight, or with hot glue applied by an adult. Keep shells, buttons and beads away from children under 3 and use paper shapes for them.
14. Beach Ball Paper Craft
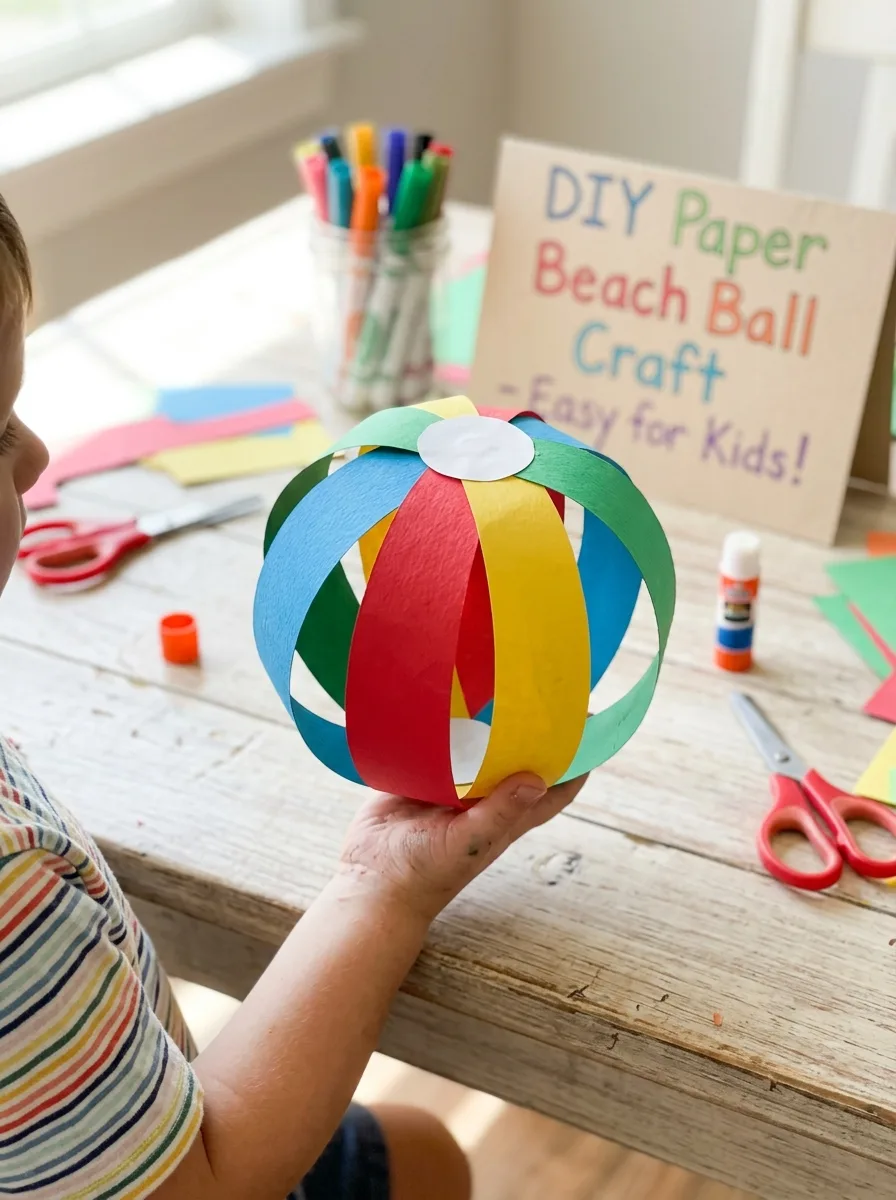
Trace a bowl to draw a circle on white paper and divide it into six wedges from the center, like slices of a pie. Kids color or glue paper onto alternating wedges in red, yellow, blue and green, leaving some white. Add a small white circle in the middle and outline the wedges and the ball with black marker.
Good to know: for younger children, precut the colored wedges and let them match each one to a drawn section, naming the colors as they go.
15. Salt Painting Sunshine
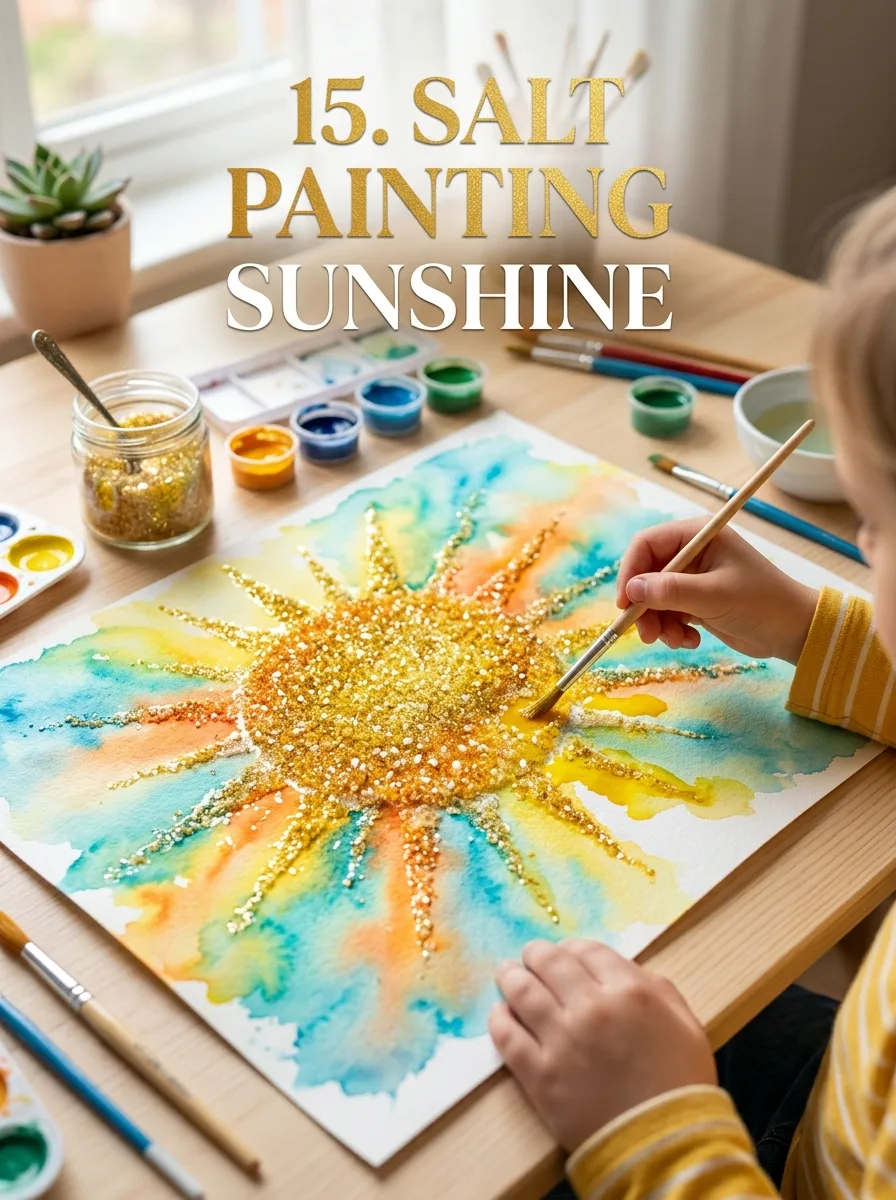
Draw a sun on cardstock, then trace the lines with white school glue squeezed straight from the bottle. Sprinkle table salt over the wet glue until it is covered, then tip off the extra over a tray. Touch a brush loaded with watercolor, or water mixed with food coloring, to the salt, and the color spreads along the lines. These summer art projects for kids include more salt painting ideas.
Good to know: the glue and salt take a long time to dry, so leave the painting flat overnight. Keep salt crafts away from dogs, which may lick them; the ASPCA warns that too much salt can make pets seriously ill.
16. Sunny Face Mask
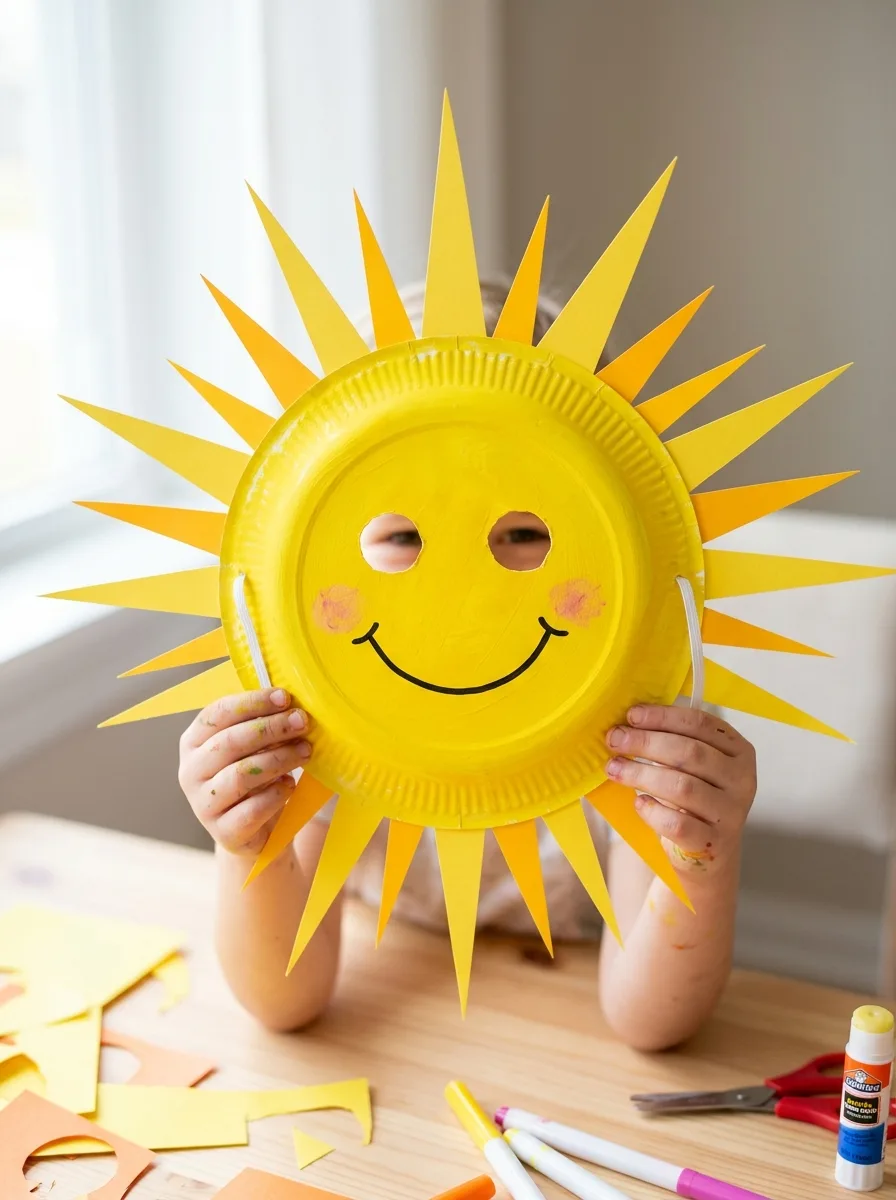
Hold a paper plate against the child’s face and mark where the eyes are, then an adult cuts two large eye holes. Kids paint the plate yellow and let it dry, then glue paper rays in yellow and orange around the edge and draw a smile and cheeks. Tape a craft stick to the bottom as a handle.
Good to know: a stick handle is easier for young children than string ties, and they can lower the mask whenever they like. Cut the eye holes large enough to see well, and keep running games for after the mask comes down.
17. Welcome Summer Door Hanger
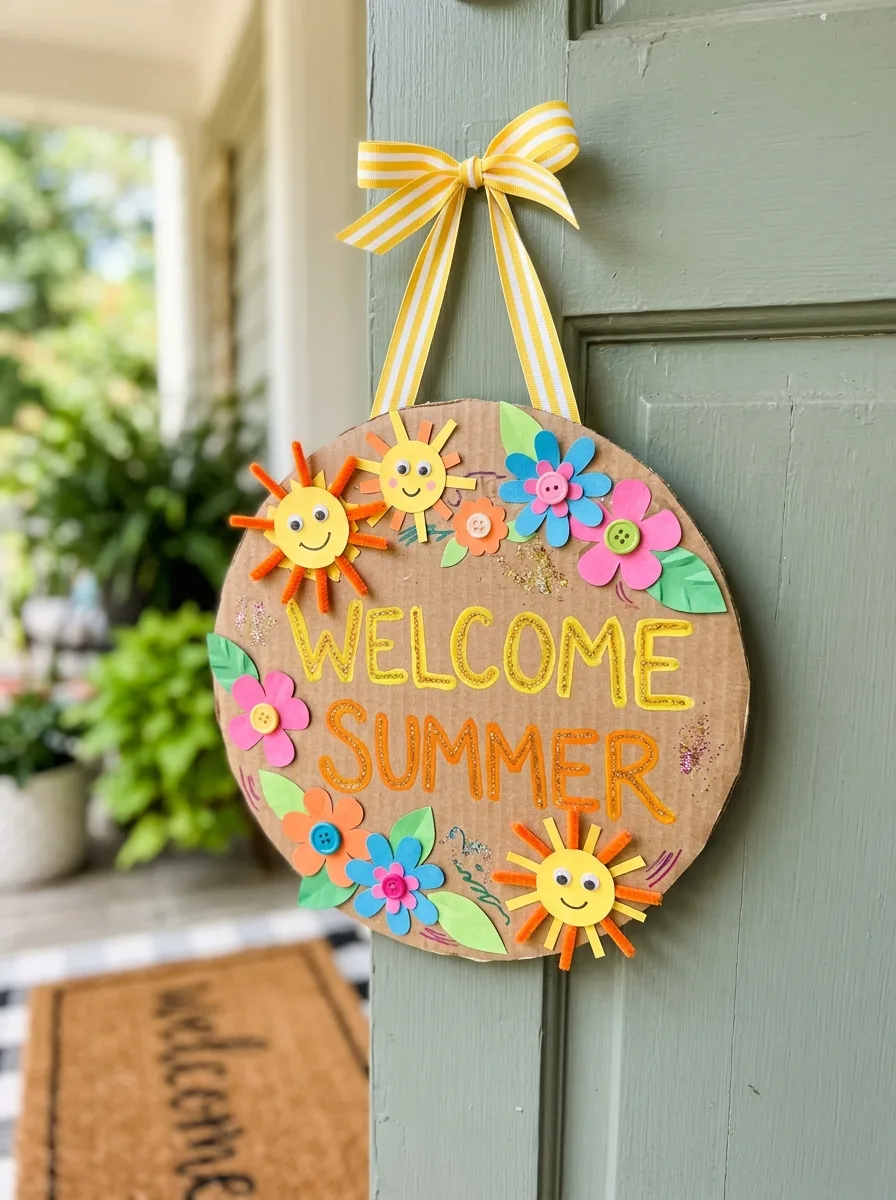
An adult cuts a circle or sun shape from sturdy cardboard, such as a shipping box. Kids paint it and let it dry, then add “Welcome Summer” with a paint pen or letter stickers and decorate it with paper flowers and suns. Punch a hole at the top, thread a ribbon loop, and hang it on the door or a doorknob.
Good to know: cardboard warps when it gets wet, so hang it on an inside door or under a covered porch, or cover it with clear packing tape. Cutting thick cardboard needs a craft knife or strong scissors, which is an adult job.
18. Popsicle Stick Sunshine
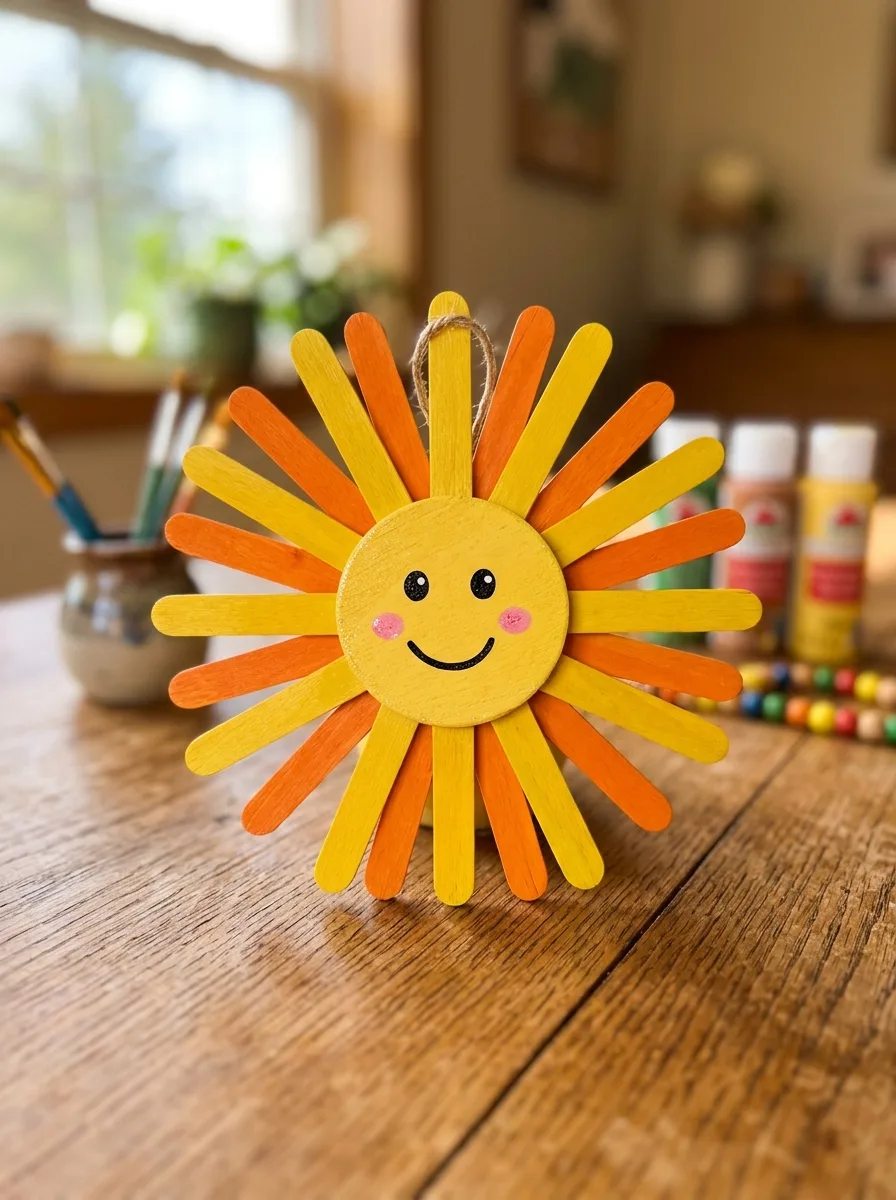
Paint craft sticks yellow and orange and let them dry. Paint the bottom of a paper plate yellow, or glue on a yellow paper circle. Glue the sticks around the back edge of the plate so they stick out as rays, alternating the colors, and let the glue dry flat. Draw a face on the front with marker.
Good to know: white glue takes a while to set on wood, so leave the sun flat until the sticks hold firmly. Googly eyes are a choking hazard for children under 3, so draw the eyes on for younger kids.
19. Summer Vocabulary Book
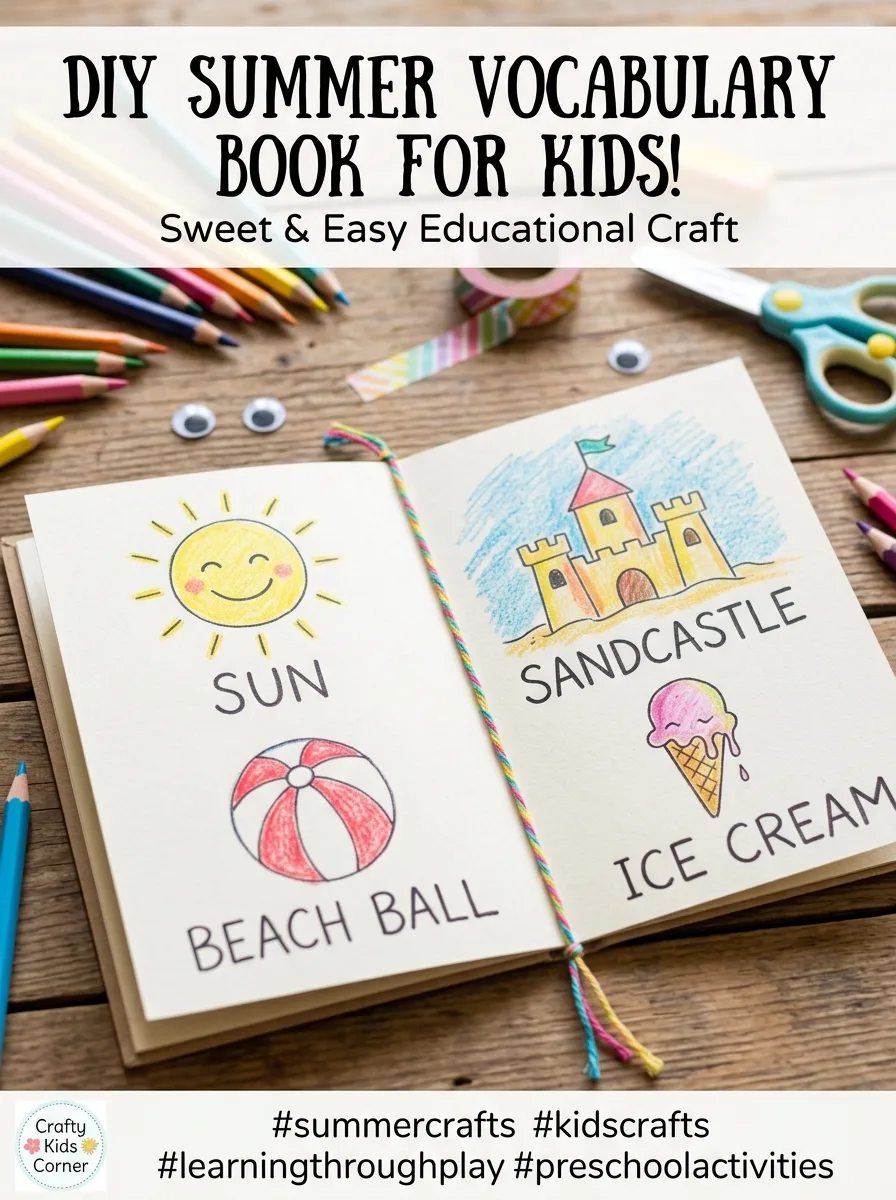
Fold three or four sheets of paper in half and staple along the fold to make a small book. Write one summer word at the top of each page, such as sun, beach, shell, ice cream or swim. Kids draw and color a picture to match each word, then decorate the cover and write or trace their name.
Good to know: say each word aloud as you write it, and let children who are ready trace or copy the letters; younger ones can simply draw. Put tape over the staples so they don’t scratch.
20. Paper Fan Craft
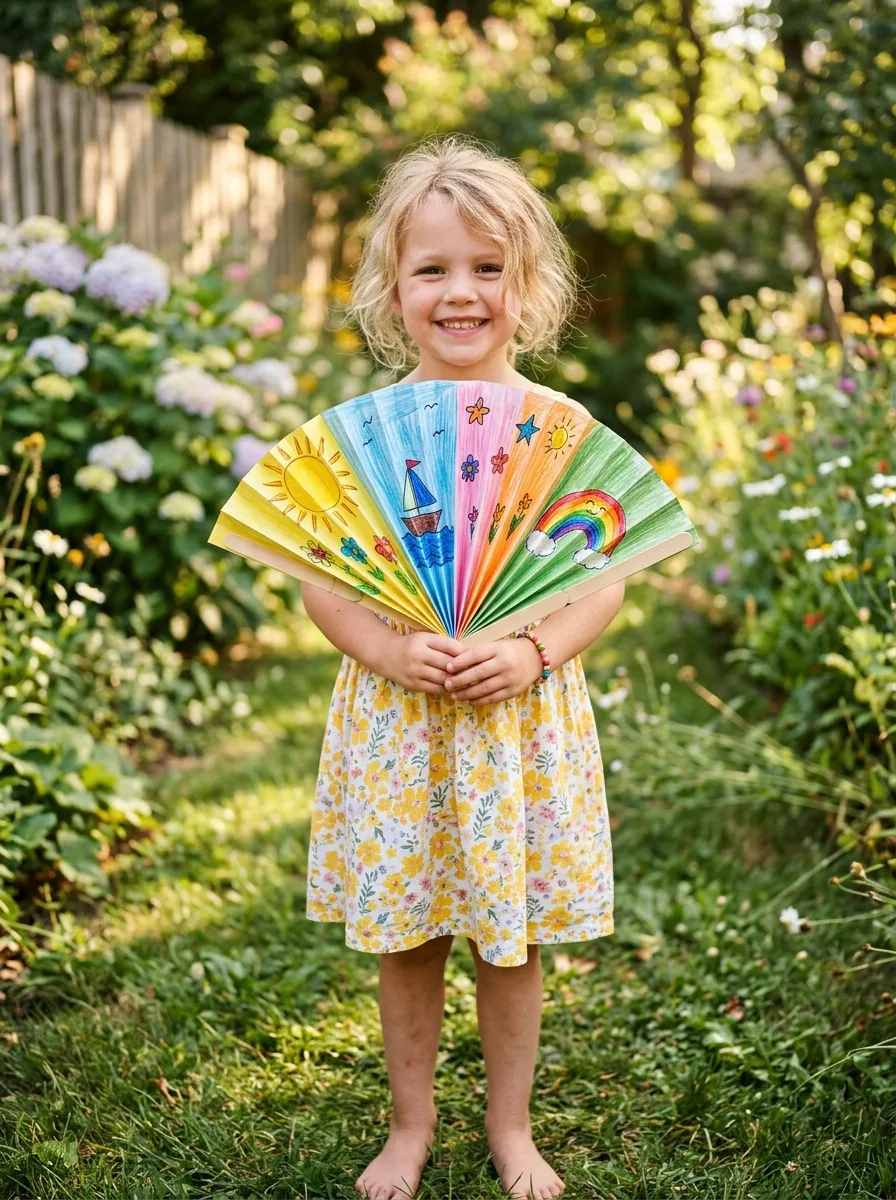
Kids decorate both sides of a rectangle of paper with summer drawings, stripes or stickers. Fold it accordion style, back and forth in strips about a finger wide, pressing each crease firmly. Pinch one end together and wrap it with tape or staple it, then spread the top open.
Good to know: cardstock holds the folds better than printer paper but is harder for small hands to crease, so start each fold for younger children.
21. DIY Bubble Solution Labels
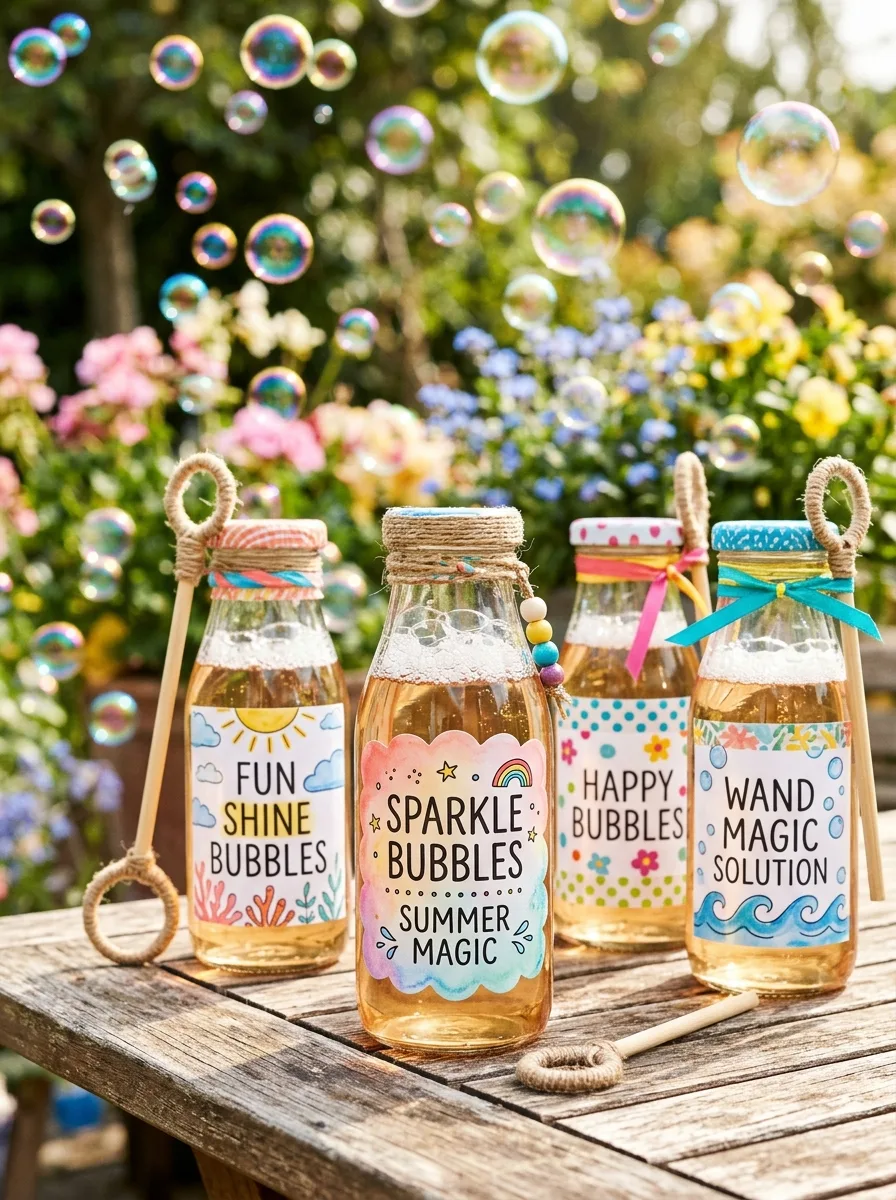
An adult mixes the bubble solution: the Exploratorium’s formula is 2/3 cup of dishwashing liquid and 2 to 3 tablespoons of glycerin in 1 gallon of water, stirred gently and left overnight. Pour it into small plastic bottles with lids. Kids decorate paper labels with their name, suns and bubbles, then tape the labels on with clear packing tape so they survive wet hands.
Good to know: use hand dishwashing liquid only, never dishwasher or laundry detergent, and store the bottles out of reach when not in use, as Poison Control advises. If solution gets in a child’s eyes, rinse them with water, and call Poison Help at 1-800-222-1222 with any questions.
22. Sand Paper Art Board
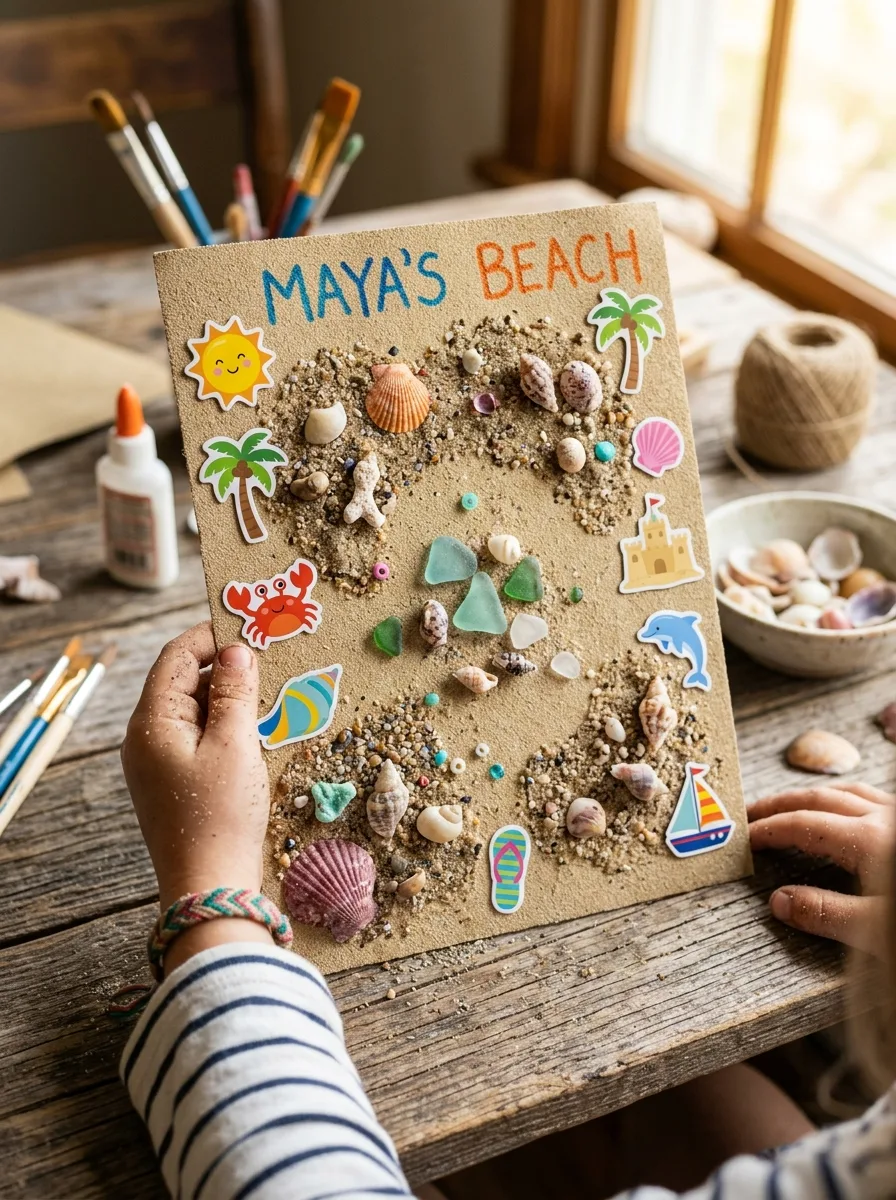
Spread a thin layer of white glue over a piece of cardboard, or over the bottom half for a beach with sky above. Sprinkle play sand or craft sand over the glue, press it down lightly, and tip off the extra over a tray. Once it is dry, glue on shells, paper fish and a paper sun, and add a colored paper border.
Good to know: work outside or over a tray, and supervise younger children so sand stays out of mouths and eyes. Let the board dry flat, ideally overnight, before adding the extras, or they slide off.
23. Paper Plate Clock
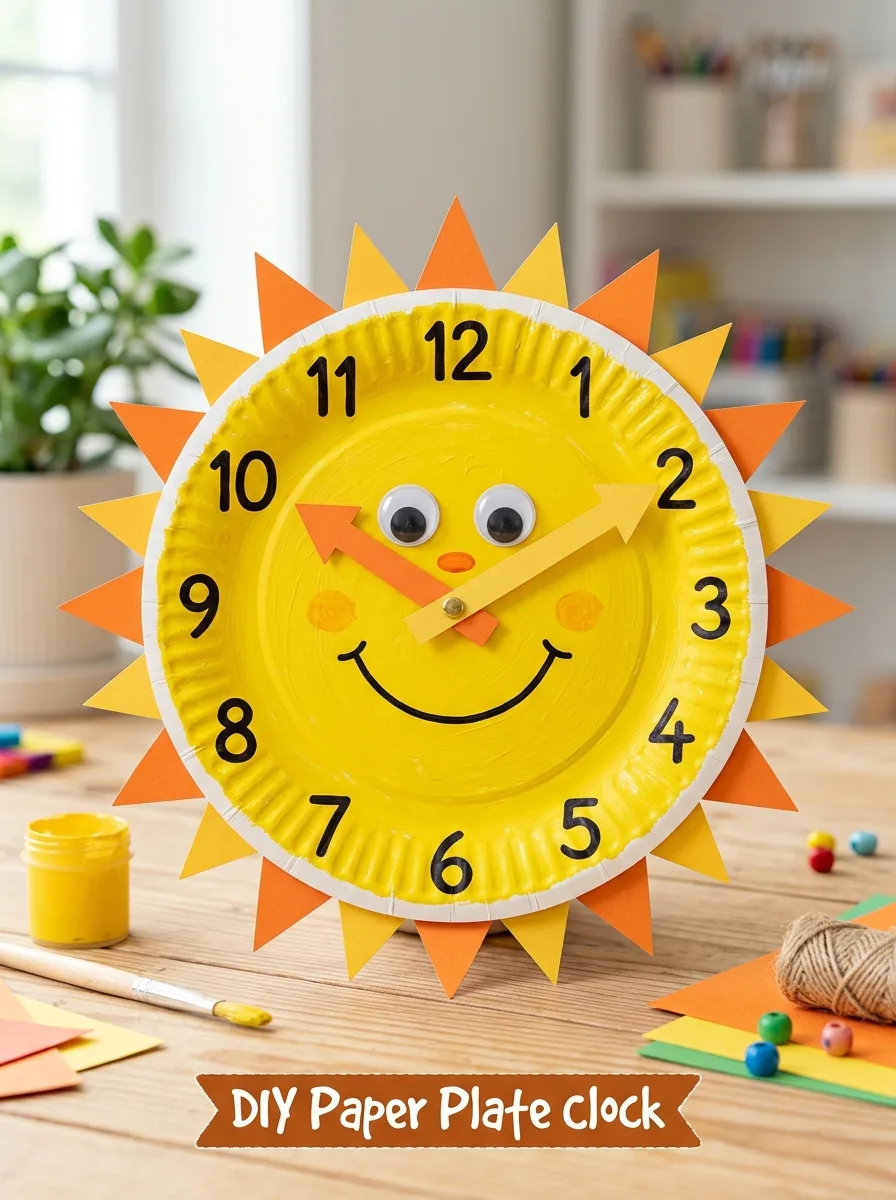
Paint a paper plate yellow and let it dry. Write the numbers 1 to 12 around the edge, placing 12, 3, 6 and 9 first to get the spacing right. Cut two paper hands, one shorter than the other. An adult pushes a metal paper fastener through the hands and the center of the plate and opens the prongs at the back. Add paper rays and a face.
Good to know: paper fasteners have sharp prongs and are small enough to choke on, so an adult should handle them and keep the box away from children under 3. Set the hands to times in the child’s day, such as lunch or bedtime, and talk about what happens then.
24. Summer Goal Jar Lids
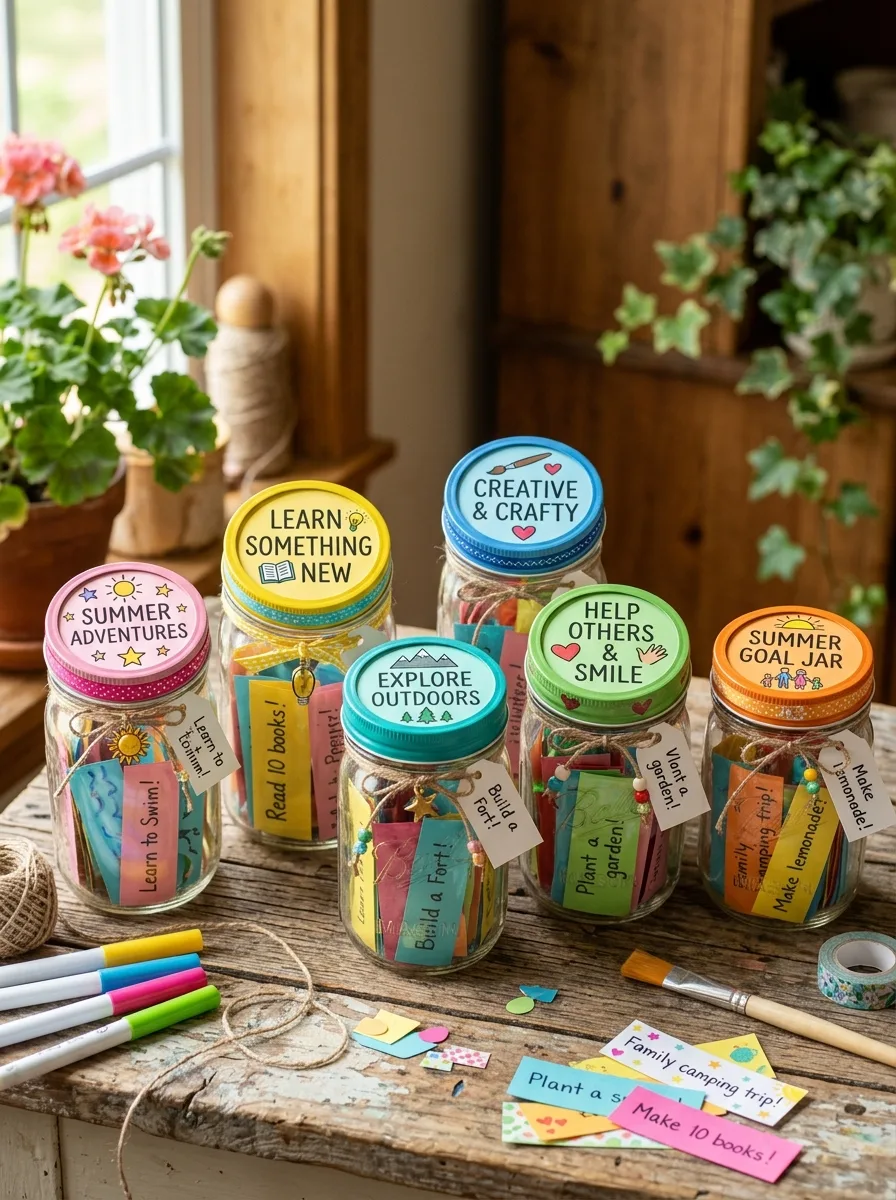
Use small, clean jars, plastic for young children. Kids paint the lids or cover them with stickers and paper circles cut to fit. On a slip of paper for each jar, write one summer goal, such as learning to swim, reading a stack of library books or growing a plant. Put one goal in each jar, close the lid, and line the jars up on a shelf.
Good to know: acrylic paint or paint pens grip metal lids better than washable paint, which tends to flake. Pick goals a child can reach by the end of summer.
25. Rainbow Ribbon Wand
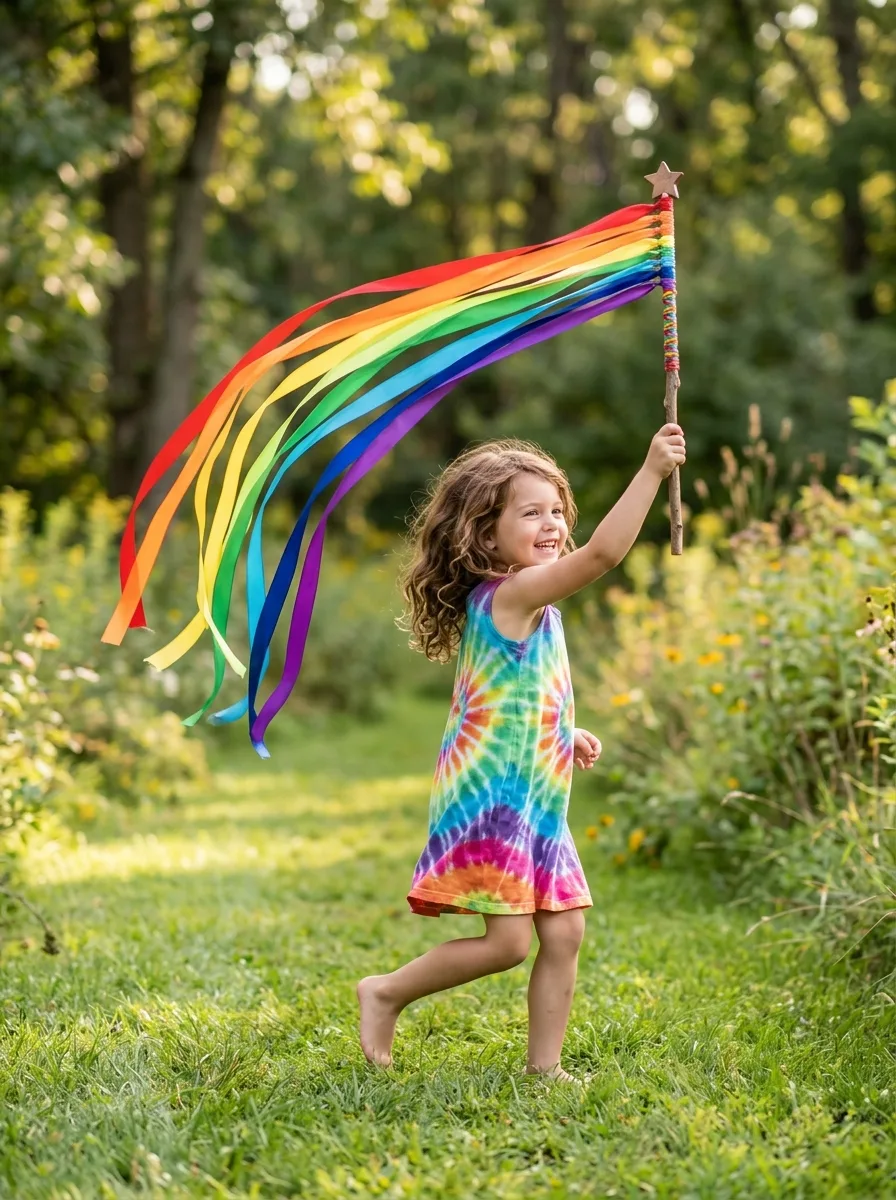
Cut ribbons in red, orange, yellow, green, blue and purple, each about as long as the child’s arm. Tie them one at a time to the end of a short wooden dowel or a cardboard tube with a double knot, then wrap tape over the knots to hold them. Kids wave the wand outside to make loops and spirals.
Good to know: sand any rough ends on a wooden dowel, keep the stick short for young children, and give everyone room to wave without hitting faces. Put the wand away after play so a baby can’t get tangled in the ribbons.
Common mistakes to avoid
- Leaving beads, gems, googly eyes, pom-poms or paper fasteners where children under 3 can reach them.
- Treating paper sunglasses or a paper hat as real sun protection.
- Putting water beads or baby oil in a sensory bottle, or leaving the cap unglued.
- Making bubble solution with dishwasher or laundry detergent.
- Giving glass jars to young children.
- Planning outdoor crafts for midday without shade or sunscreen.
First day of summer craft FAQs
When is the first day of summer?
In the Northern Hemisphere, astronomical summer begins on the June solstice, which falls on June 20 or 21 depending on the year. Meteorologists count summer from June 1.
Which of these crafts work for toddlers?
Fruit stamping, the beach ball, the paper fan and the bucket list poster, all with an adult helping. Skip small parts, loose glitter and glass for children under 3.
Which summer crafts can kids use outside?
The windsock, ribbon wand, bubble bottles and lemonade stand sign. Plan for shade, hats and sunscreen, and avoid the strongest sun between 10 a.m. and 4 p.m.
How can I keep the mess down?
Cover the table, use smocks, put out a little paint at a time, choose glitter glue over loose glitter, and do the salt and sand projects over a tray or outside.


