

22 Sweet and Messy Summer Handprint Crafts
Handprint crafts turn a painted palm into a sun, a crab or a slice of watermelon, and they record how small a child’s hand is at that age. Most need only washable paint, heavy paper and a few markers, and each print takes a minute or two.
Below are 22 summer handprint ideas, with how to make each print and one practical tip. Start with the setup basics, since a little preparation keeps the paint on the paper and off the furniture. For a handprint project outside the summer theme, the handprint train in these train crafts for preschoolers uses the same method.
Before you paint
Choose paint made for children
Use washable paint with the ACMI AP seal, which means a toxicologist has reviewed it; washable finger paint is a common choice. Crayola, for one, says it doesn’t recommend its regular art products for intentional direct skin contact and points to products made for skin, so read the label, keep paint off the face and broken skin, and wash it off with soap and water right after printing.
Supervise closely
Babies and toddlers put their hands in their mouths, so have one adult paint and press while another holds the child, and wash the hand straight away. Googly eyes, beads and sequins are choking hazards for children under 3 under the CPSC small parts rule, so draw eyes on instead for younger children. Tracing and cutting out a hand shape is an option for a baby who won’t keep still.
Set up a wash station
Before painting, put out a bowl of warm soapy water, a towel and wipes, cover the table and roll up sleeves. Use cardstock or other heavy paper, which wrinkles less under wet paint than printer paper.
Label the keepsake
Write the child’s name and age, or the date, on the back or in a corner. Let prints dry flat before adding details, so markers don’t smear.
The 22 handprint crafts at a glance
| Craft | Hand position | Paint colors | Details added after drying |
|---|---|---|---|
| Sun | Several prints in a circle, fingers out | Yellow, orange | Center circle, face |
| Pineapple | One print, fingers up | Yellow palm, green fingers | Crisscross lines |
| Watermelon | One print, fingers together | Pink or red | Green rind, black seeds |
| Crab | Two prints, thumbs together | Red | Claws, eyes |
| Flamingo | One print, fingers down, thumb up | Pink | Head, beak, legs |
| Octopus | One print, fingers down | Any bright color | Three extra arms, eyes |
| Palm tree | One or two prints, fingers spread | Green | Trunk, coconuts |
| Ice cream cone | One or two prints, fingers up | Pink, mint or brown | Cone, sprinkles |
| Fish | One print, sideways | Bright colors | Eye, scales, bubbles |
| Turtle | One print, fingers down, thumb out | Green | Shell pattern, eye, tail |
| Popsicle | One print, fingers together and up | Bright colors | Craft stick |
| Sailboat | One print, fingers up | Any color | Boat, mast, waves |
| Starfish | One print, fingers spread wide | Orange, yellow or tan | Dots, face |
| Butterfly | Two prints, thumbs overlapping | Two bright colors | Body, antennae |
| Jellyfish | One print, fingers down | Pink, purple or blue | Extra tentacles, eyes |
| Lemon slice | One print, fingers slightly spread | Yellow | White segment lines, leaf |
| Beach scene | Footprints and handprints | Tan, blue | Sun, shells |
| Rainbow | Rows of prints in an arch | Six rainbow colors | Clouds |
| Fireworks | Several prints, fingers spread, rotated | Red, white, blue, gold | Paint dots |
| Shark | One print, sideways, thumb up | Gray | Tail, belly, eye, teeth |
| Sandcastle | Several prints side by side, fingers up | Tan | Door, flags, sand |
| Flower | Prints in a ring, or one print fingers up | Pink, purple or yellow | Stem, leaves |
1. Handprint Sun
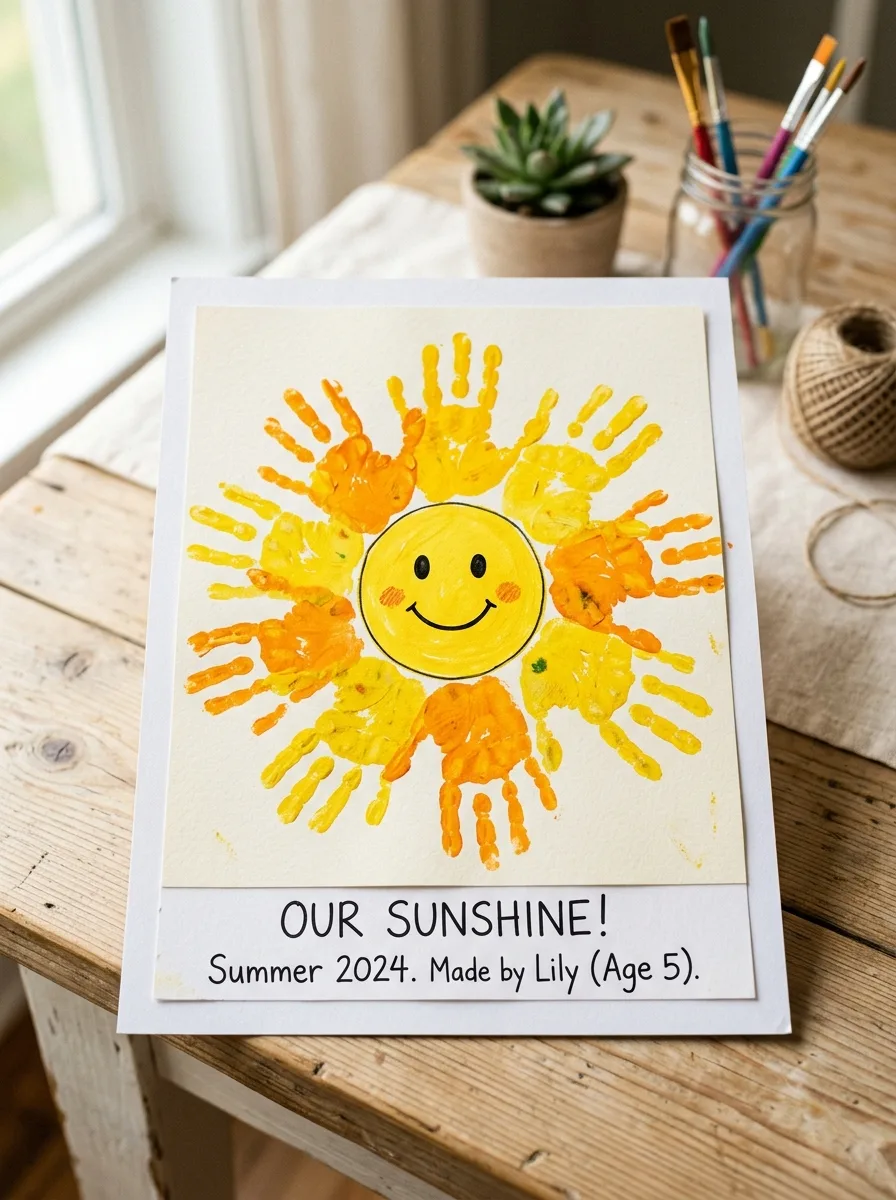
Draw a circle in the middle of the page. Paint the child’s hand yellow or orange and press it several times around the circle, with the fingers pointing outward as rays. Brushing yellow and orange onto the same hand gives a warmer sun. When the prints are dry, glue a yellow paper circle in the middle and draw a face.
Good to know: repaint the hand before each print, since a second print from one coat usually comes out faint. Wipe the hand with a damp cloth before switching colors.
2. Handprint Pineapple
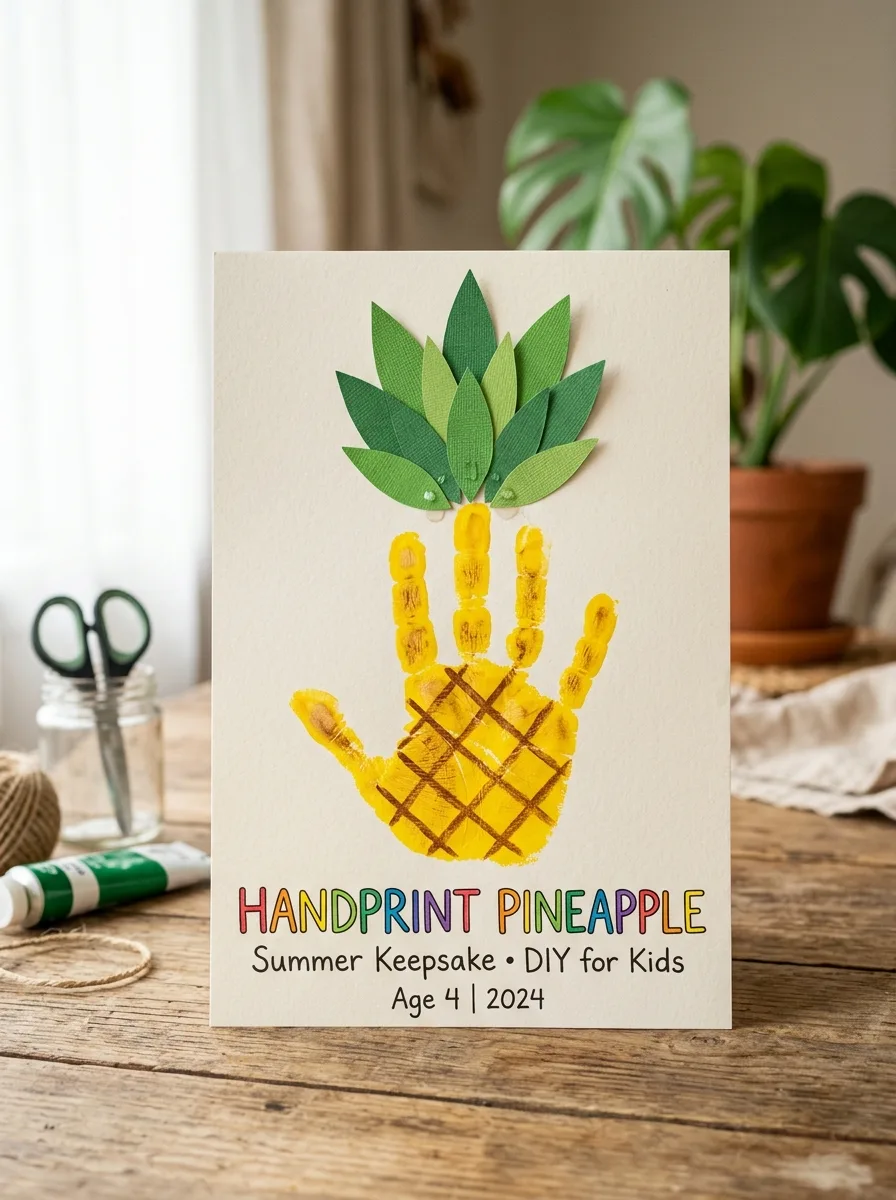
Brush yellow paint on the palm and green on the fingers, then press the hand with the fingers pointing up: the palm becomes the fruit and the fingers the leafy crown. Once dry, draw a crisscross pattern on the yellow part with a brown or orange marker. Or print the whole hand yellow and glue paper leaves on top.
Good to know: two colors on one hand take a few seconds to brush on, so use a foam brush and press while the paint is still wet; a thin coat gives sharper fingers than a thick one.
3. Handprint Watermelon
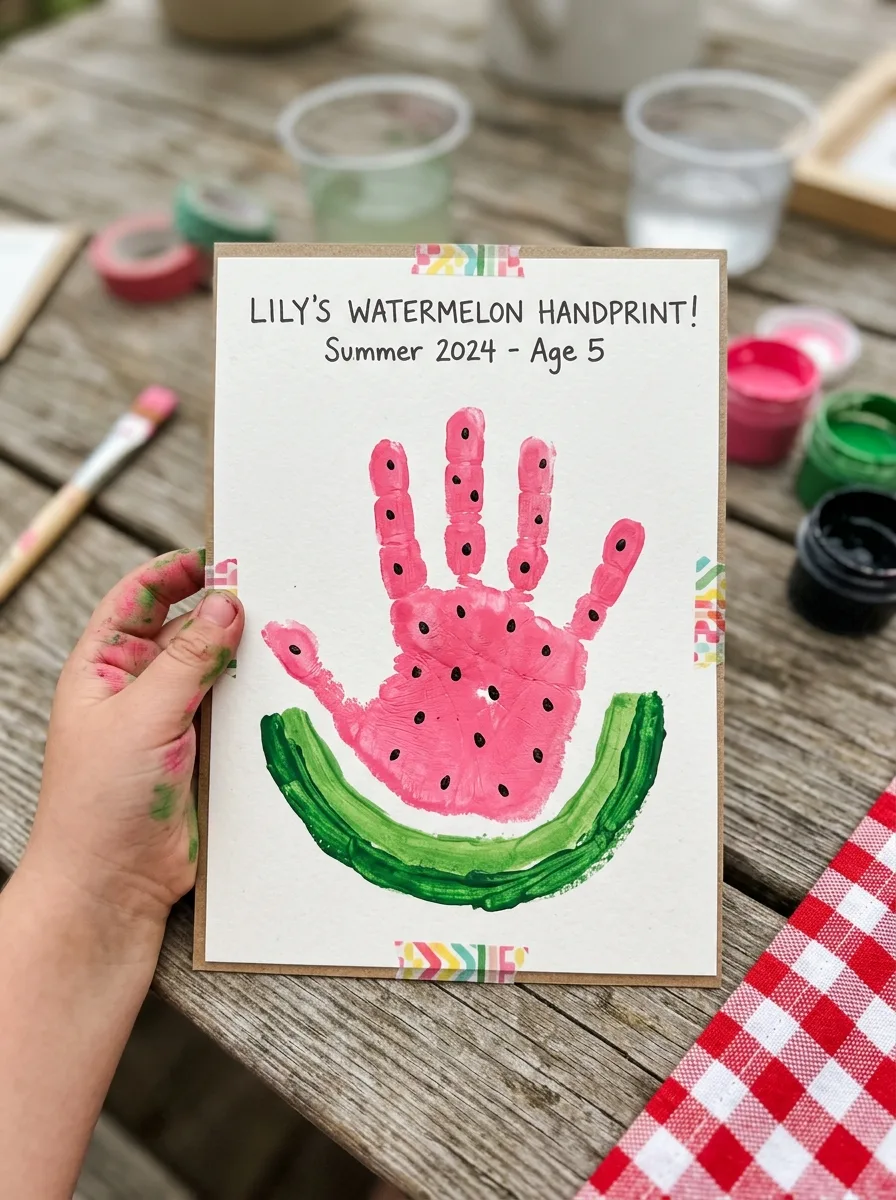
Paint the hand pink or red, keep the fingers together, and press it onto the paper. Once dry, add a curved green rind along the bottom edge with paint or a paper strip, and dot black seeds across the pink with a marker or a fingertip dipped in black paint.
Good to know: a green paper arc glued on for the rind gives a crisp edge and means one less color of paint on small hands.
4. Handprint Crab
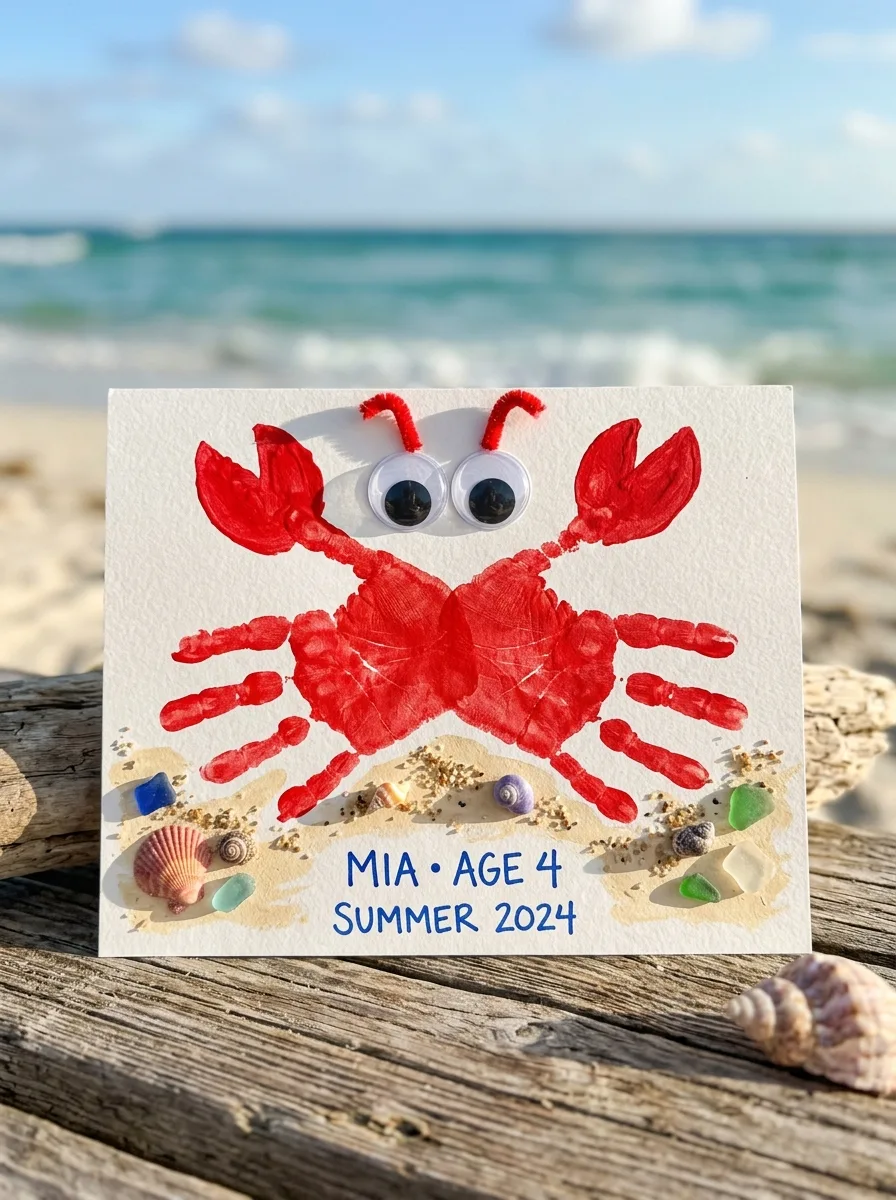
Paint both hands red and press them side by side with the thumbs touching or overlapping in the middle and the fingers spread outward to each side as legs. Add two claws with red paper or thumbprints at the top, then draw eyes on stalks once the paint is dry.
Good to know: press one hand at a time and wash it before painting the other, so a young child isn’t sitting with two painted hands.
5. Handprint Flamingo
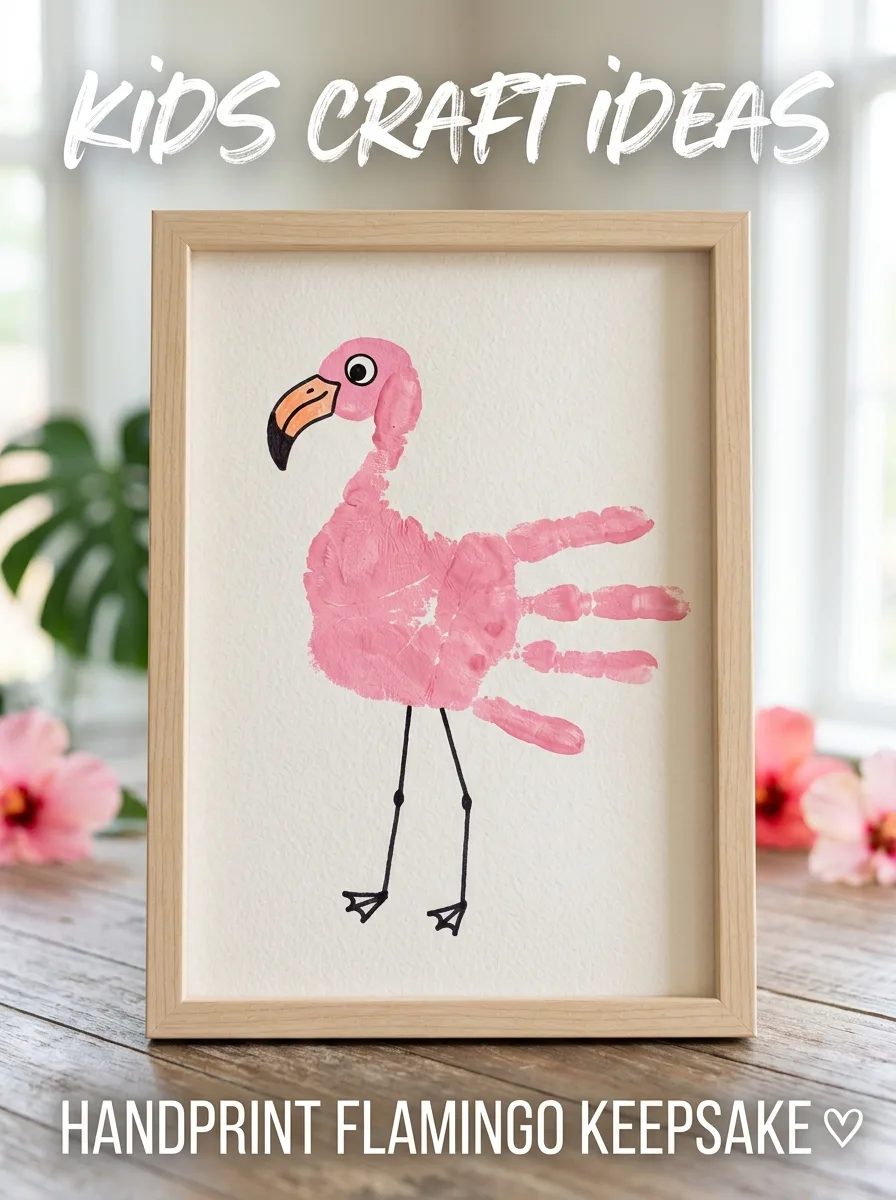
Paint the hand pink and press it with the fingers pointing down and the thumb pointing up: the fingers become the feathers and the thumb the long neck. Once dry, draw a head with a black-tipped beak at the top of the thumb, a dot for the eye, and two thin legs, one bent the way flamingos often stand.
Good to know: if you don’t have pink, mix it from red and white, adding the white a little at a time.
6. Handprint Octopus
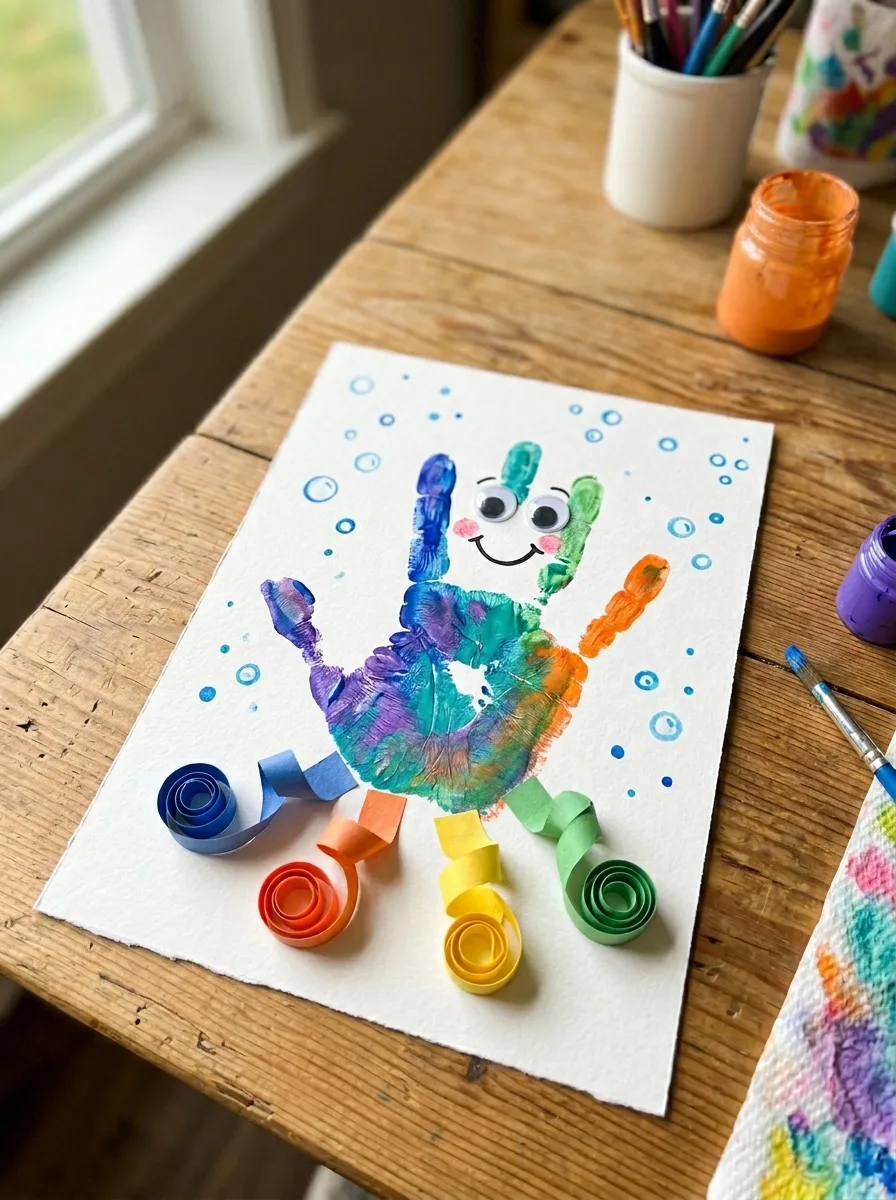
Paint the hand in one bright color and press it with the fingers pointing down: the palm is the head and the fingers are the arms. An octopus has eight arms and a hand has five digits, so add three more arms with paint or marker, or overlap a second print. Add eyes and a smile once dry.
Good to know: press the hand flat and lift it straight up without sliding, which keeps the arms from smudging together. Counting the arms together is an easy math moment.
7. Handprint Palm Tree
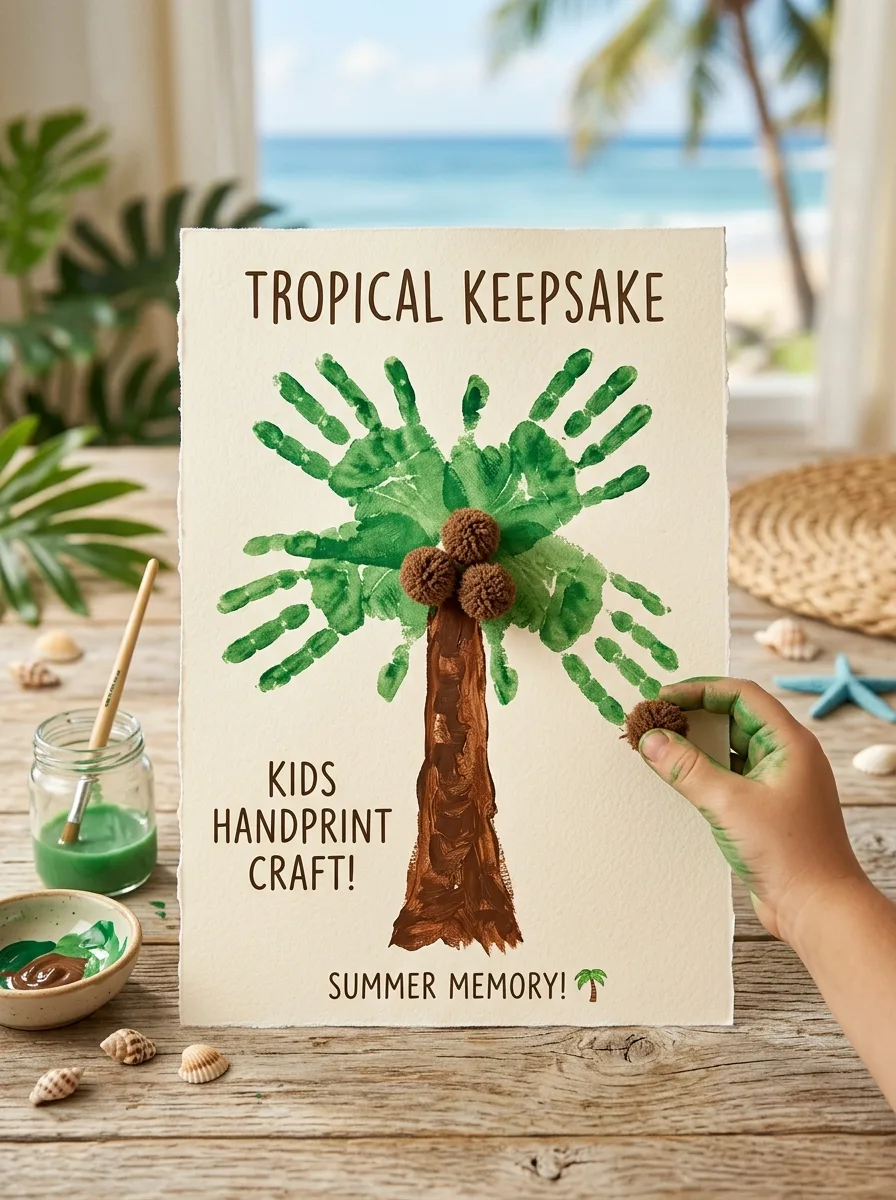
Draw or glue a curved brown trunk from the bottom of the page. Paint the hand green, spread the fingers and press it at the top of the trunk so the fingers become fronds; a second, overlapping print makes a fuller tree. Add brown coconuts with fingertip dots and a sun once the paint is dry.
Good to know: a strip of brown paper for the trunk dries faster than paint and gives the handprint a clean place to land.
8. Handprint Ice Cream Cone
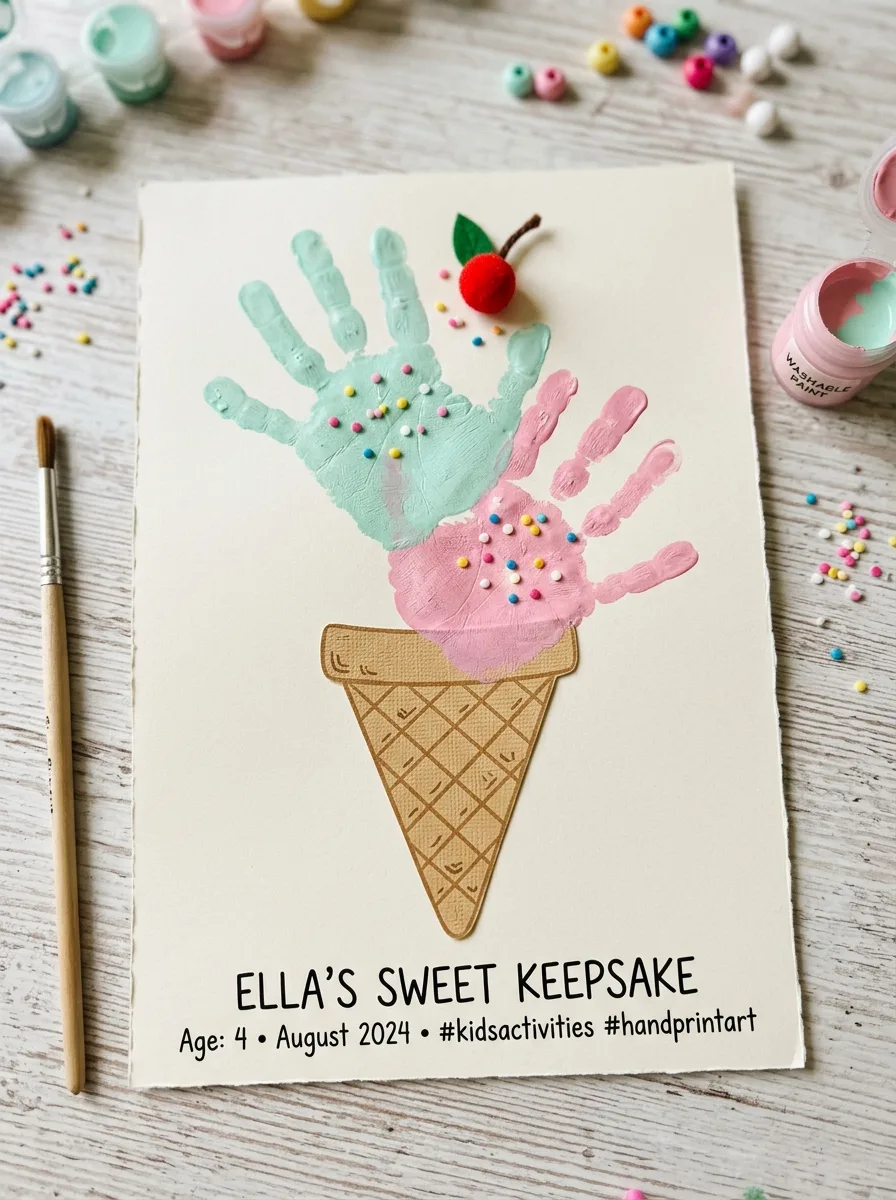
Cut a cone from tan or brown paper, glue it near the bottom of the page and draw a crisscross waffle pattern on it. Paint the hand in an ice cream color such as pink, mint or brown and press it above the cone with the fingers together; add a second print above for a double scoop. Finish with dots of paint for sprinkles.
Good to know: glue the cone on first and print the scoops last, so the wet paint doesn’t get smudged while you’re gluing.
9. Handprint Fish
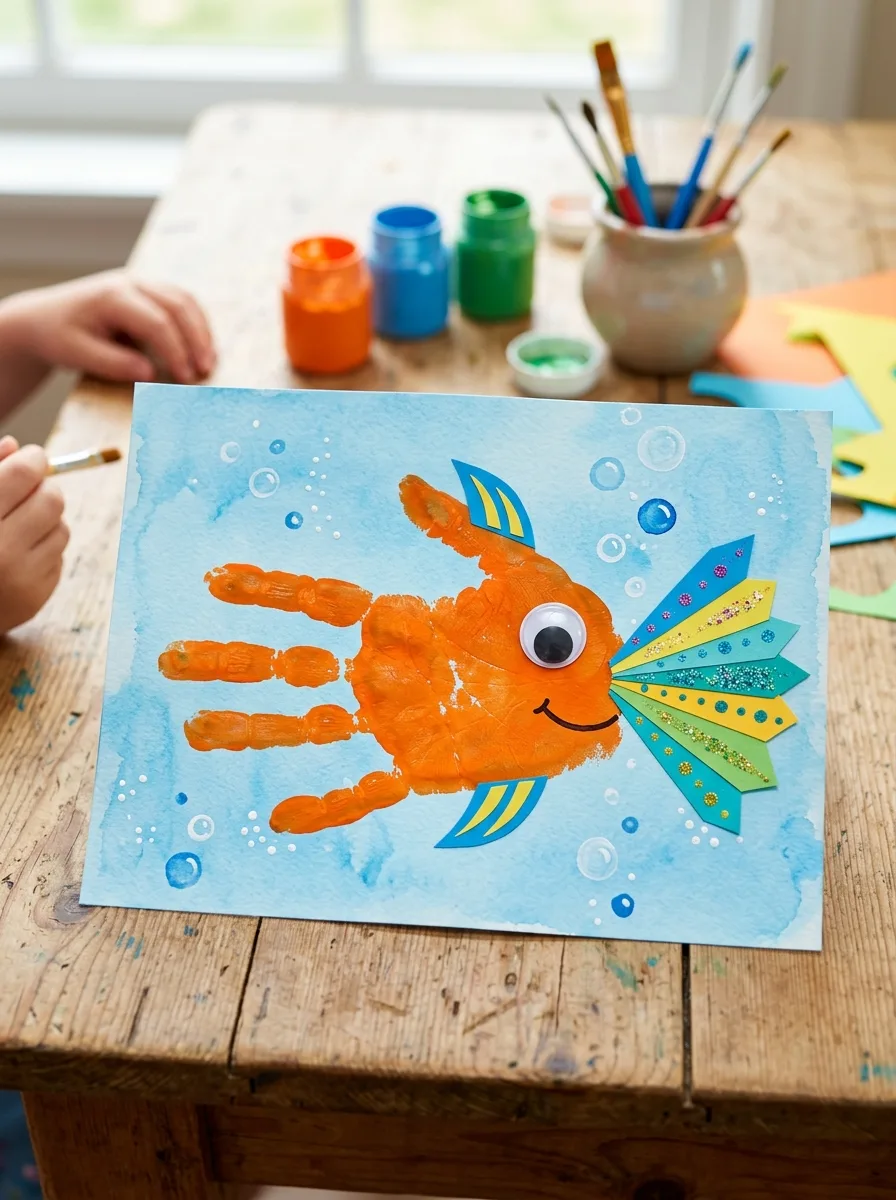
Paint the hand in one or several bright colors and press it sideways with the fingers together: the fingers form the tail and the palm the body, with the thumb as a top fin. Once dry, add an eye, a mouth, curved scale lines and a few bubbles.
Good to know: brushing stripes of different colors across the hand gives a rainbow fish in one print; work quickly so every stripe is still wet when you press.
10. Handprint Turtle
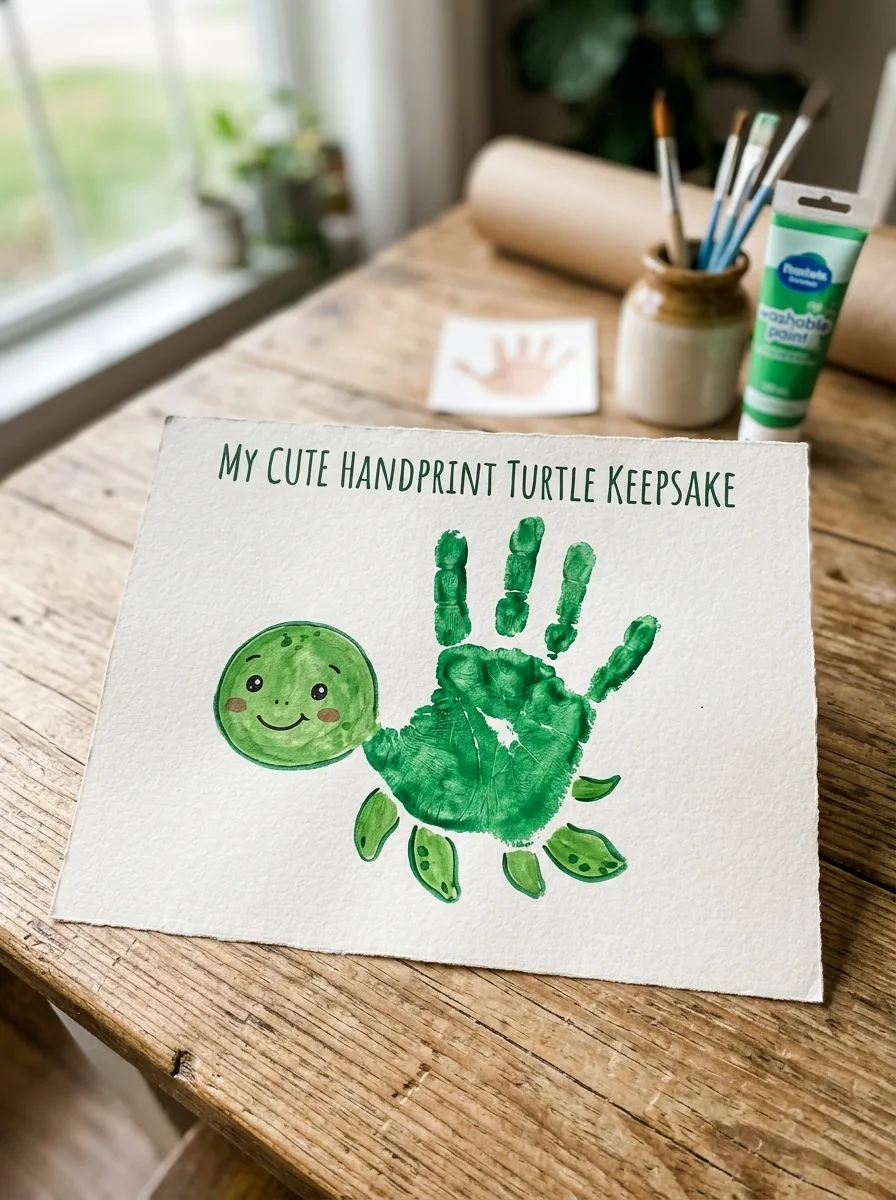
Paint the hand green and press it with the fingers slightly spread and pointing down and the thumb out to the side: the palm becomes the shell, the thumb the head and the fingers the legs. Once dry, draw a pattern of hexagons or dots on the shell, add an eye and a short tail. For more turtle designs, see these turtle painting ideas.
Good to know: dab a little darker green on the palm before printing to give the shell some texture, and wait until it’s dry before drawing on it, since markers smear on wet paint.
11. Handprint Popsicle
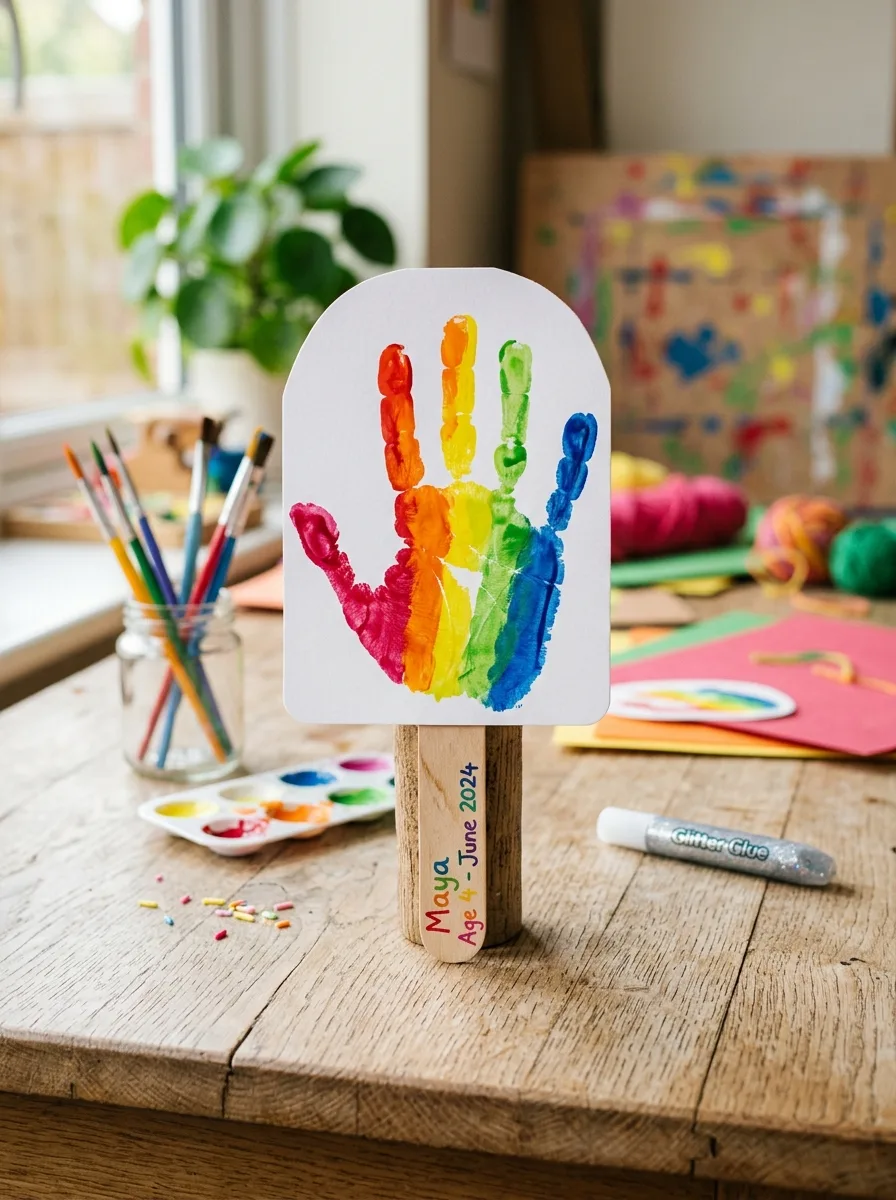
Paint the hand in one or two bright colors, keep the fingers together and press it with the fingers pointing up, so the print looks like a rounded ice pop. Glue a wooden craft stick or a brown paper strip below the palm, and add drips with a little paint along the edges.
Good to know: attach the craft stick with white glue and let it dry flat; a glue stick won’t hold wood well.
12. Handprint Sailboat
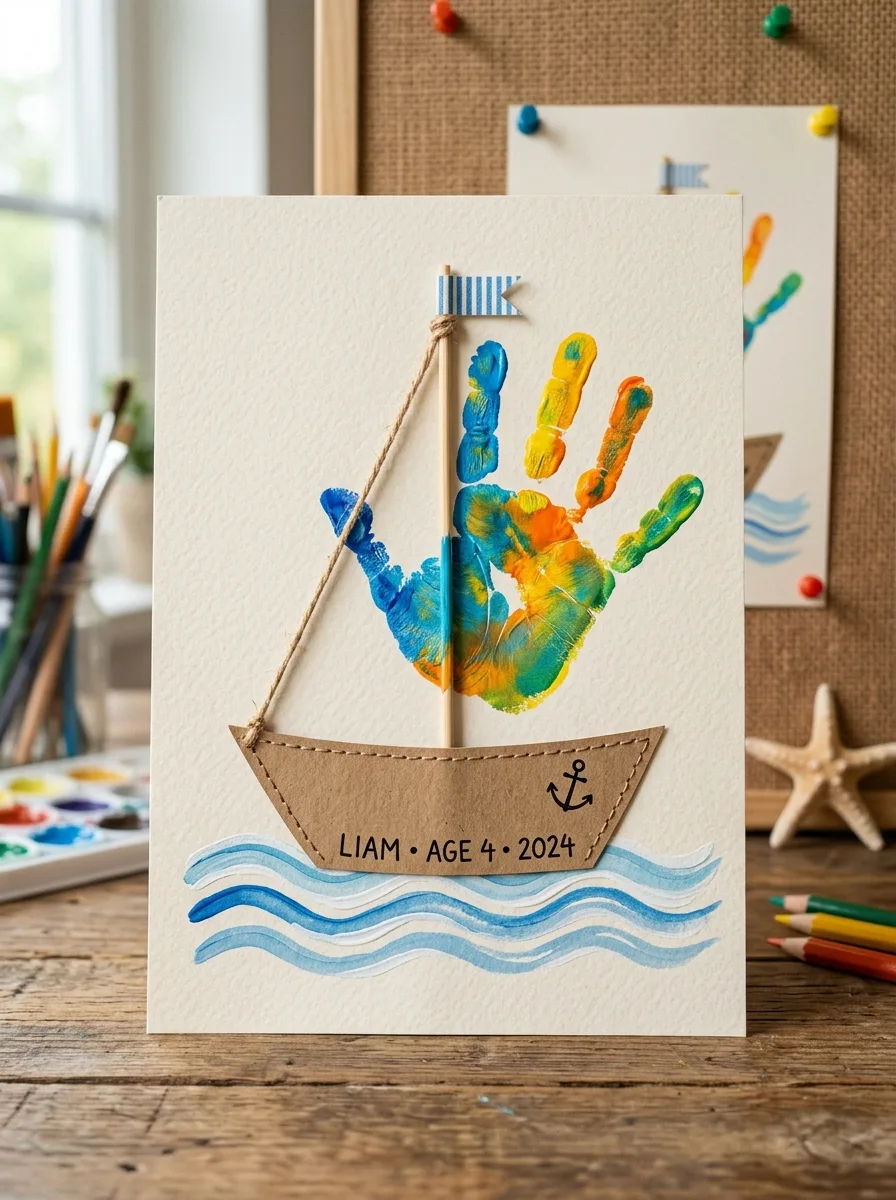
Glue or draw a boat shape near the bottom of the page and a thin line for the mast. Paint the hand a bright color and press it above the boat, fingers pointing up, so the print forms the sail. Once dry, add waves, a small flag and a sun.
Good to know: while you wash the child’s hand, they can sponge blue paint across the bottom of the page for quick waves.
13. Handprint Starfish
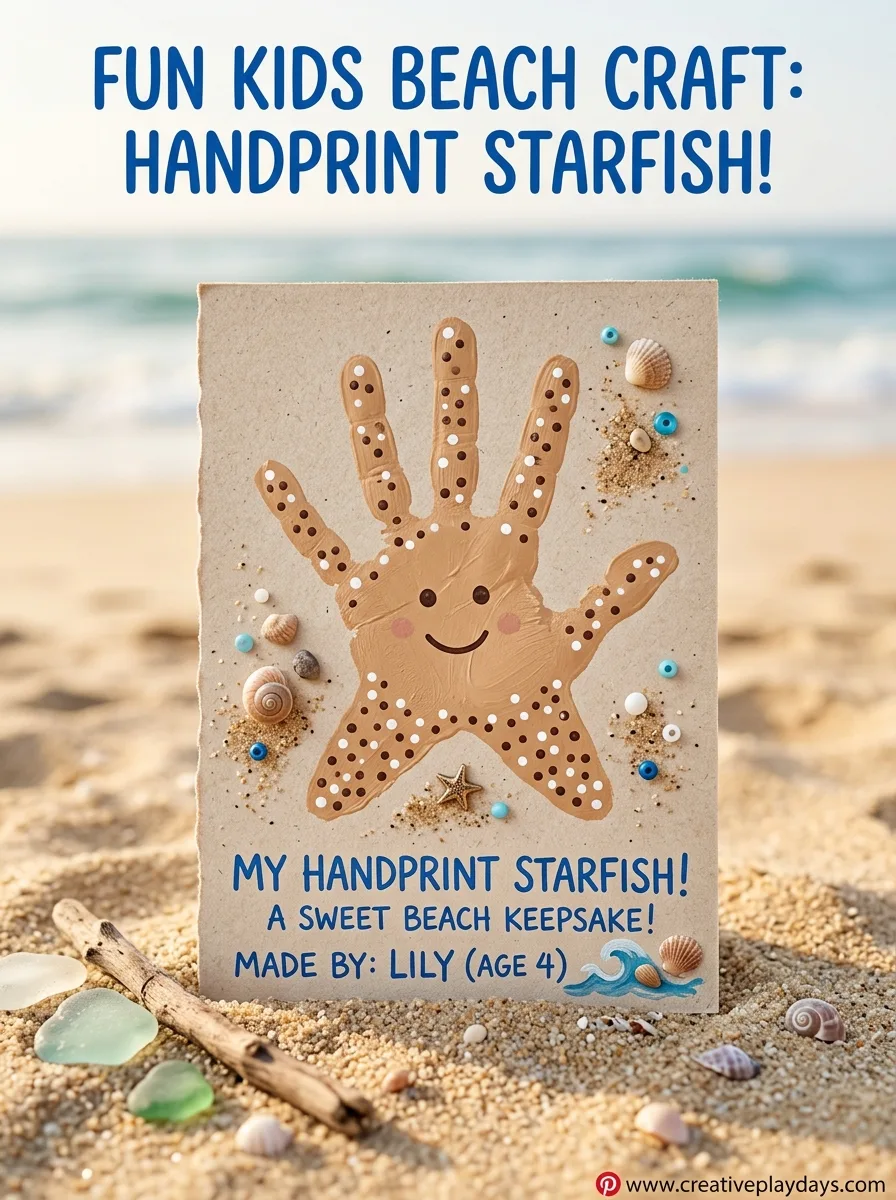
Paint the hand orange, yellow or tan and press it with the fingers spread wide: the palm is the center and the thumb and fingers are the arms. Many sea stars have five arms, which makes a hand a good match. Once dry, add dots with a fingertip or cotton swab for texture, and a face if you like.
Good to know: sprinkling a little sand onto the wet print adds texture; do it over a tray, let it dry and shake off the extra.
14. Handprint Butterfly
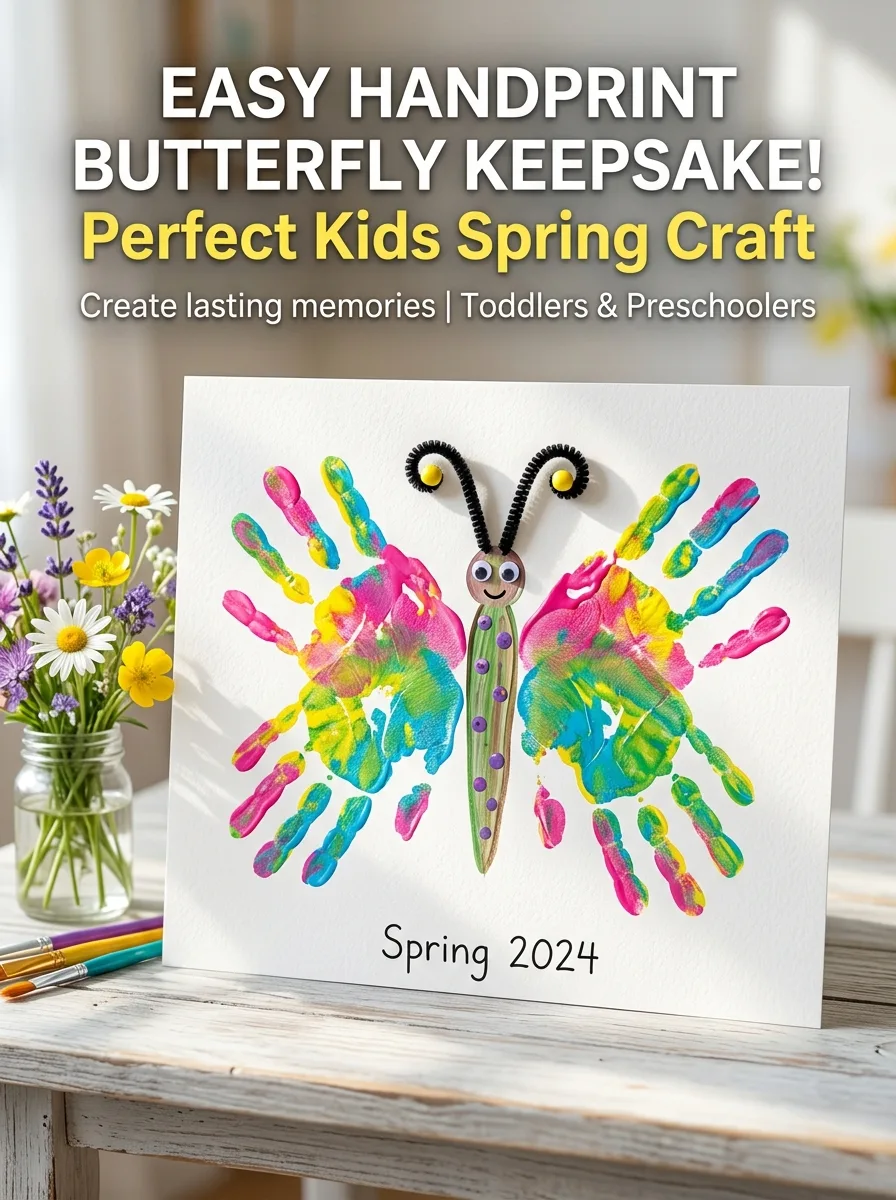
Paint both hands, a different color on each or stripes on both, and press them side by side with the thumbs overlapping in the middle and the fingers pointing up and outward as wings. When dry, draw or glue a thin body down the middle where the thumbs meet, add antennae, and decorate the wings with dots.
Good to know: make the two prints one hand at a time, washing in between, so a toddler isn’t left with two painted hands reaching for everything.
15. Handprint Jellyfish
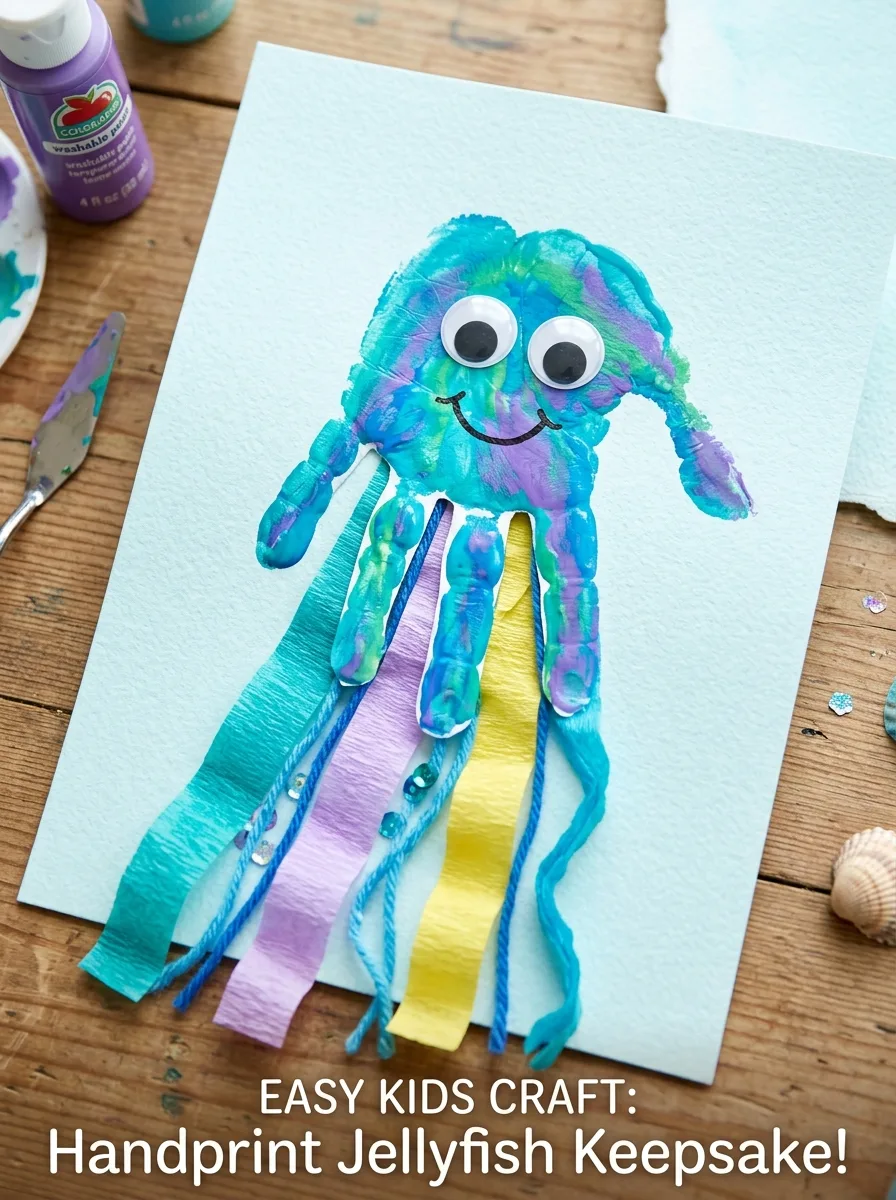
Paint the hand pink, purple or blue and press it with the fingers pointing down: the palm becomes the rounded bell and the fingers the tentacles. Once dry, add more wavy tentacles with marker, ribbon or curled paper strips, plus eyes and a smile.
Good to know: attach ribbon or paper tentacles with white glue rather than a glue stick and let them dry flat. Keep ribbon pieces short for younger children.
16. Handprint Lemon Slice
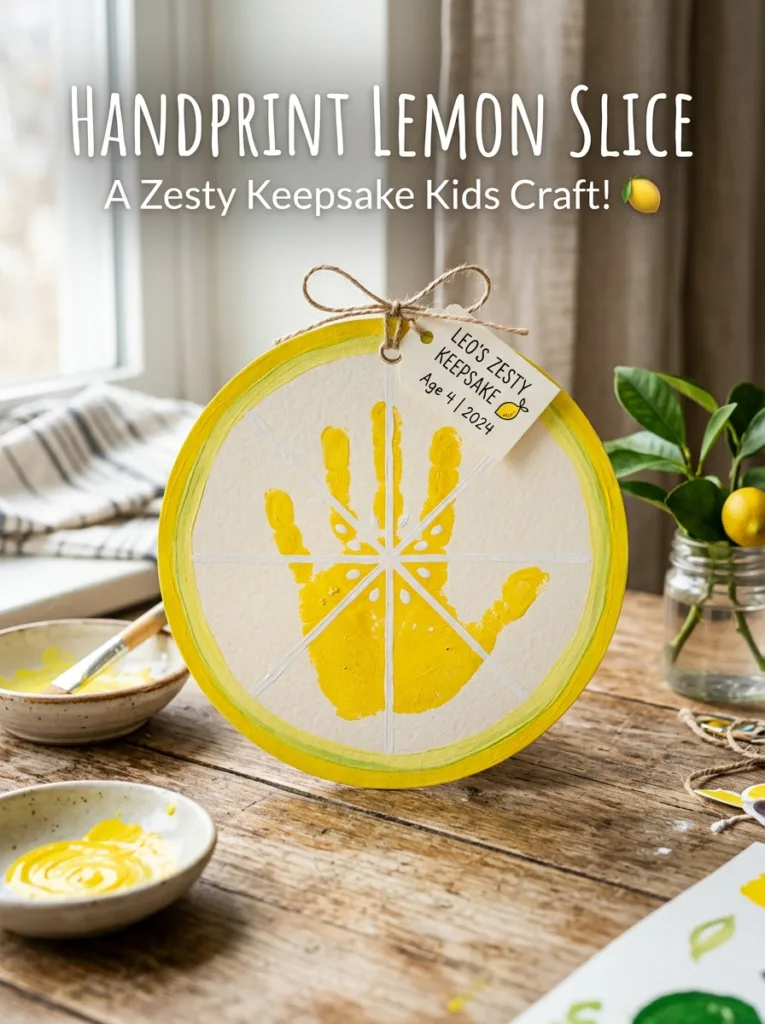
Paint the hand bright yellow and press it with the fingers slightly spread. Once dry, draw white lines from the palm out between the fingers to suggest segments, outline the print with a darker yellow or green rind, and add a green leaf at the top.
Good to know: white lines show up best with white paint or a white paint pen; a white crayon barely shows on yellow.
17. Handprint Footprint Beach Scene
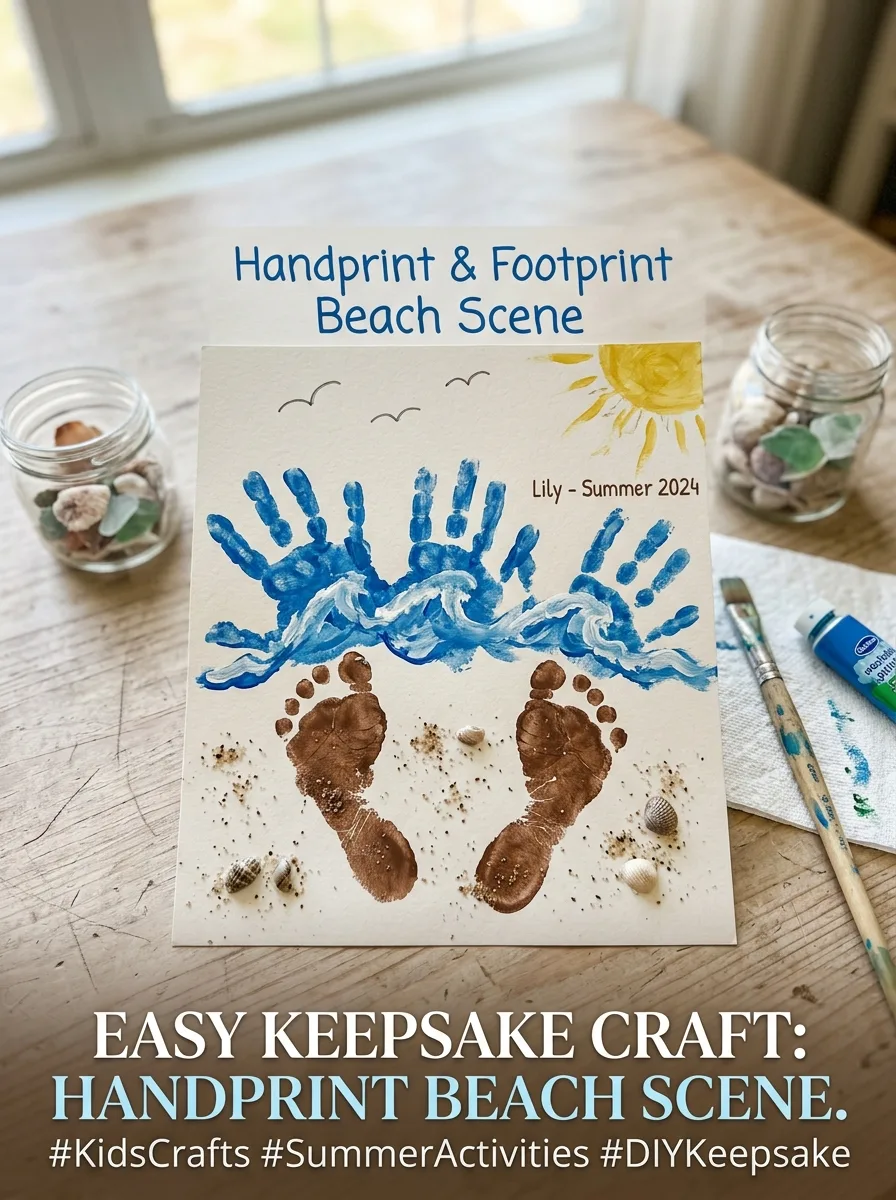
Paint the child’s feet tan or light brown and press them along the bottom of a large sheet of paper as sand. Then paint the hands blue and press them in a row above as waves. Add a yellow sun, shells and a beach umbrella once everything is dry.
Good to know: do the footprints with the child sitting in a chair and wipe the feet clean before they stand up; painted feet are slippery on hard floors.
18. Handprint Rainbow
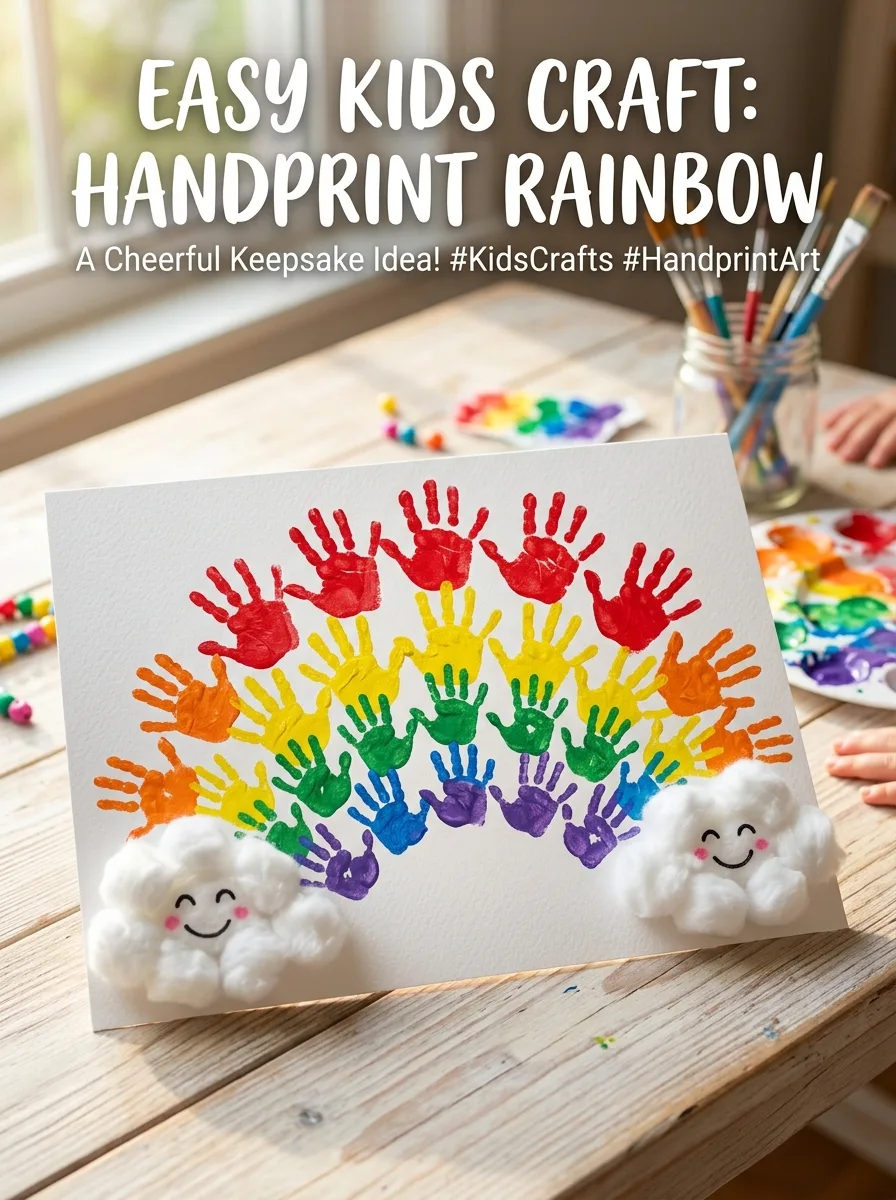
Paint and print one color at a time in curved rows, starting with red across the top and working down through orange, yellow, green, blue and purple. Wipe or wash the hand between colors. Add cotton ball or paper clouds at each end once the paint is dry.
Good to know: a rainbow takes a lot of prints, so use a large sheet of paper and spread the rows over two sessions for younger children, or make it a group project with one color each.
19. Handprint Fireworks
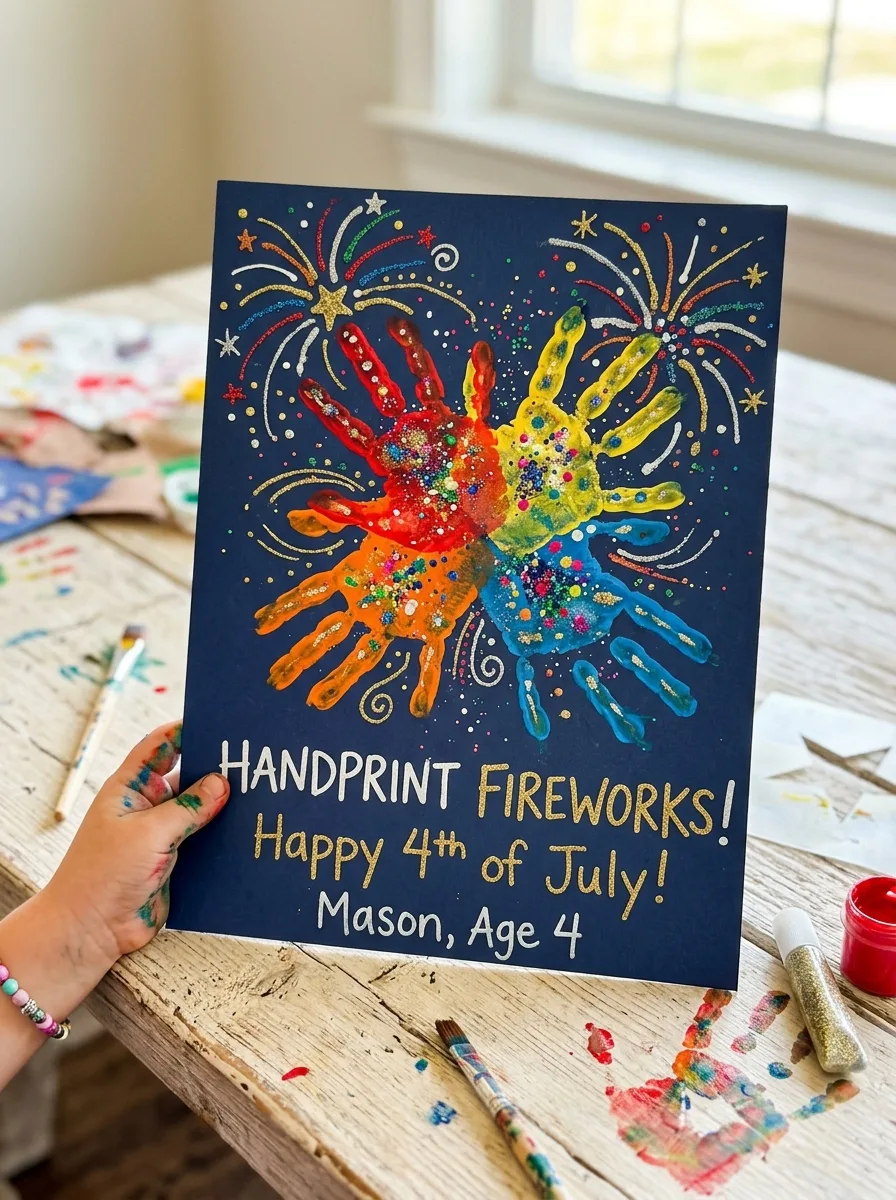
Use black or dark blue paper. Paint the hand red, white, blue or gold and press it with the fingers spread wide, then turn the paper and print again so the fingers point a different way, building up a burst. Add dots of paint around each burst once dry.
Good to know: loose glitter spreads everywhere and can get into eyes; glitter glue or metallic paint gives the same sparkle with less mess.
20. Handprint Shark
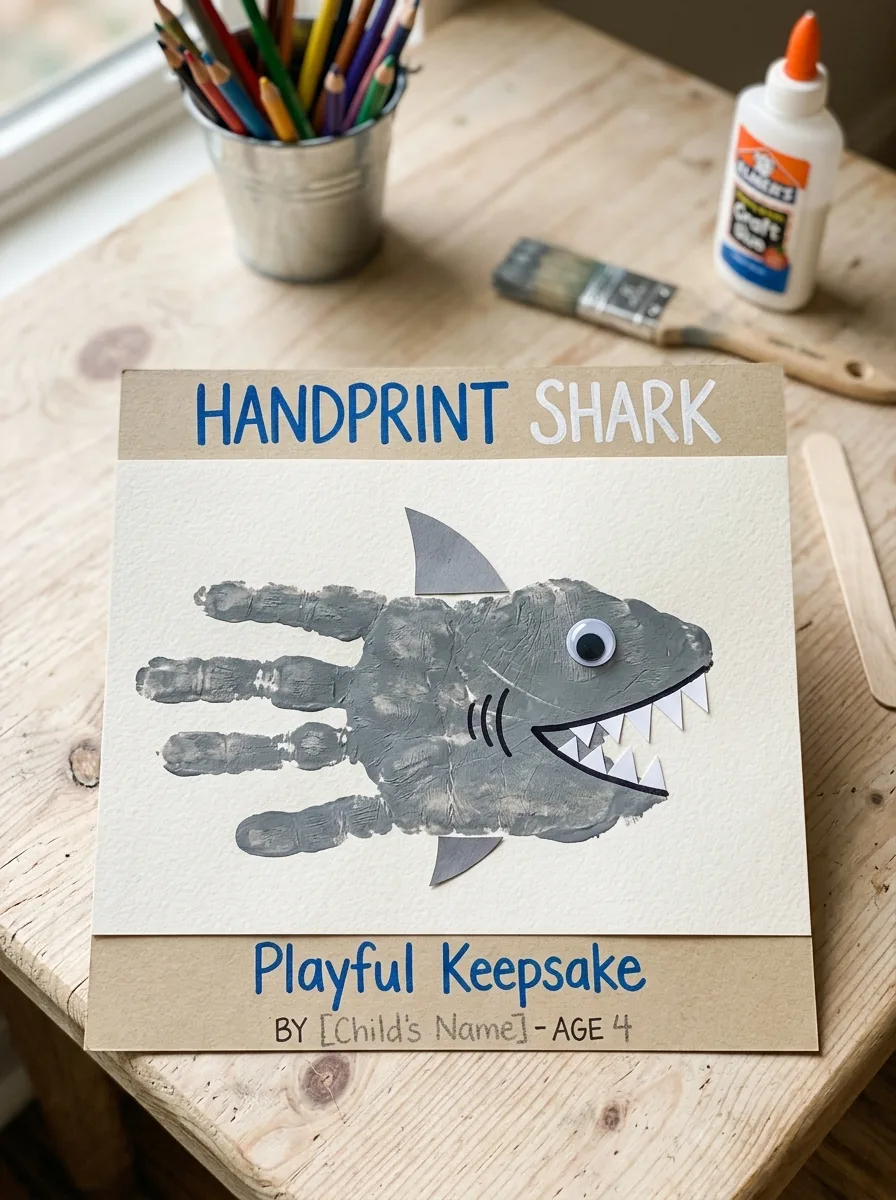
Paint the hand gray and press it sideways with the fingers together and the thumb pointing up as the dorsal fin. Once dry, add a tail fin at the wrist end, a white belly, an eye, gill lines and a row of small triangle teeth. Draw bubbles and waves around it.
Good to know: brush white along the lower edge of the hand before printing for a two-tone shark, and add the white last so it doesn’t mix into the gray.
21. Handprint Sandcastle
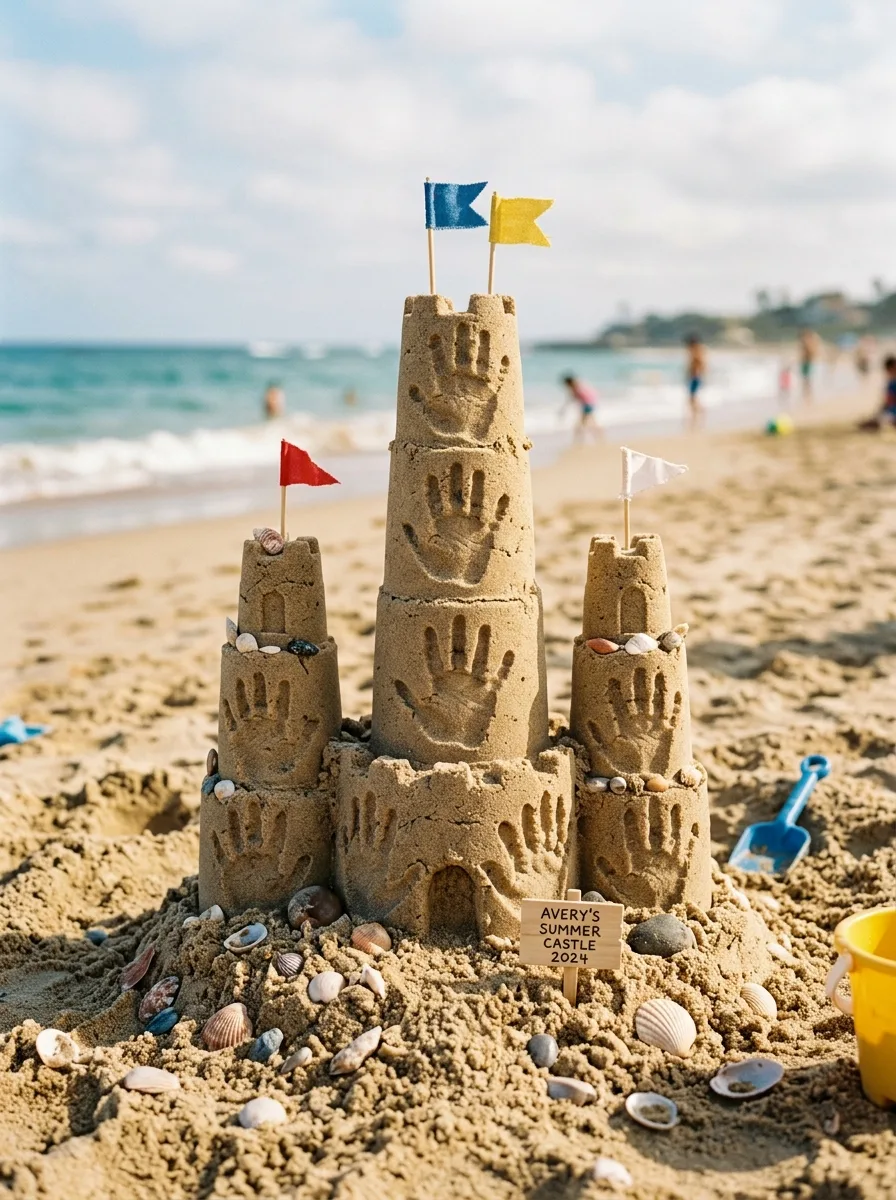
Paint the hand tan or light brown and print it several times side by side with the fingers pointing up to make the castle walls and towers. Once dry, add a door, windows and paper flags. Brush glue over parts of the castle and sprinkle on real sand for texture.
Good to know: sprinkle sand over a tray or outdoors, let the glue dry, then tip off the extra. Supervise younger children so sand stays out of mouths and eyes.
22. Handprint Flower
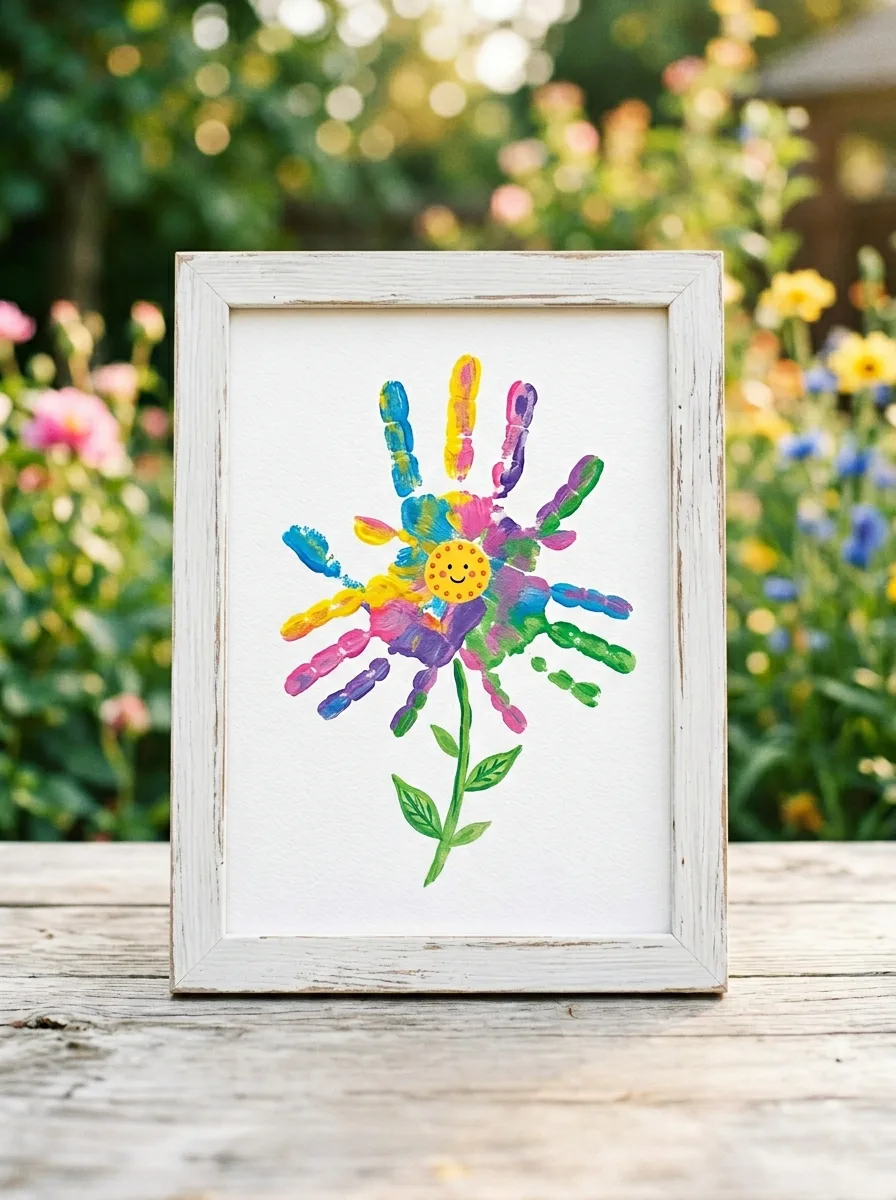
Paint the hand in a bright flower color and press it several times in a ring with the fingers pointing outward, or make one print with the fingers up for a tulip-like bloom. Add a paper circle or a fingertip of a contrasting color in the center, then a green stem and leaves; a green handprint with the fingers together makes good leaves.
Good to know: a single print with the fingers up and the thumb tucked in is the quickest version for toddlers who won’t sit still for several prints.
Common mistakes to avoid
- Using paint that isn’t washable, such as acrylic craft paint, which is hard to get off skin and clothes once dry.
- Painting near the face or on broken skin.
- Loading the hand with thick paint, which blurs the fingers into a blob.
- Adding googly eyes, beads or sequins to crafts for children under 3.
- Letting a child stand up on a hard floor with painted feet.
- Forgetting to write the child’s name and the date on the print.
Handprint craft FAQs
What paint is best for handprint crafts?
Washable, non-toxic paint for children, ideally with the ACMI AP seal; washable finger paint is a common choice. Check the maker’s guidance on skin contact, and wash the paint off with soap and water right after printing.
How do you get a clear handprint?
Brush on a thin, even coat instead of dipping the hand, press the hand flat while gently pressing each finger down, and lift straight up. Repaint before every print.
How can you do handprint crafts with a baby?
Have two adults, paint the hand quickly with a soft brush, and press when the baby’s hand is relaxed, then wash it right away. A calm moment works better than a tired or hungry one, and tracing the hand is an alternative to paint.
How do you keep handprint art looking good?
Let it dry flat, label it, and store it flat in a folder or frame it. Keeping it out of direct sun helps the colors last.


2 Comments