

23 Cute End of Summer Crafts for Kids
End of summer crafts give kids a way to look back on the season: the trips, the beach, the long evenings outside. Many use what summer left behind, such as photos, shells, pressed flowers and ticket stubs, and a few help with the move back to school.
Below are 23 ideas for kids of different ages, each with what you need, how to make it and one practical note. A few involve glass, magnets, glow sticks or battery lights, so read the safety basics first.
Before you start
Match the job to the age
Young children can paint, glue and stick with help. Cutting with a craft knife, hot glue, spray sealers and anything made of glass are adult jobs, so do those steps yourself and stay at the table while kids work.
Keep small parts and magnets from young children
Beads, seeds, small shells and buttons are choking hazards for children under 3. Small magnets carry an extra risk: the CPSC warns that when two or more magnets are swallowed, they attract each other inside the body, and the injuries can need surgery. Seek medical care right away if you think a child has swallowed one.
Use battery lights, not flames
Light jars and lanterns with battery-powered LED lights instead of candles. If a light runs on a button or coin battery, make sure the battery compartment is screwed shut; the CPSC says a swallowed button battery can seriously burn a child’s throat in about two hours. Keep spare batteries out of reach.
Choose non-toxic supplies
Look for the ACMI AP seal on paints, glue and markers, which means a toxicologist has reviewed the product. ACMI says products with its CL (Cautionary Labeling) seal should never be given to children in sixth grade or younger.
The 23 crafts at a glance
| Craft | Who can make it | Mess level | Safety note |
|---|---|---|---|
| Sunset painting | Preschool and up | Medium | Washable paint |
| Summer memory scrapbook | All ages, with help | Low | Use photo copies |
| Paper sunflower | Preschool and up | Low | Child-safe scissors |
| Firefly jar | Preschool and up, with an adult | Low | No candles; supervise glow sticks |
| Goodbye summer banner | Preschool and up | Low | None |
| Pressed flower bookmark | School age | Low | Start pressing early |
| Sunflower paper plate | Preschool and up | Medium | Real seeds: choking risk under 3 |
| Paper campfire | Preschool and up | Low | Keep away from real flames |
| Paper lantern | School age | Low | LED light only |
| Apple stamp art | Preschool and up | Medium | Adult cuts the apples |
| Seashell magnets | School age | Low | Keep magnets from young children |
| Summer photo collage | All ages, with help | Low | Use photo copies |
| Friendship bracelets | School age | Low | Beads: choking risk under 3 |
| Late summer wreath | Preschool and up | Medium | Adult handles hot glue |
| Back to school countdown chain | Preschool and up | Low | None |
| Leaf rubbing art | Preschool and up | Low | Avoid poison ivy |
| Gratitude stone | Preschool and up | Medium | Adult applies sealer |
| Time capsule | All ages, with help | Low | No food or batteries inside |
| Sand art in a jar | School age | Medium | Plastic jar for young kids |
| Constellation canvas | School age | Medium | Washable paint |
| Popsicle stick countdown | All ages, with help | Low | None |
| Last day of summer crown | Preschool and up | Low | Cover staples with tape |
| Golden hour silhouette | School age | Medium | Child-safe scissors |
1. End of Summer Sunset Painting
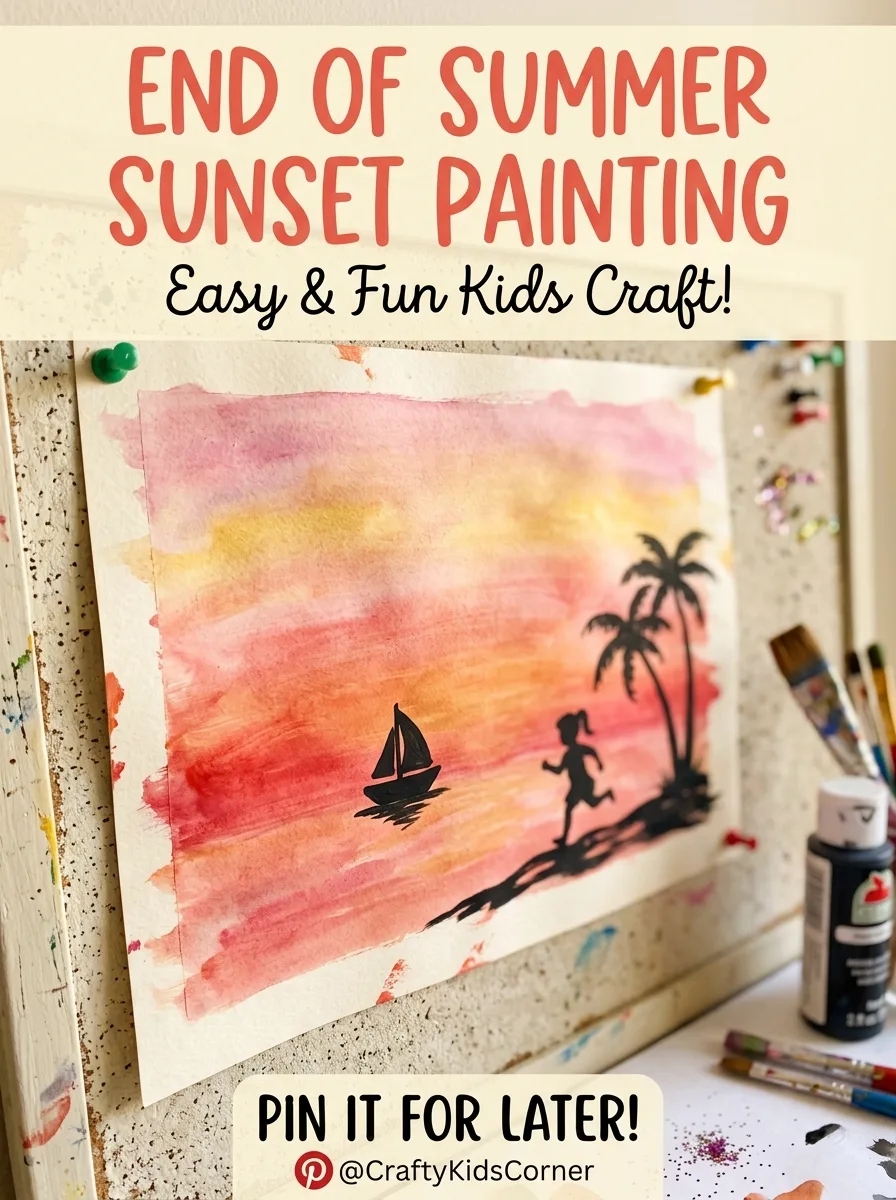
Brush clean water over a sheet of watercolor paper, then paint bands of red, orange, yellow and pink across it so the colors blend where they meet. Let it dry completely. Cut a horizon, trees, a beach or a skyline from black paper and glue it along the bottom, or paint the silhouettes in black once the sky is dry.
Good to know: watercolor paper or heavy cardstock holds up to wet paint without curling; printer paper wrinkles and can tear.
2. Summer Memory Scrapbook
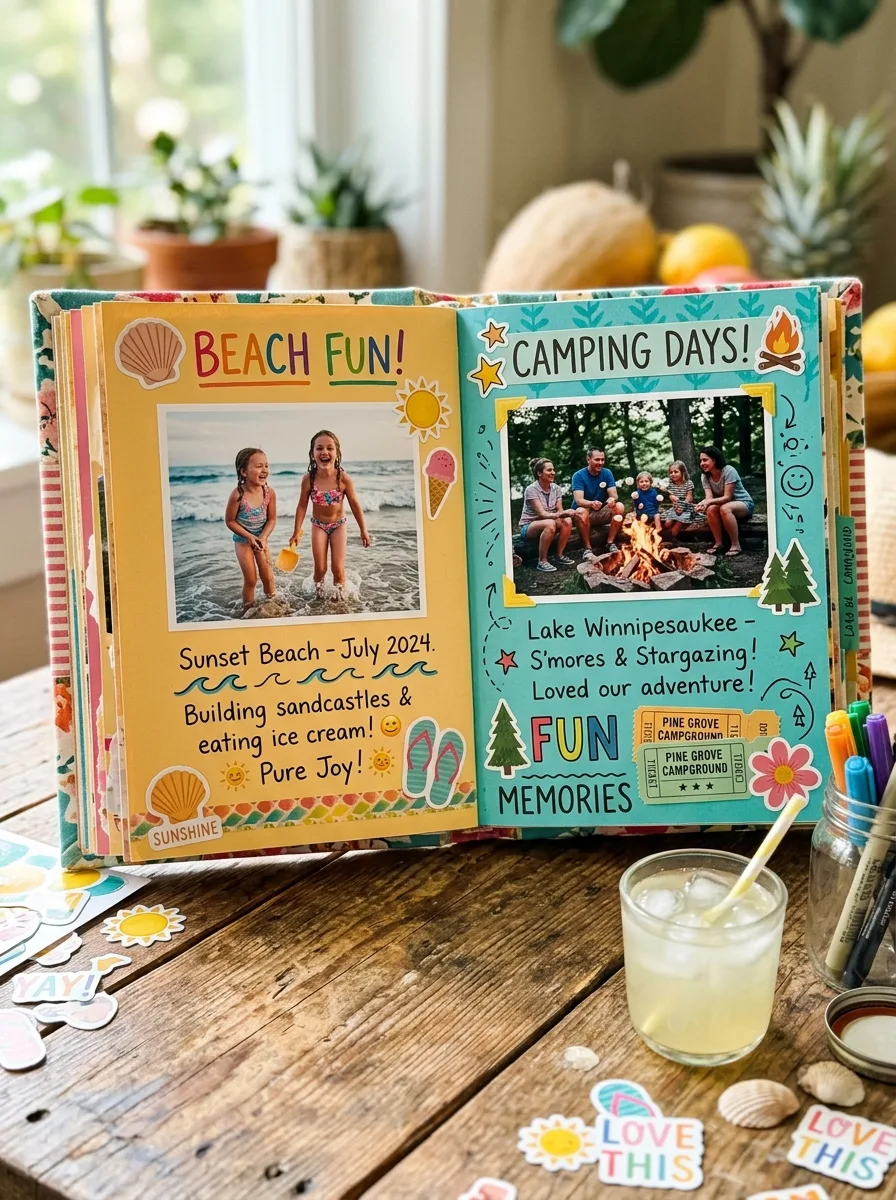
Gather printed photos, postcards, ticket stubs, maps and drawings from the summer. Give each page a theme, such as a trip, a visit or a favorite day, and let kids arrange everything before gluing it down with a glue stick or double-sided tape. Add captions with the date and place, and decorate with stickers and doodles.
Good to know: print copies of photos rather than using originals, which glue and tape can damage, and let kids write their own captions.
3. Paper Sunflower
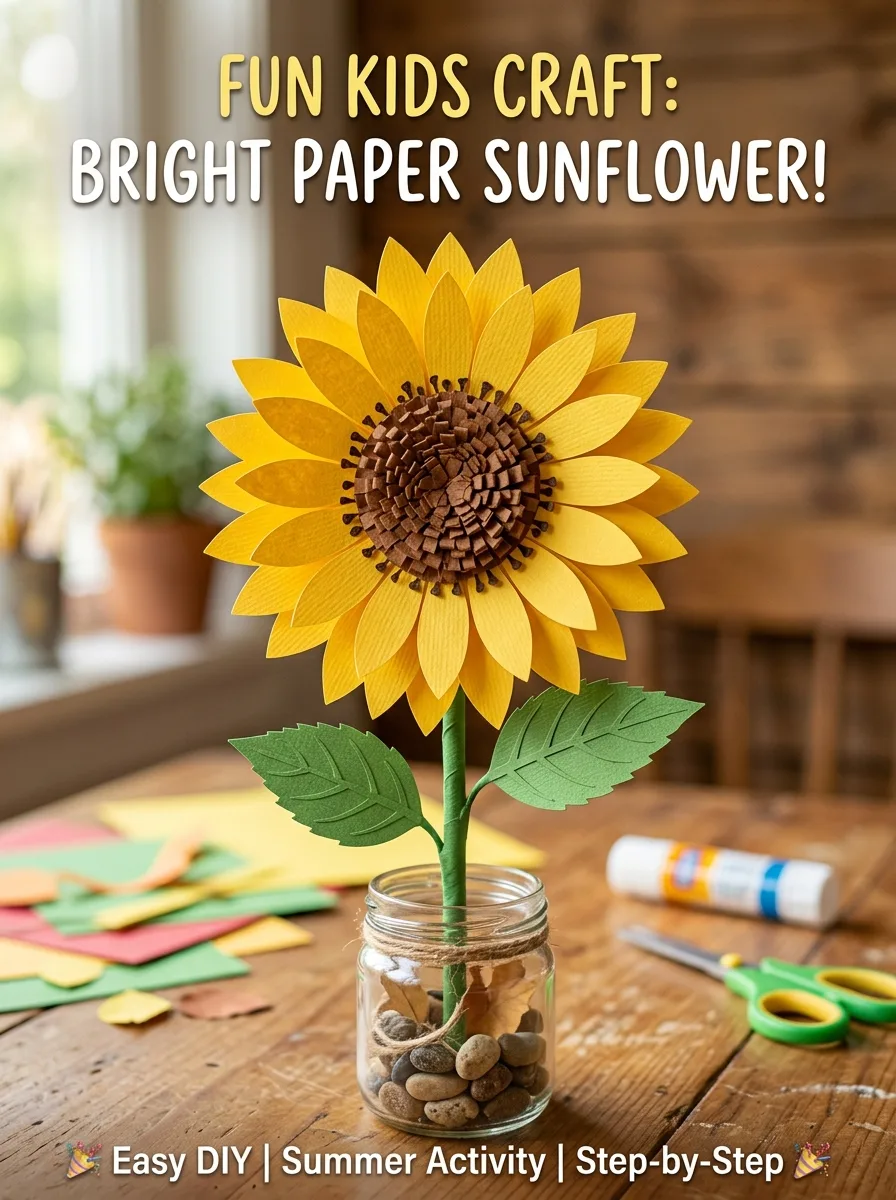
Cut a brown circle for the center and lots of yellow petals, or let older kids trace and cut their own from a template. Glue the petals around the back of the center in two overlapping layers, then add seeds with a brown marker, fingertip dots or crumpled tissue paper. Finish with a green paper stem and leaves.
Good to know: fold the yellow paper into a stack and cut several petals at once to save time; younger children can tear petals instead of cutting them.
4. Firefly Mason Jar
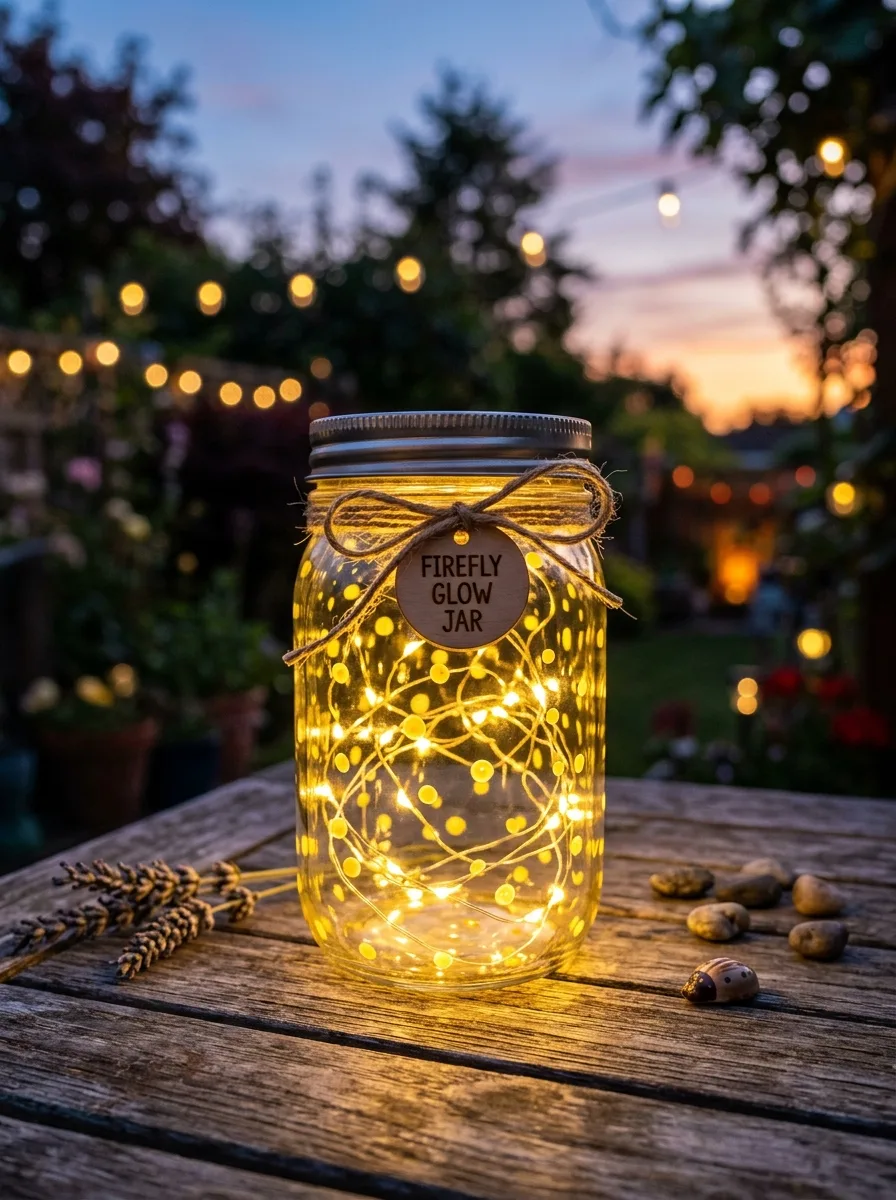
Use a clean plastic jar, or a glass jar for older kids. Paint small dots of glow-in-the-dark paint on the inside or outside, let them dry, and hold the jar under a bright light so the dots glow when the room is dark. For a steadier light, add a string of battery LED fairy lights, then tie ribbon or twine around the lid.
Good to know: if you use glow sticks, don’t let children bite, bend hard or cut them open, as the liquid can irritate eyes and skin. If it gets in an eye, rinse with water and call Poison Help at 1-800-222-1222. Never put a candle in the jar.
5. Goodbye Summer Banner
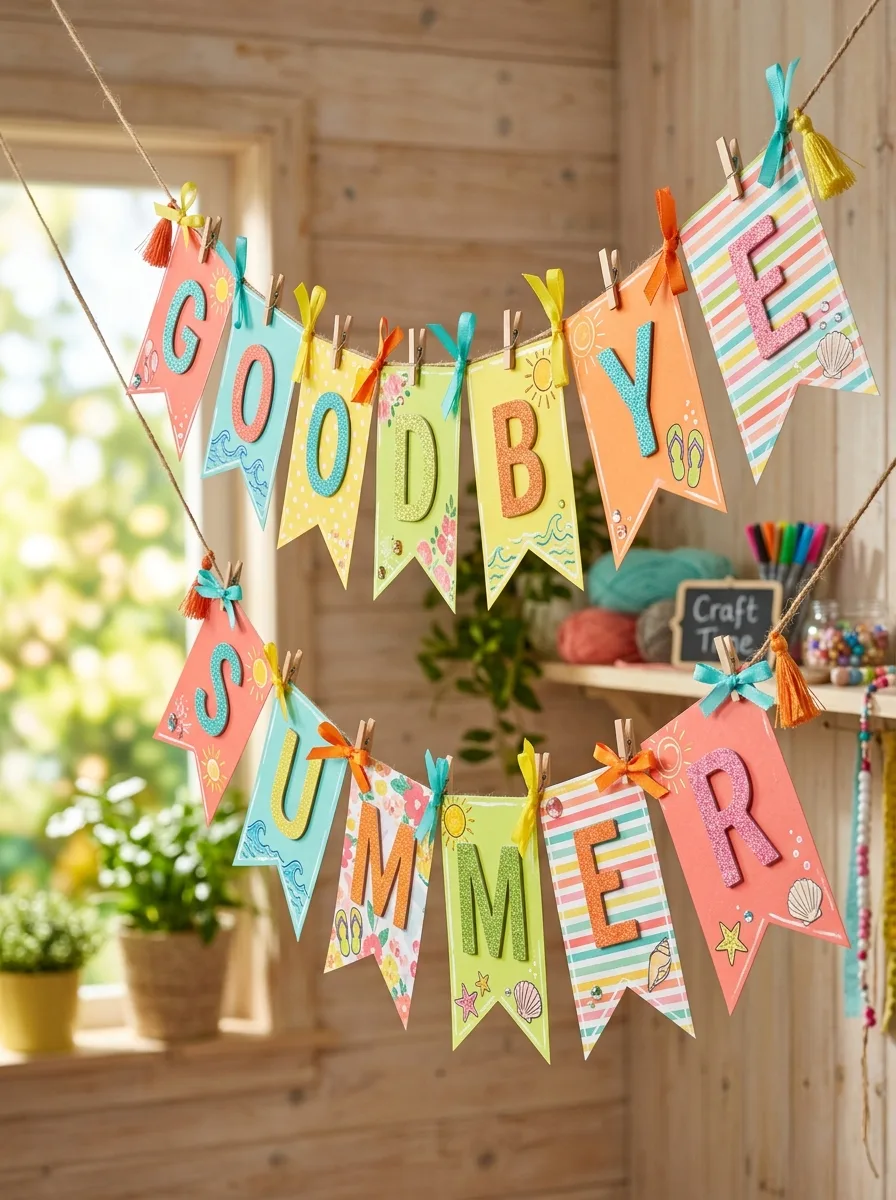
Cut triangle flags or rectangles from cardstock, one for each letter of “Goodbye Summer” or another short phrase. Kids write or trace a letter on each flag and decorate it with suns, waves and stickers. Punch two holes at the top of each flag and thread them in order onto yarn or ribbon to hang.
Good to know: lay the flags out in order and number the backs lightly in pencil before threading; it’s easy to string a letter out of place.
6. Pressed Flower Bookmark
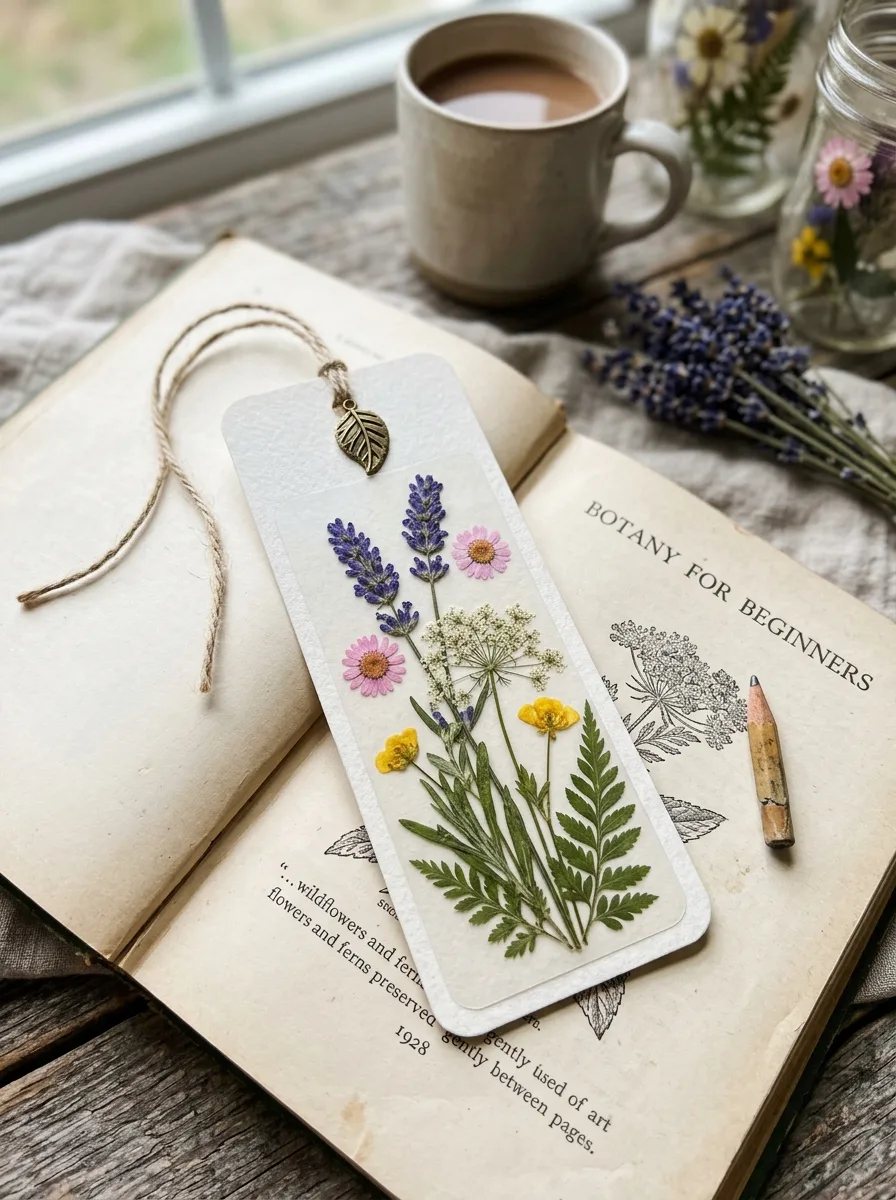
Press small, flat flowers and leaves between sheets of absorbent paper inside a heavy book. When they’re completely dry, arrange them on a strip of cardstock, cover it with clear contact paper or a self-adhesive laminating sheet, and trim the edges. Punch a hole at the top and add a ribbon tassel.
Good to know: start early: University of Maryland Extension suggests checking the flowers after a week and allowing two to three weeks for them to dry completely. Flat blooms such as violets and daisies, and ferns, press best.
7. Sunflower Paper Plate
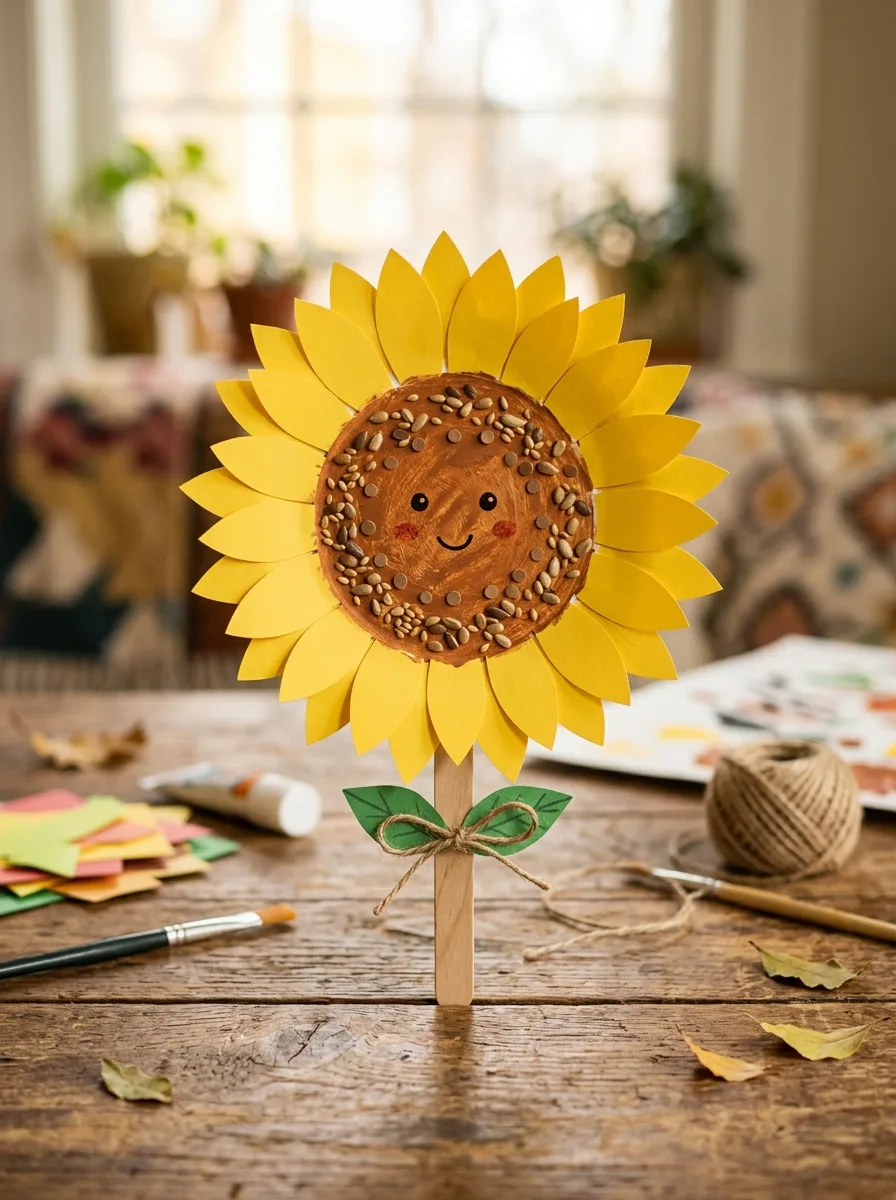
Paint the center of a paper plate brown and let it dry. Glue yellow paper petals around the rim, or paint the rim yellow and snip it into petals. Add texture to the center with brown fingertip dots, crumpled tissue paper or real sunflower seeds, and glue on a green stem.
Good to know: real seeds are small enough to choke on, and some children are allergic to seeds, so use paper or paint for children under 3 and check for allergies first.
8. Paper Campfire with S’mores
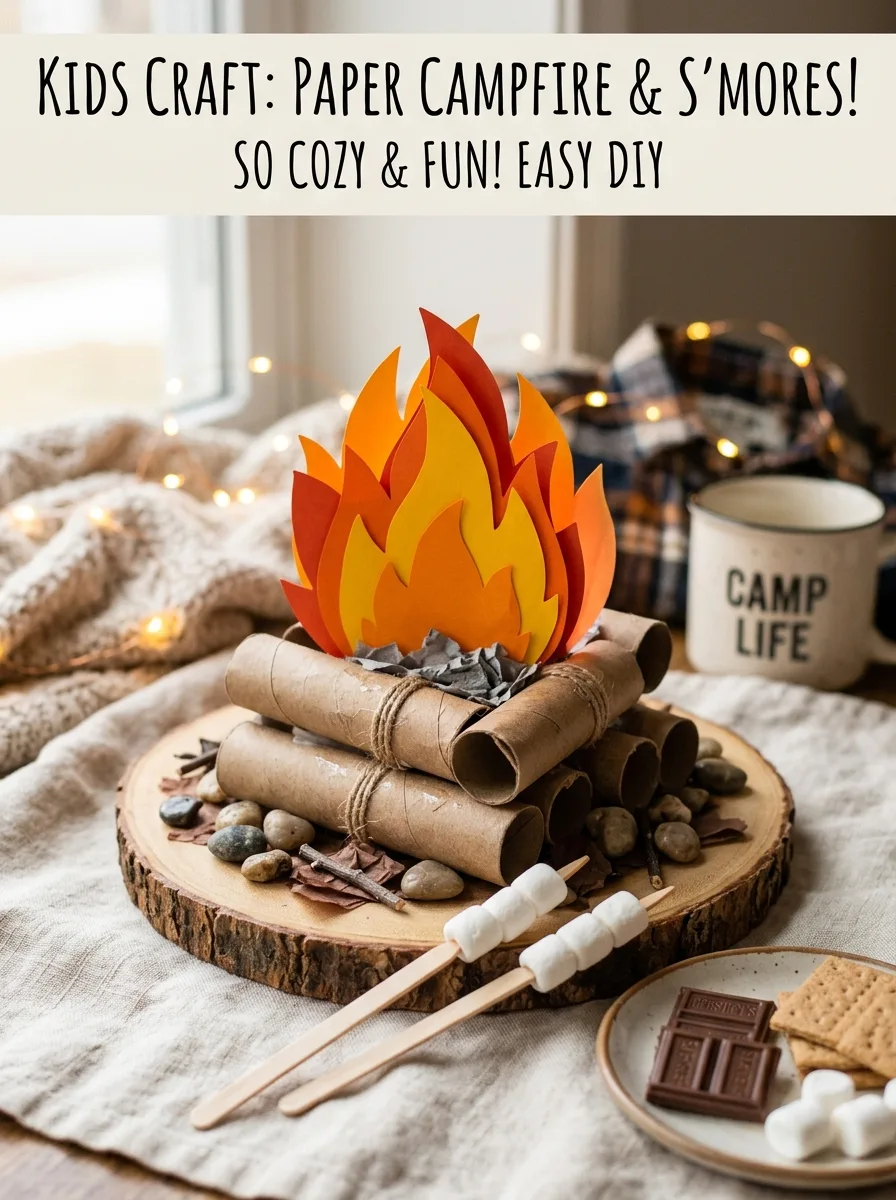
Roll sheets of brown paper or paper bags into logs, tape them closed and stack them in a small pile. Cut flames from red, orange and yellow tissue paper or cardstock and tuck them between the logs. Make paper marshmallows on sticks, or a s’more from brown and white paper squares, to finish the scene.
Good to know: this is an indoor pretend-play craft, so keep it well away from candles, stoves and fire pits; paper and tissue catch fire easily.
9. Paper Lantern
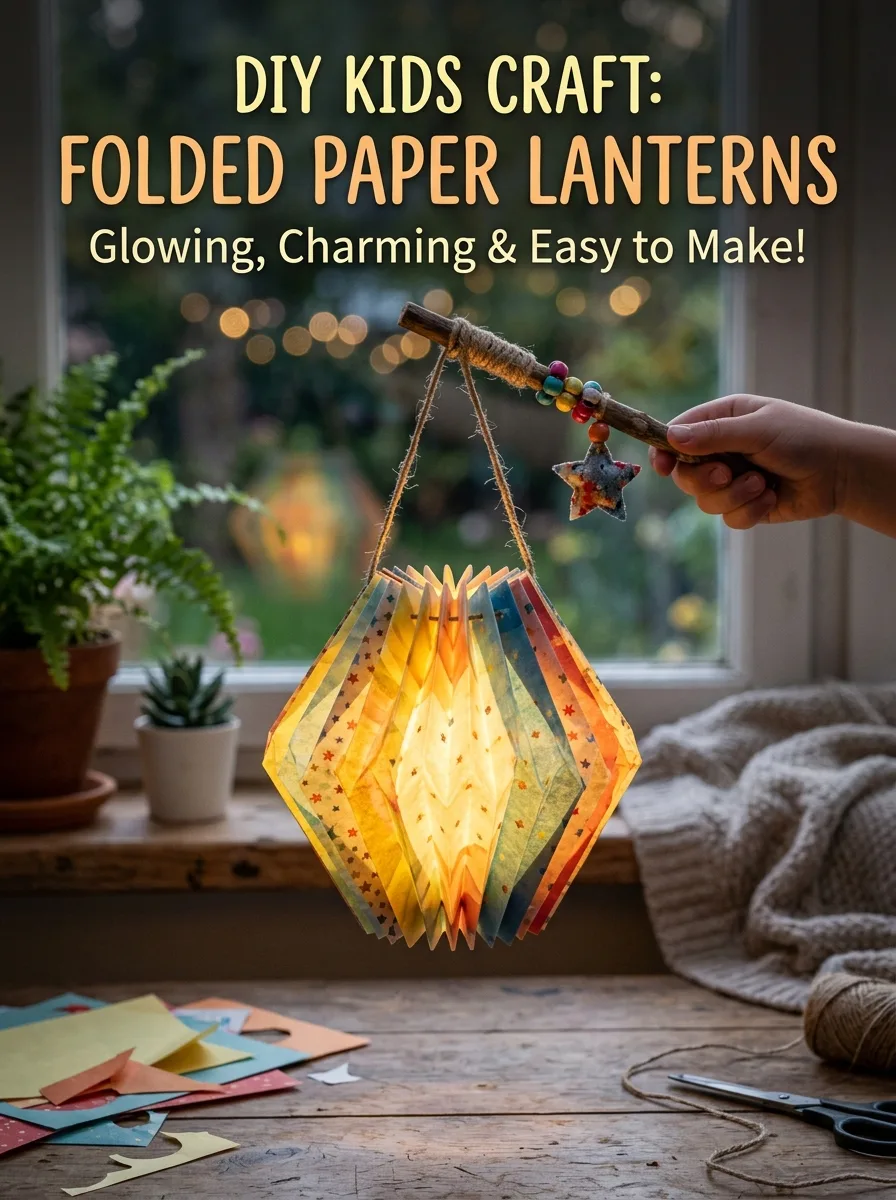
Fold a sheet of construction paper in half lengthwise and draw a line a little way in from the open edges. Cut slits from the fold up to the line, evenly spaced. Unfold the paper, roll it into a tube with the slits running up and down, tape or glue the edges, and add a paper strip across the top as a handle.
Good to know: light the lantern only with a battery LED tea light, never a candle. If the light uses a button or coin battery, check that the compartment is secured.
10. Apple Stamp Art
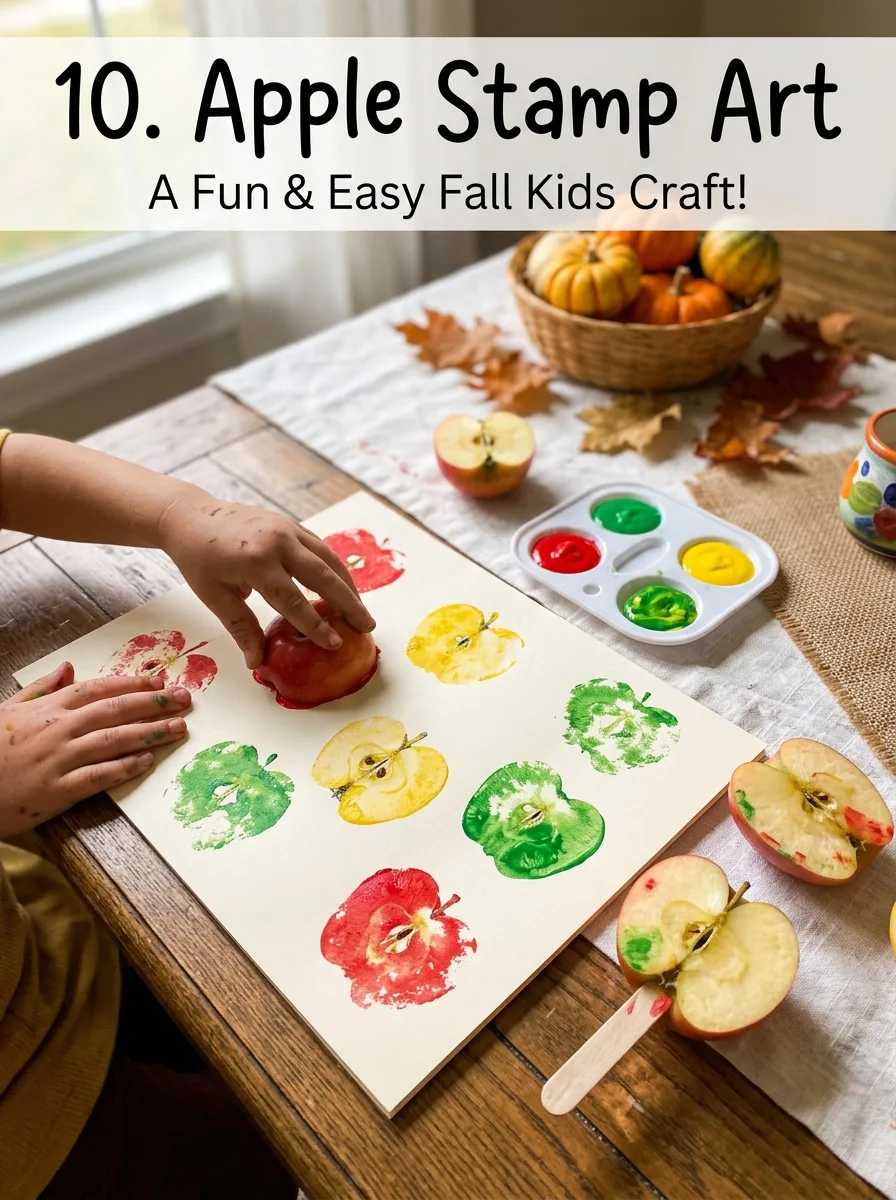
An adult cuts firm apples in half: cutting across the middle shows a star-shaped seed pattern, and cutting from stem to base gives the classic apple outline. Blot the cut sides dry with a paper towel, dip them in a thin layer of red, green or yellow washable paint, and press onto paper. Add stems and leaves with a brush or marker.
Good to know: a dry cut surface and a thin layer of paint give the clearest print; a wet, juicy apple slides and smears.
11. Seashell Magnets
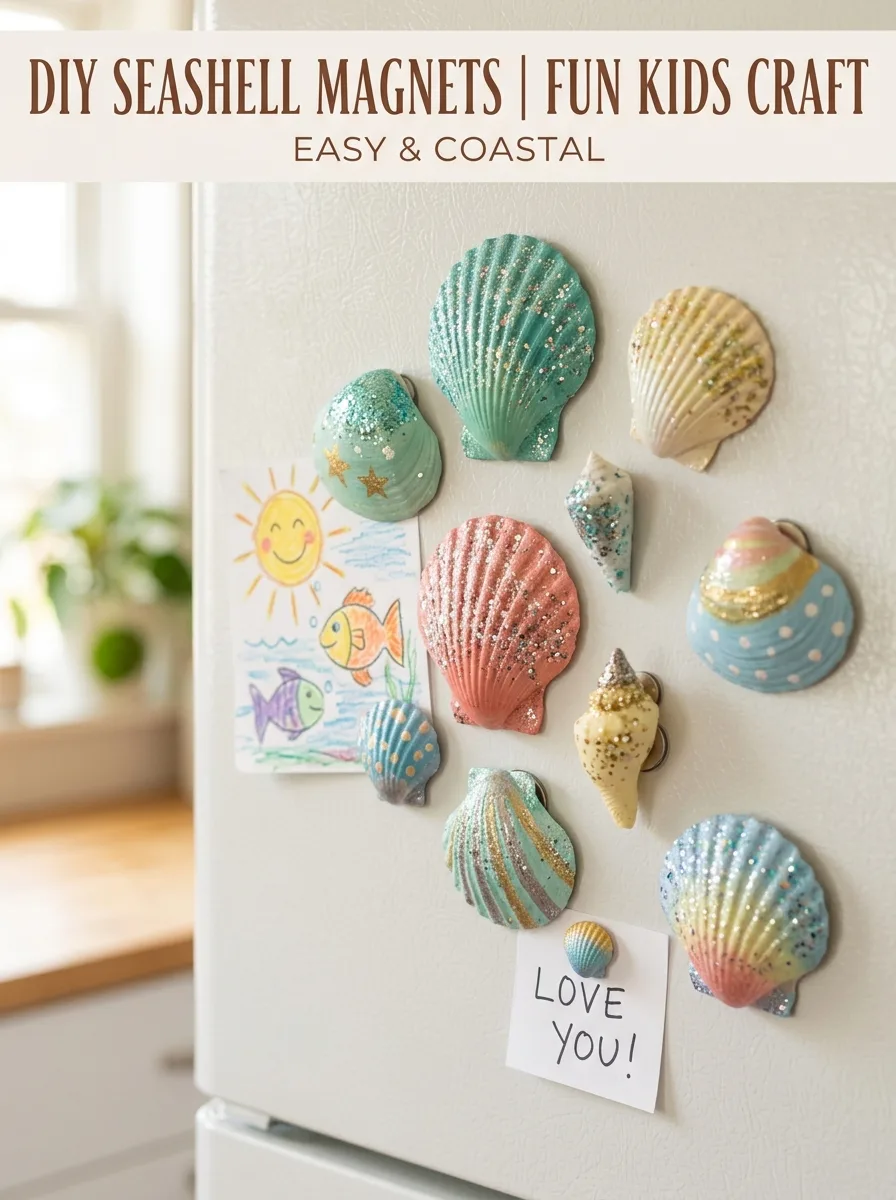
Rinse shells collected over the summer and let them dry completely. Kids paint them or decorate them with paint pens. An adult then glues a small magnet to the back with a strong craft glue and lets it cure as the label directs. Flatter shells sit better against the fridge.
Good to know: keep loose magnets away from young children and count them before and after the craft. Take only empty shells: National Park Service beaches ask visitors to put back any shell with a living animal inside, and collecting limits vary by park.
12. Summer Photo Collage
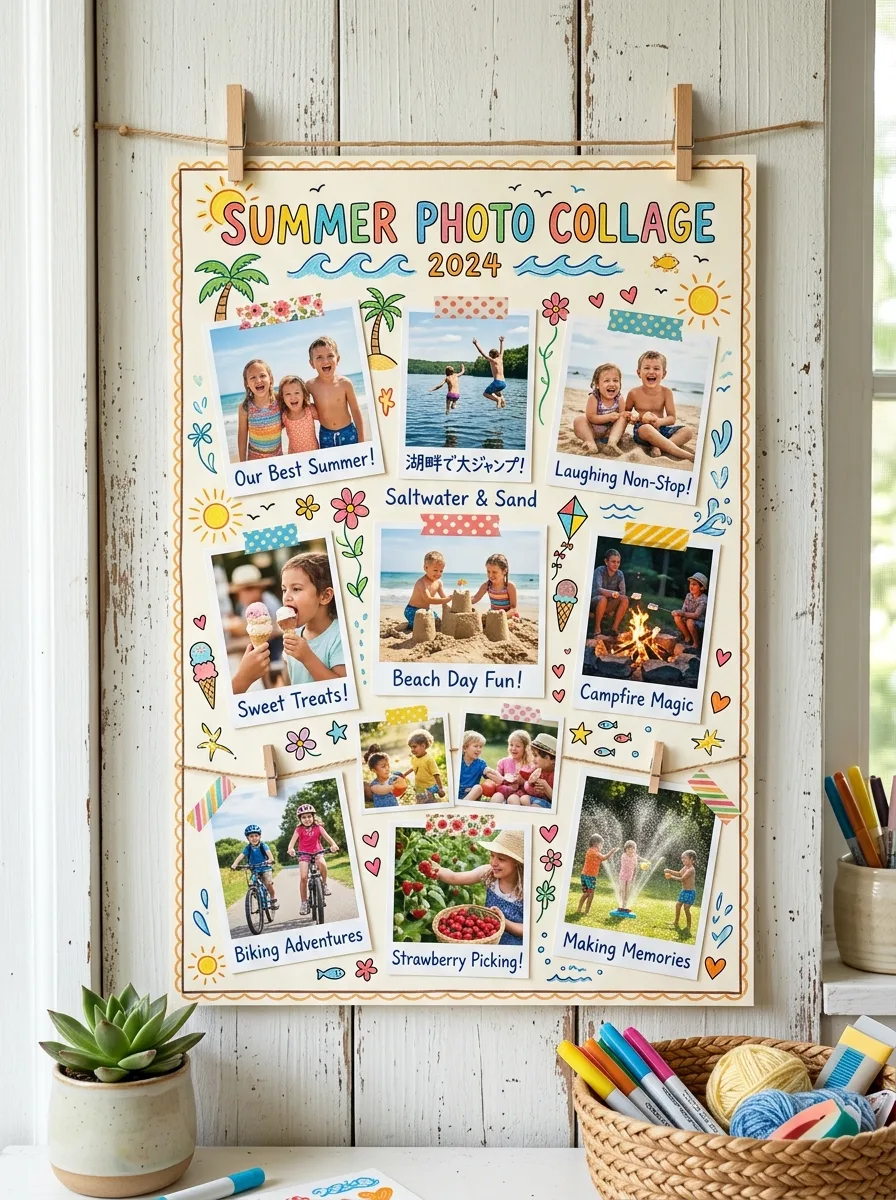
Print a mix of summer photos, then let kids arrange them on poster board or cardstock before gluing; overlapping them looks fuller than a neat grid. Fill the gaps with ticket stubs, drawings, stickers and short captions, and write the year across the top.
Good to know: for a collage kids can keep adding to, pin photos to a cork board or clip them to a string with clothespins instead of gluing them.
13. Friendship Bracelets
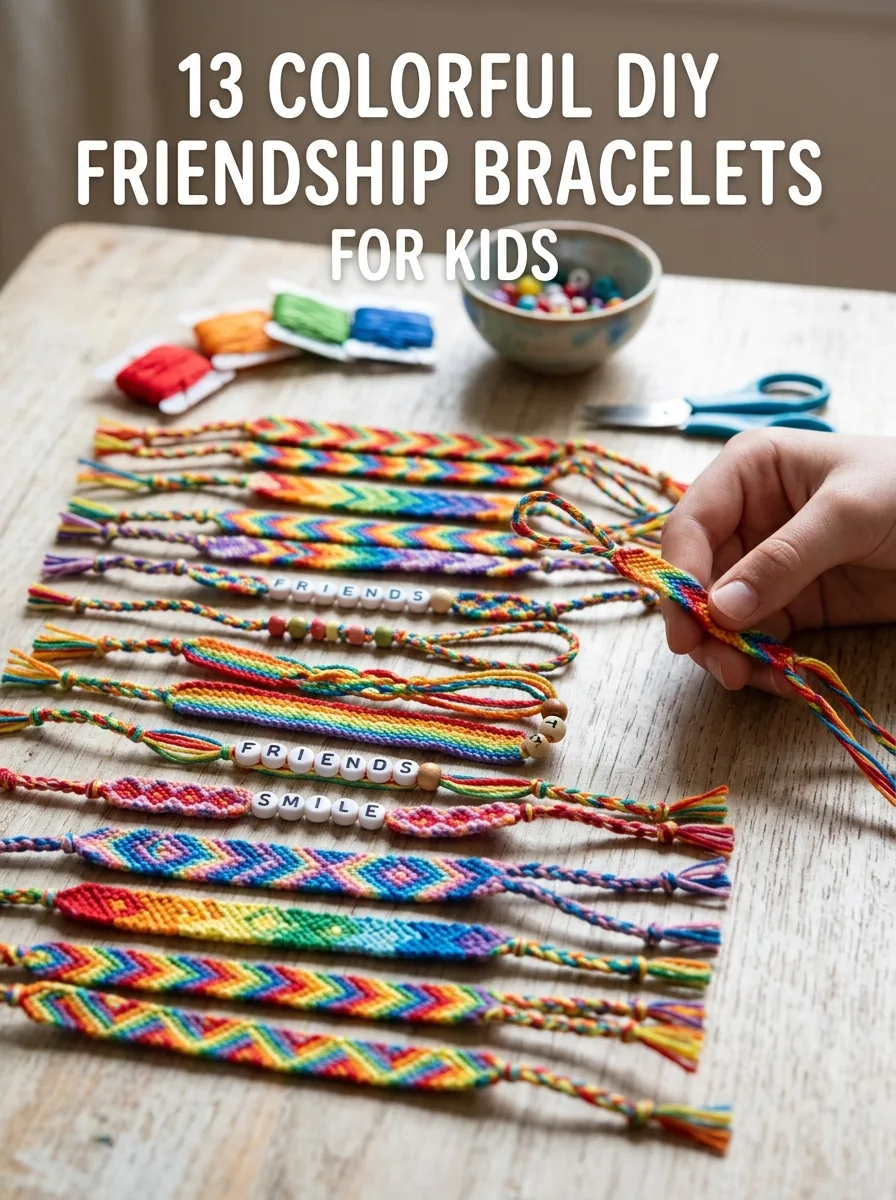
Older kids can knot embroidery floss into simple braids or a candy-stripe pattern, taping the top to a table or clipboard to keep it steady. Younger children can thread large beads onto pipe cleaners or thick cord. Make matching pairs to give to friends from camp, the neighborhood or school.
Good to know: beads are a choking hazard for children under 3, so keep bead trays out of reach of babies and toddlers. Large beads on pipe cleaners are easiest for preschoolers to thread.
14. Late Summer Wreath
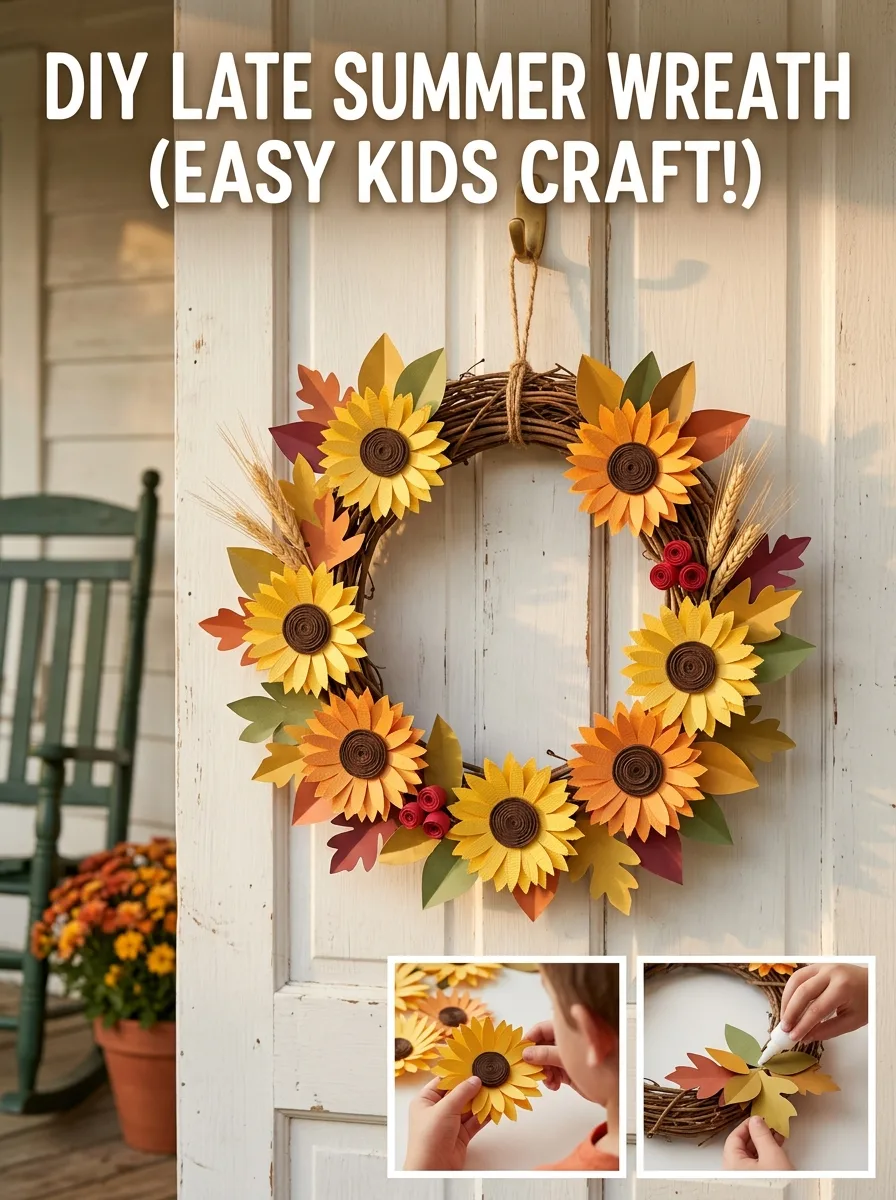
Cut the center out of a paper plate or a cardboard circle to make a ring. Kids glue on paper sunflowers, leaves cut from green, yellow and orange paper, or pressed leaves from a walk, overlapping them so the ring is covered. Add a ribbon loop at the top for hanging.
Good to know: white glue holds paper well but needs drying time, so let the wreath dry flat before hanging it, or pieces can slide off.
15. Back to School Countdown Chain
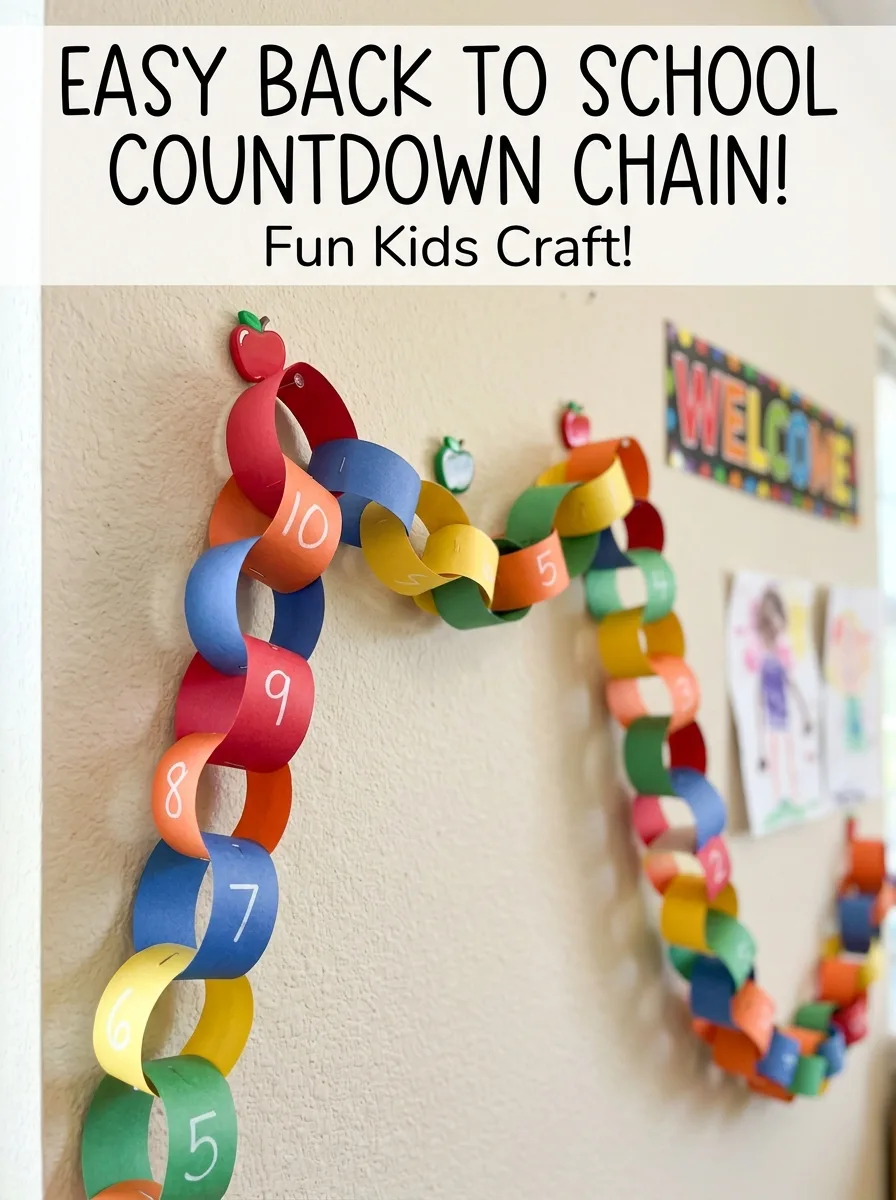
Count the days until school starts and cut one paper strip for each. Kids can write a countdown number or a small activity on each strip, then loop the first strip into a ring, tape or glue it, thread the next strip through and keep going. Hang the chain up and remove one link each morning.
Good to know: tape holds right away and is easier for small hands than glue, which needs to be held in place until it grips.
16. Summer Leaf Rubbing Art
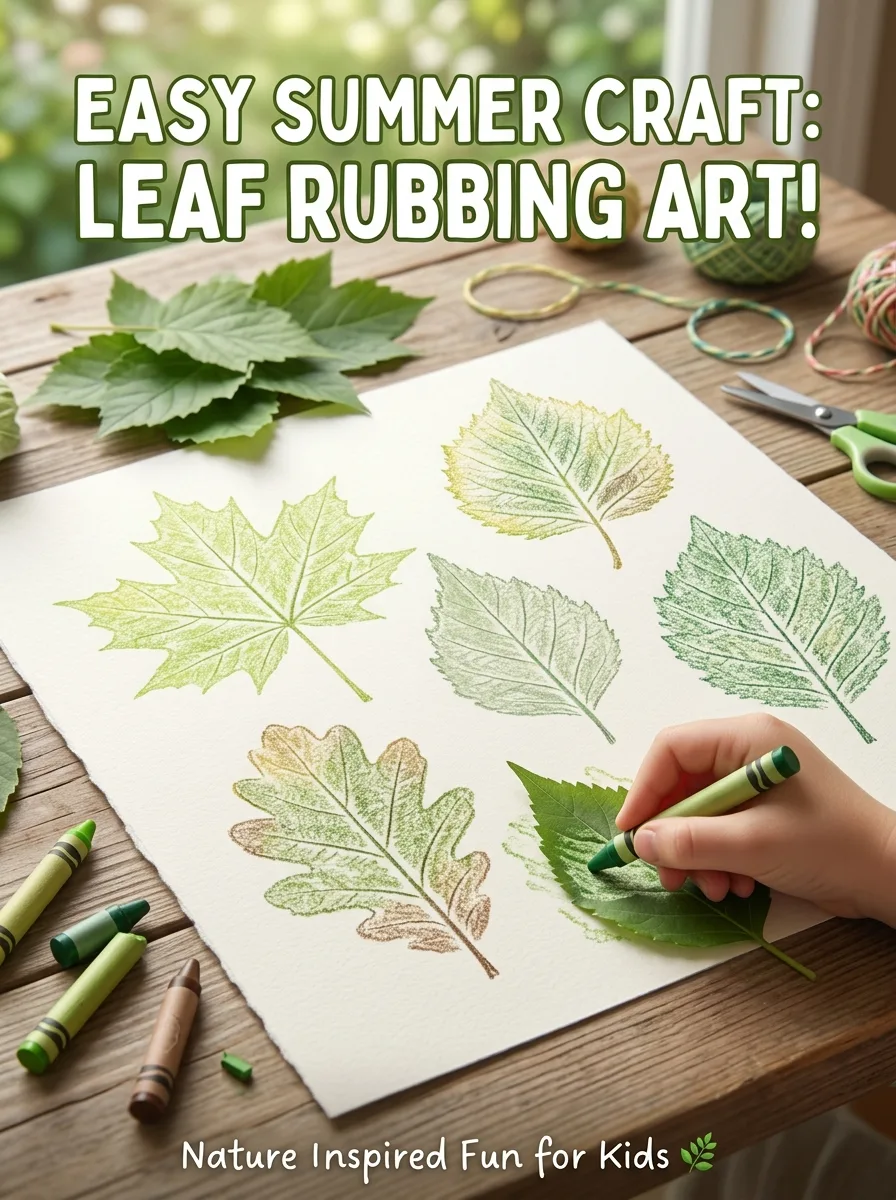
Collect leaves of different shapes and place them vein side up under a sheet of thin paper. Peel the paper wrapper off a crayon and rub its side gently over the leaf until the outline and veins appear. Use a different color for each leaf, and label the tree if you know it.
Good to know: check what kids collect: extension services note that poison ivy has leaflets in groups of three, so leave any three-leaflet plant alone. Fresh, flexible leaves give clearer rubbings than dry, crumbly ones.
17. Gratitude Stone
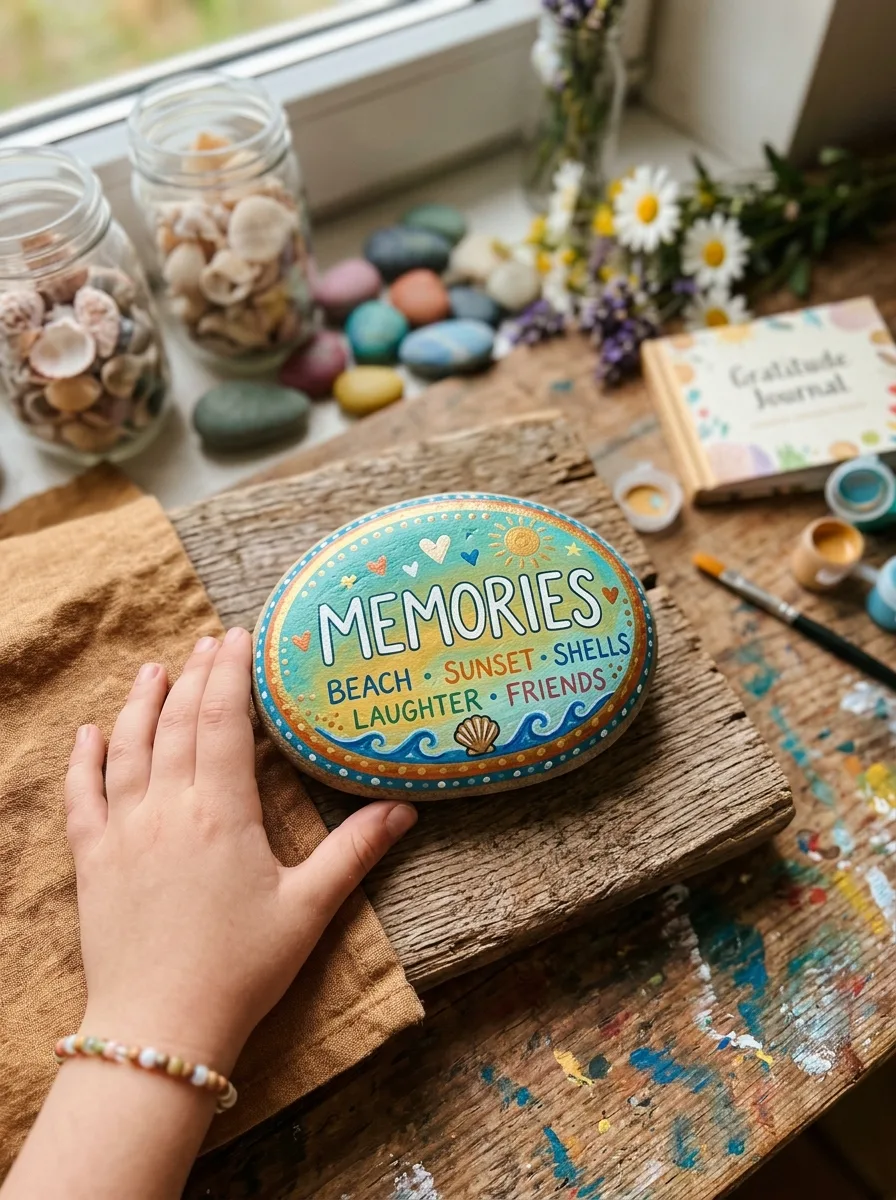
Wash and dry a smooth, flat stone. Kids paint it in summer colors, then add a word, drawing or symbol for something they loved about the season, using paint pens or a fine brush once the base coat is dry. Seal it with a clear brush-on sealer, or an adult can use a spray sealer outdoors.
Good to know: spray sealers give off fumes, so spray outdoors away from children and follow the label. Use stones from your own yard or a craft store, since parks and beaches may not allow collecting.
18. End of Summer Time Capsule
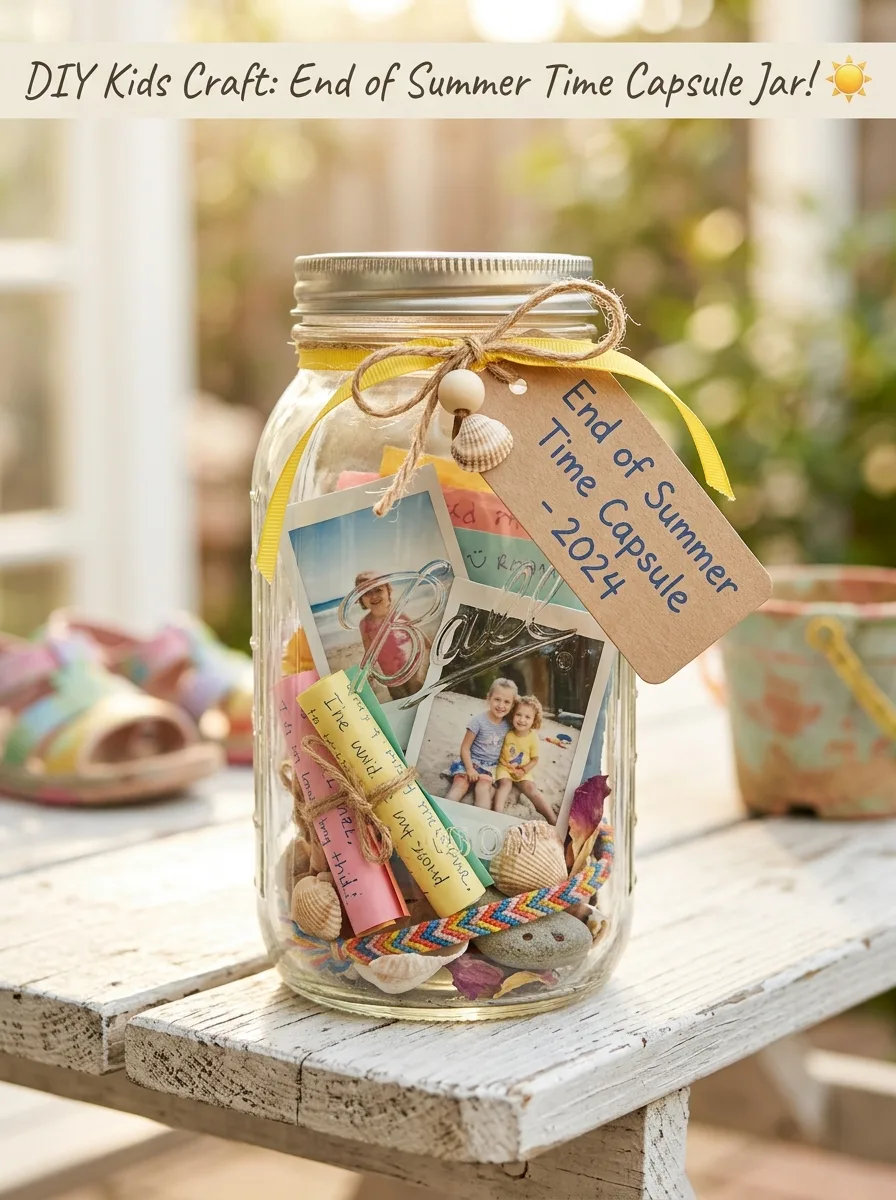
Decorate a shoebox, tin or jar with summer colors and a label showing the year and the date to open it. Kids fill it with photos, a drawing, a letter to their future self, their height marked on a ribbon and small souvenirs. Seal it and store it somewhere dry.
Good to know: leave out food, batteries and anything that could leak or spoil, and tape a list of the contents to the lid.
19. Sand Art in a Jar
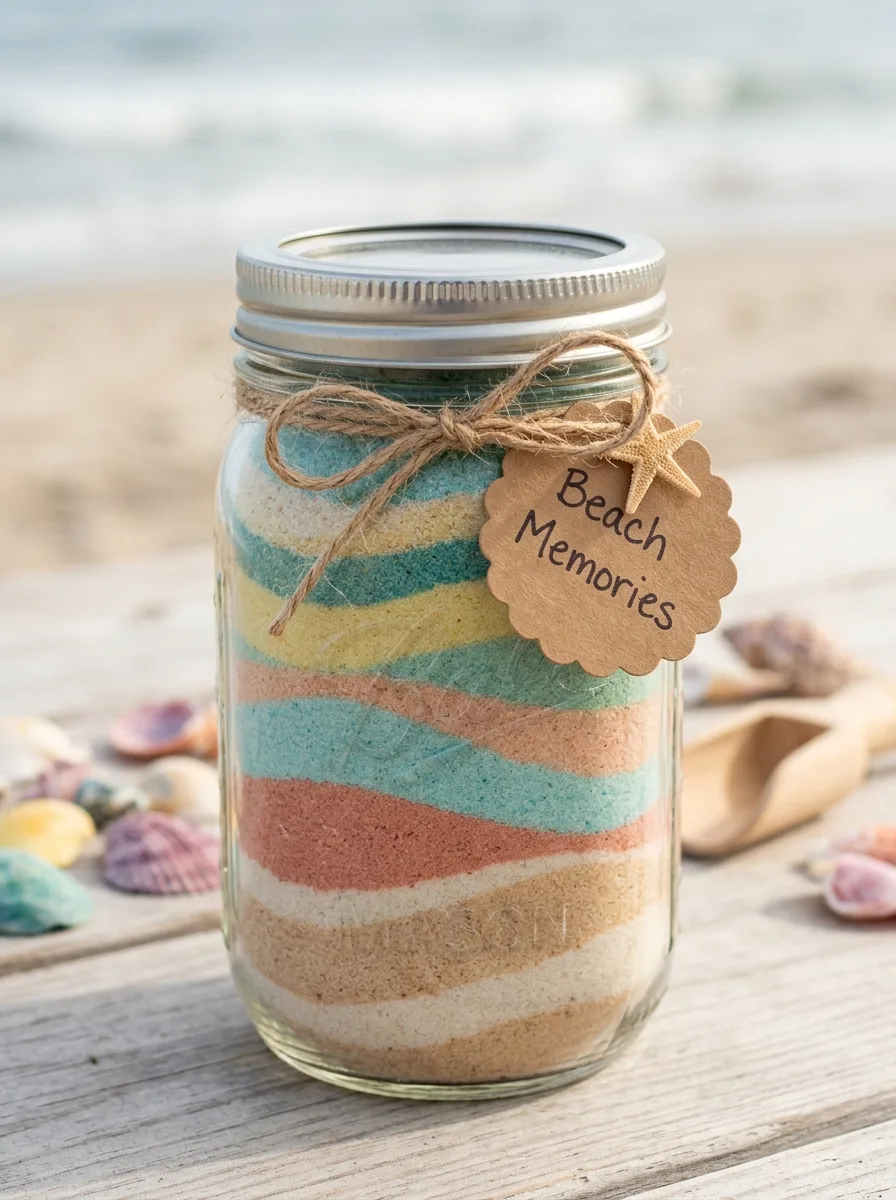
Use a small, clean jar or bottle, plastic for younger children, and colored craft sand. Pour one color at a time through a funnel or from a spoon to build layers, tilting the jar now and then to make waves. Fill it right to the top so the layers can’t shift, then close the lid tightly.
Good to know: pour over a tray to catch spills, and supervise younger children so sand stays out of mouths and eyes. A little glue around the lid keeps curious hands from opening it.
20. Summer Constellation Canvas
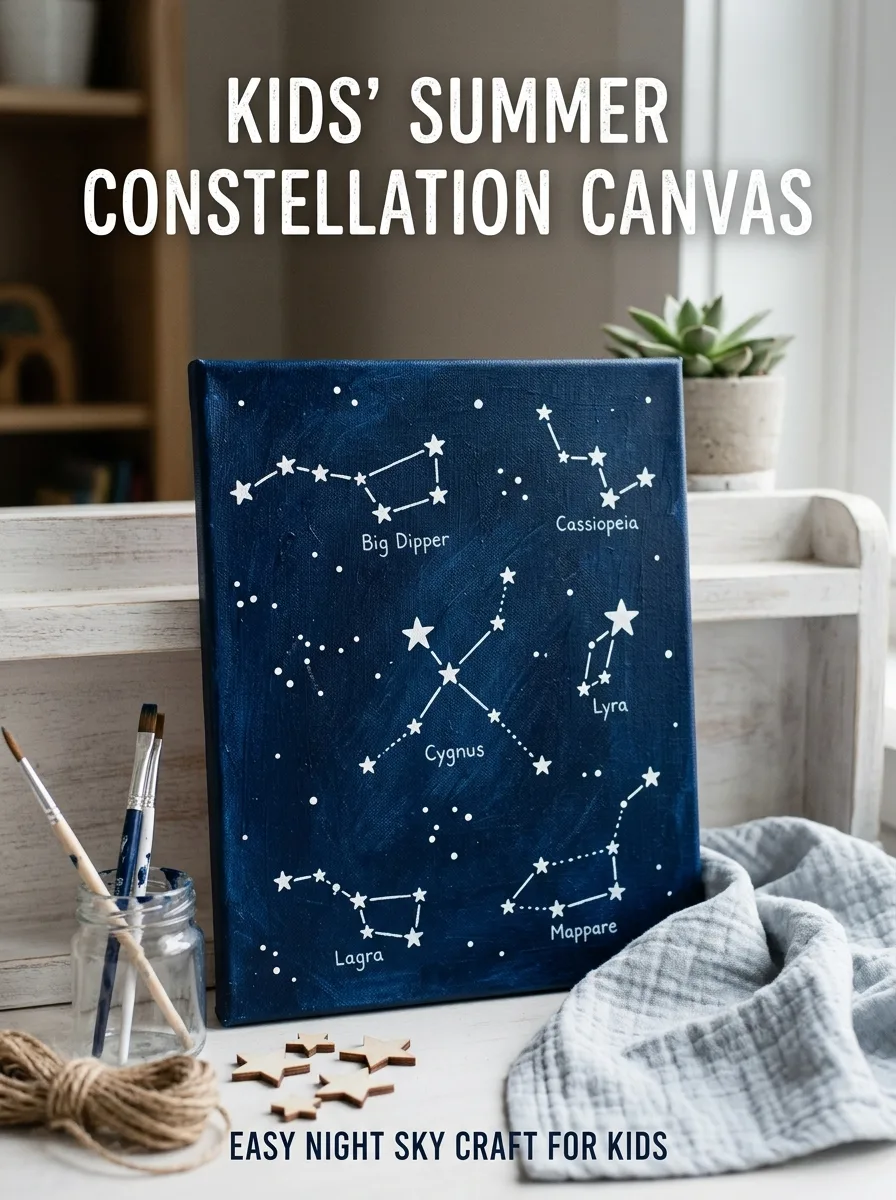
Paint a canvas or heavy paper dark blue or black and let it dry. Kids dot white or yellow paint for stars, then connect them with thin lines to make constellations, such as the Summer Triangle formed by the stars Vega, Deneb and Altair. Add white splatter for distant stars; these star pattern painting ideas have more ways to paint stars.
Good to know: the end of a pencil or a cotton swab makes neat, round star dots. Splattering paint is messy, so do it outside or inside a cardboard box.
21. Popsicle Stick Summer Countdown
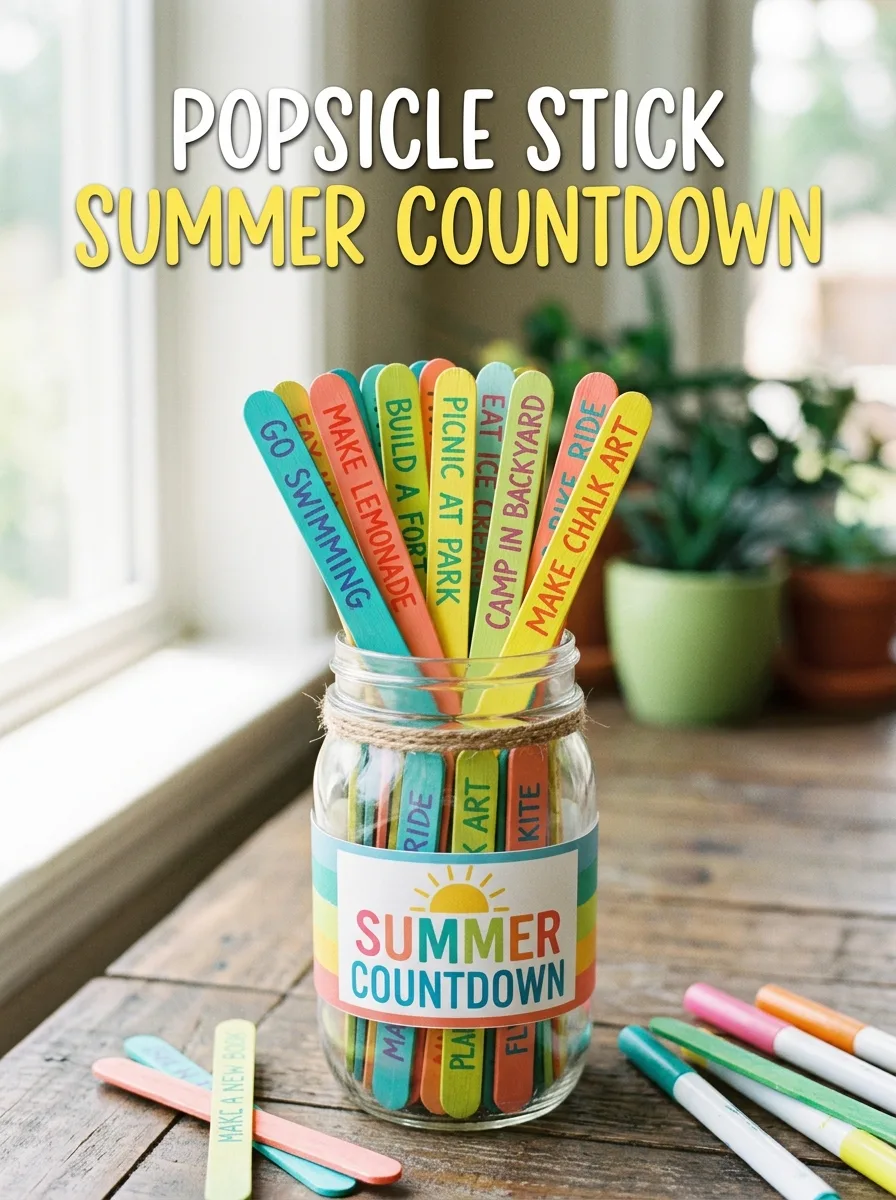
Kids and adults write a simple summer activity on each craft stick, such as a picnic, a bike ride or a library visit, and color the tips. Put the sticks in a decorated jar with the writing end down. Each day, a child pulls one stick and the family does that activity.
Good to know: include free, quick and indoor activities so a rainy or busy day doesn’t break the countdown.
22. Last Day of Summer Crown
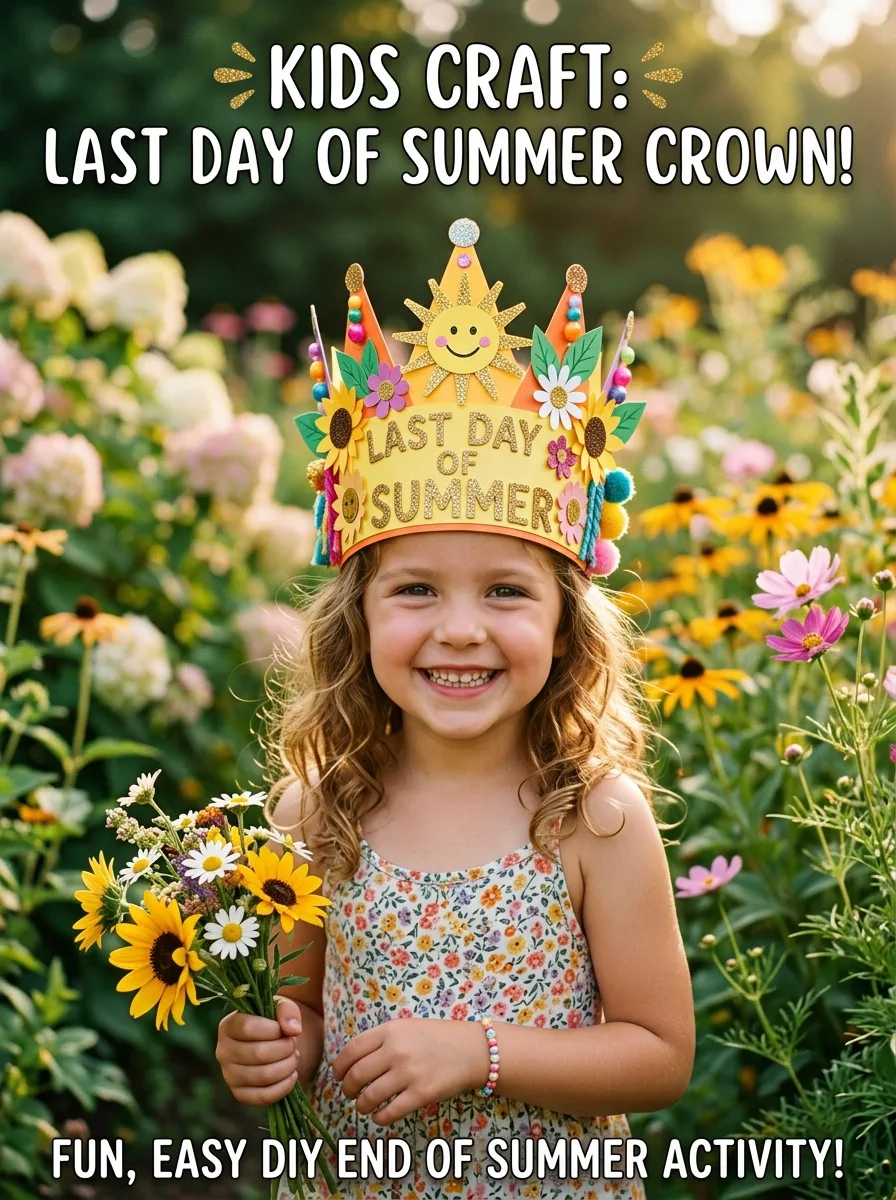
Cut a strip of cardstock long enough to wrap around the child’s head with some overlap, and cut points or waves along the top edge. Kids decorate it with stickers, paper flowers, painted suns and glitter glue. Measure it on the child, then tape or staple the ends together.
Good to know: if you staple, cover the staple on the inside with tape so it can’t scratch, and choose glitter glue over loose glitter for less mess.
23. Golden Hour Silhouette Art
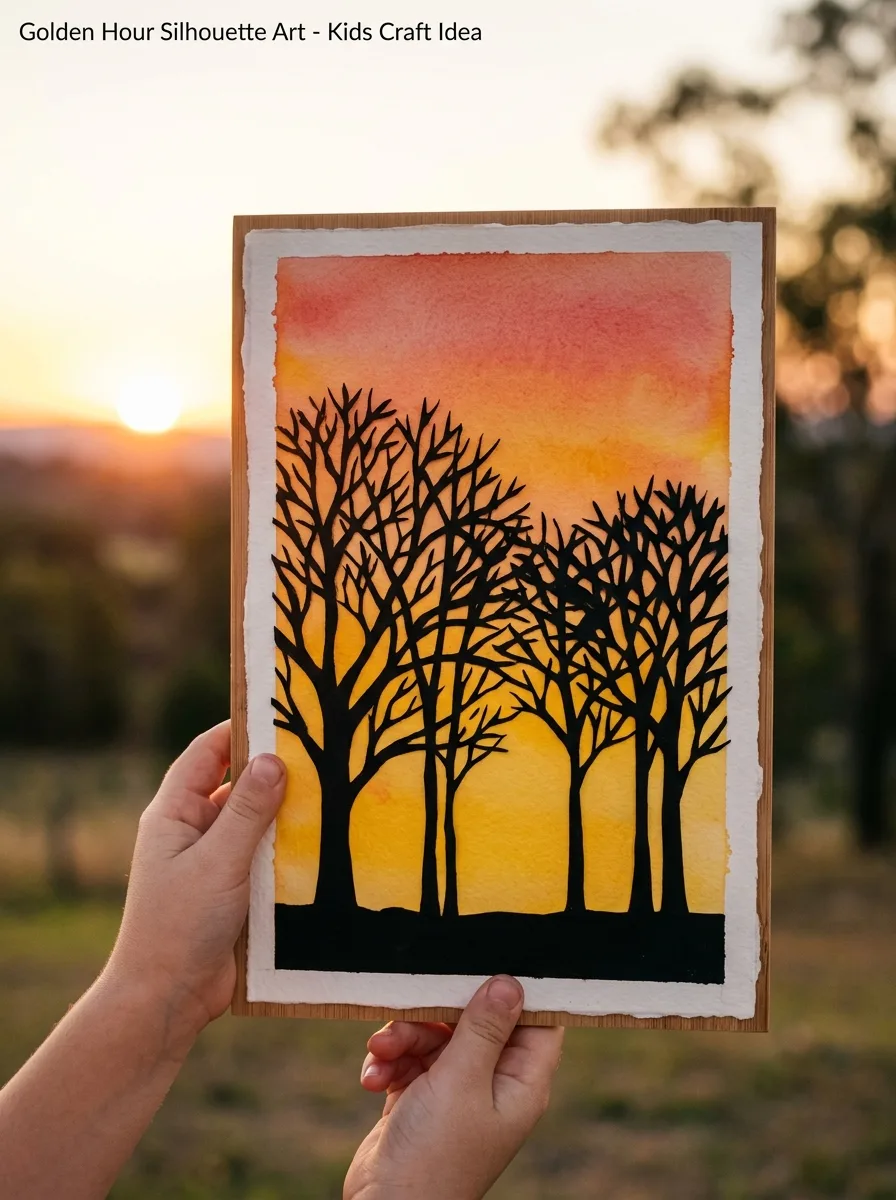
Paint bands of gold, orange and pink across the paper, or blend them with a damp brush, and let it dry. Cut trees, birds, people or a beach umbrella from black paper and glue them along the bottom, with a half circle of sun peeking above the horizon. For a night version, swap the sun for a moon; these moon painting ideas show several.
Good to know: simple, bold shapes read best in silhouette and are easier for kids to cut than detailed ones; a palm tree or a row of birds works well.
Common mistakes to avoid
- Putting a candle in a paper lantern or jar instead of a battery LED light.
- Leaving loose magnets, button batteries, beads or seeds where babies and toddlers can reach them.
- Letting children chew, cut or break open glow sticks.
- Giving glass jars to young children.
- Taking shells with living animals inside, or collecting where it isn’t allowed.
- Gluing original photos that can’t be replaced.
End of summer craft FAQs
What end of summer crafts work for toddlers?
Apple stamping, paper plate sunflowers, leaf rubbings with a chunky crayon and the countdown chain, all with an adult helping. Skip seeds, beads and small shells for children under 3.
How do you make a firefly jar glow safely?
Use glow-in-the-dark paint or battery LED fairy lights with a secured battery compartment, never candles. Supervise glow sticks so children don’t chew or break them open.
How long does it take to press flowers for crafts?
University of Maryland Extension suggests allowing two to three weeks between absorbent paper in a heavy book, checking the flowers after the first week.
Which crafts help kids remember the summer?
The scrapbook, photo collage, time capsule and gratitude stone all use a child’s own photos, souvenirs and words, so they become keepsakes rather than just decorations.


