

20 Fun and Creative Summer Leg Painting Ideas You’ll Love
Leg painting turns your legs into a canvas for a festival, a party, a beach day or a photo shoot. Because the paint goes on skin, the product matters more than the design: use only cosmetic face and body paint made for skin, never craft acrylics, markers or poster paint.
Below are 20 summer leg painting designs, each with how to paint it and one practical tip. Read the skin-safety basics first, including the patch test and why to skip “black henna”.
Skin safety first
Use only paint made for skin
Use cosmetic face and body paint, the kind sold for face painting. The FDA’s advice on face paints and novelty makeup is clear: don’t decorate your skin with things that aren’t intended for it. By law, color additives in cosmetics, face paint included, must be approved by the FDA for that use, and you can check the colors on a label against the FDA’s list of color additives permitted in cosmetics.
Patch-test first
The FDA suggests trying a dab of a new product on your arm for a couple of days to check for an allergic reaction before you use it on a larger area, especially if you have allergies. Don’t paint over cuts, broken skin, rashes or irritated skin, and keep paint and glitter away from your eyes.
Skip henna and “black henna”
The FDA says henna is approved only for use as a hair dye, not for skin. Products sold as “black henna” are often darkened with PPD, a hair-dye ingredient that the FDA says can cause dangerous skin reactions and that isn’t permitted in cosmetics applied to skin. For a henna-style look, paint the pattern with brown or black cosmetic body paint.
Remove it the way the label says
Follow the maker’s removal directions. Water-activated face paints usually come off with warm water and soap; scrub gently and stop if your skin gets sore. Don’t sleep in it: the FDA says not to go to bed with makeup on, and Snazaroo advises always removing its paint before bed.
The 20 designs at a glance
| Design | Main colors | Best tool | Skill level |
|---|---|---|---|
| Mermaid scales | Blue, green, purple | Fishnet and sponge | Beginner |
| Hibiscus flowers | Pink, red, orange | Round brush | Intermediate |
| Ocean waves | Blue, teal, white | Round brush | Intermediate |
| Galaxy | Navy, purple, pink | Sponge, fine brush | Beginner |
| Henna-style patterns | Brown, deep red, black or white | Liner brush | Advanced |
| Butterflies | Any bright colors | Round brush | Beginner |
| Vines and leaves | Greens | Round brush | Beginner |
| Watermelon | Red, green, black | Round brush | Beginner |
| Sunflowers | Yellow, brown, green | Round brush | Beginner |
| Rainbow stripes | Rainbow colors | Flat brush or sponge | Beginner |
| Seashells and starfish | Pink, cream, coral | Round brush | Beginner |
| Boho geometric | White or metallic gold | Liner brush, dotting | Intermediate |
| Sunset ombre | Yellow to purple | Sponge | Beginner |
| Daisy chain | White, yellow, green | Small round brush | Beginner |
| Peacock feathers | Blue, teal, gold | Liner brush | Advanced |
| Pineapples | Yellow, orange, green | Round brush | Beginner |
| Cherry blossoms | Pale pink, brown | Round brush | Intermediate |
| Leopard print | Tan, orange, black | Round brush | Intermediate |
| Fireworks | Gold, pink, white | Liner brush | Beginner |
| Citrus slices | Orange, yellow, lime, white | Sponge dauber, fine brush | Beginner |
1. Mermaid Scales
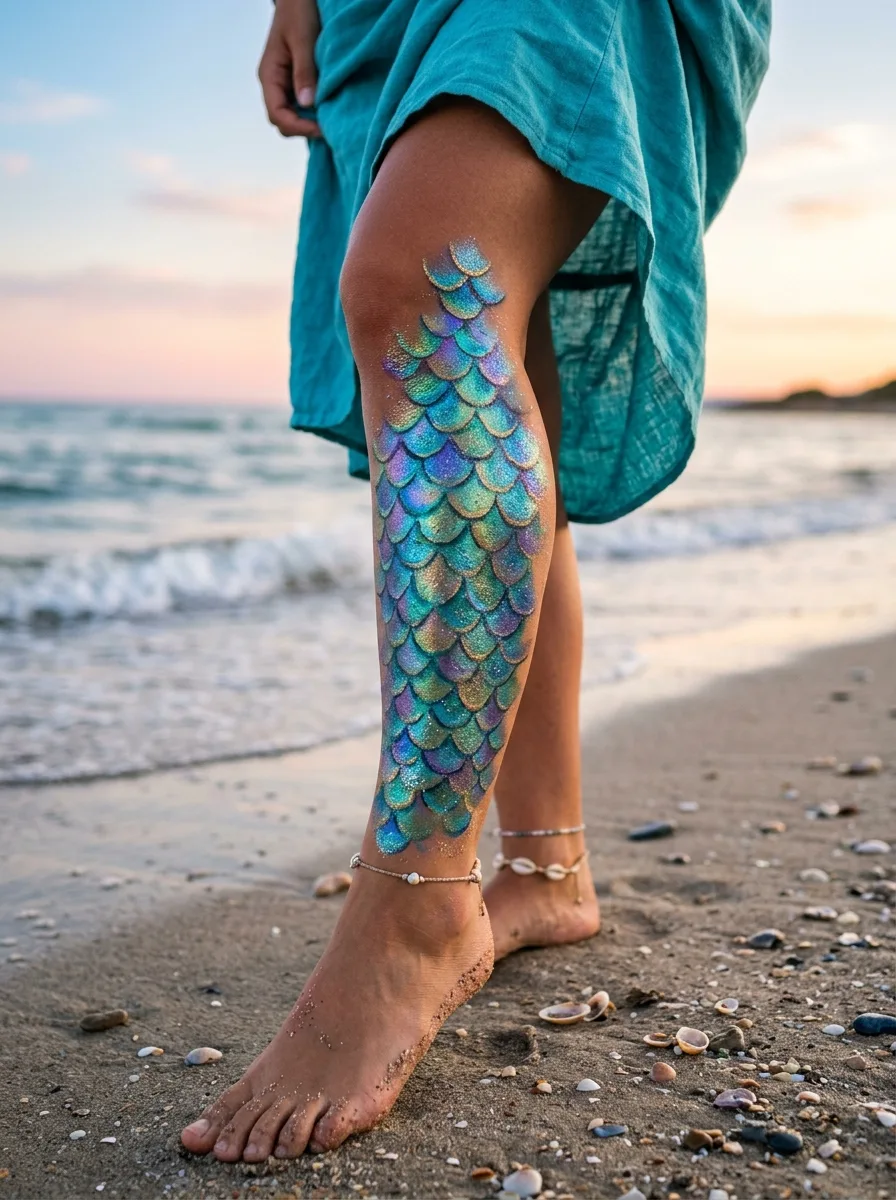
Fishnet tights make an easy stencil for mermaid scales. Pull a fishnet stocking, or a cut piece of fishnet, over the leg and hold it taut. Dab blue, green or purple cosmetic body paint over the net with a lightly loaded makeup sponge, blending the colors as you go. Peel the net away carefully, then add a thin highlight along the top of some scales.
Good to know: keep the sponge barely damp; Snazaroo notes that too much water causes streaks, and wet paint seeps under the net and blurs the scales.
2. Tropical Hibiscus Flowers
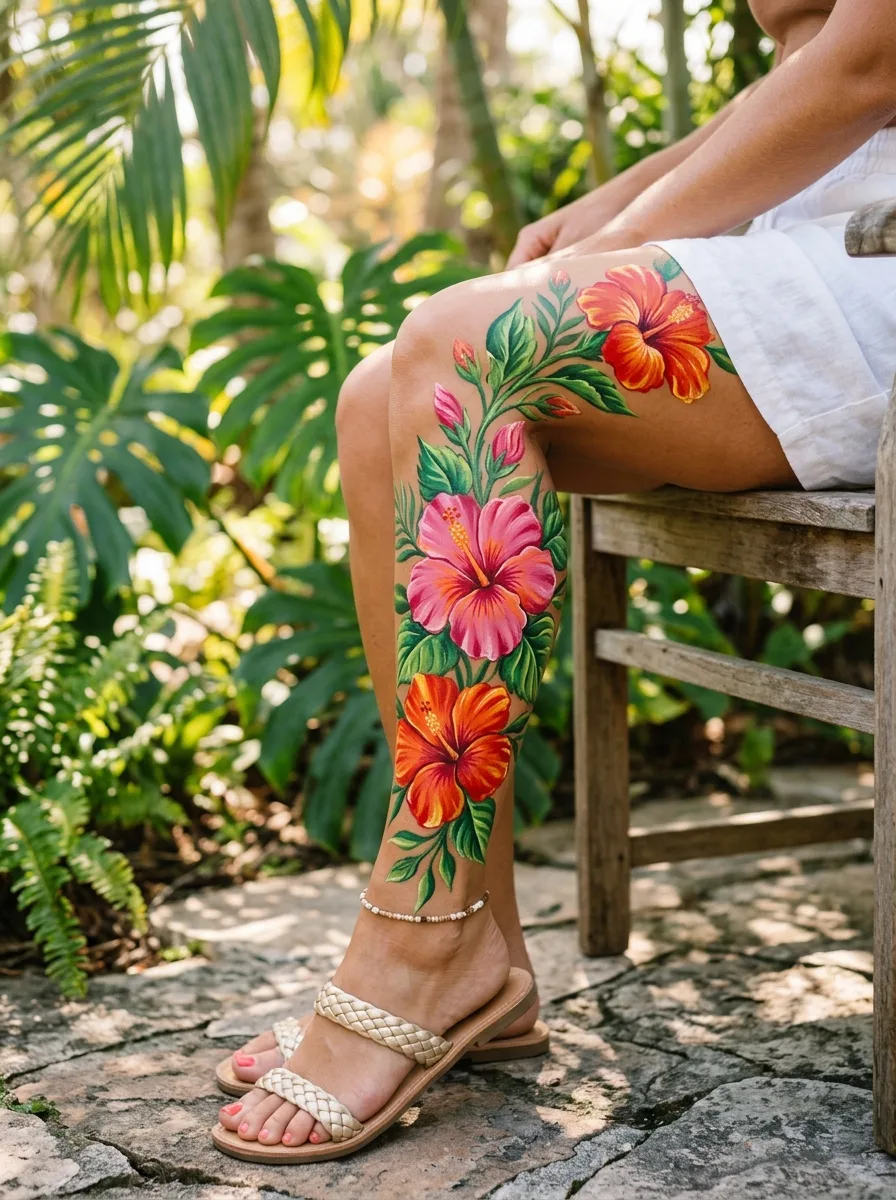
A hibiscus has five broad, overlapping petals and a long central column with a fuzzy tip. Paint the petals in pink, red or orange with a round brush, pulling each stroke from the outer edge toward the center, then darken the center with a deeper shade. Add the column in yellow, and green leaves and a vine linking two or three flowers up the leg.
Good to know: let the light petal color dry before adding the darker center, or the two mix on the skin and turn muddy.
3. Ocean Waves
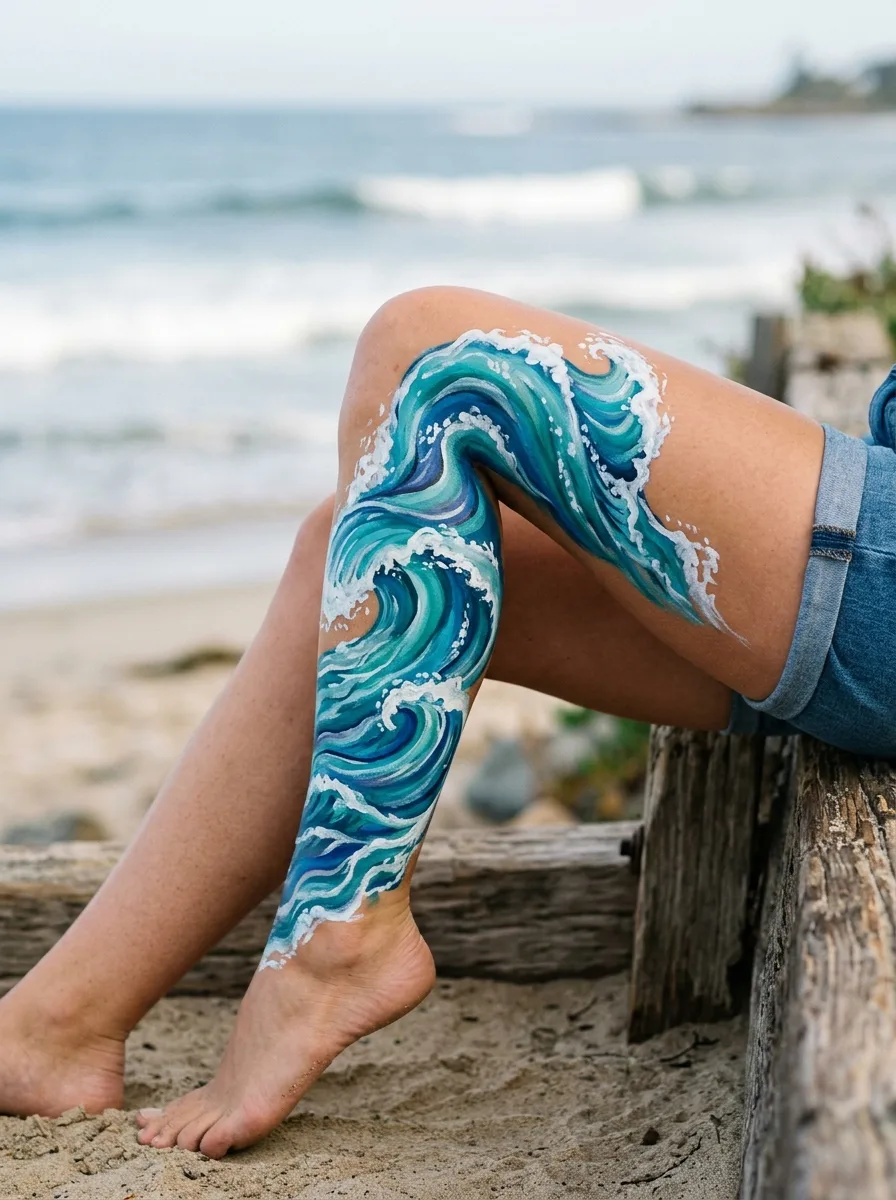
Paint curling waves in layers of blue and teal, starting with the darkest blue at the base of each wave and getting lighter toward the crest. Add white foam along the crests with the tip of a round brush, and white dots for spray. Japanese woodblock prints such as Hokusai’s The Great Wave are a good reference for claw-shaped crests.
Good to know: let each layer dry for a minute before adding the next; water-activated paint lifts and smears if you paint over it while it’s wet.
4. Galaxy Night Sky
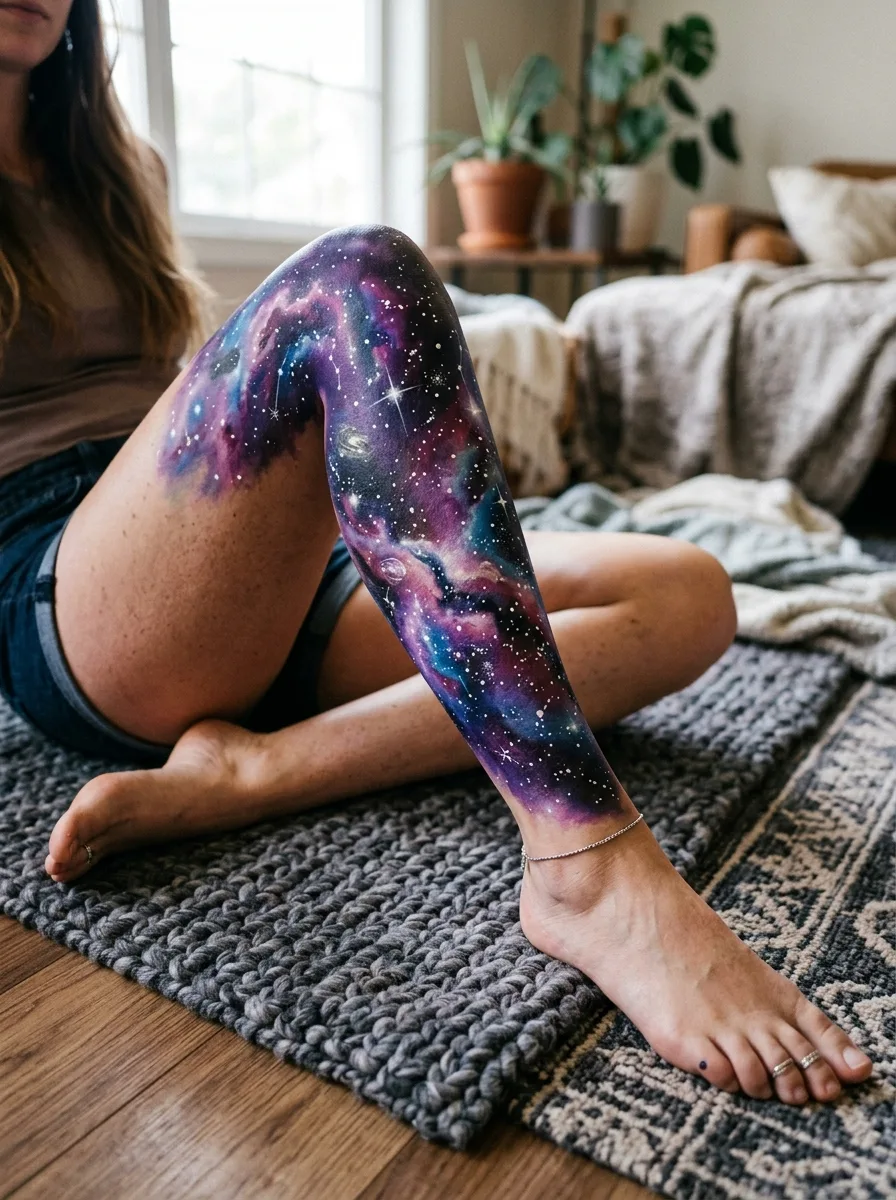
Sponge a dark base of navy and purple over the area, then dab brighter purple, pink and blue into patches for nebulas, blending the edges. Dot or flick tiny white stars with a fine brush, and add a crescent moon or a few larger four-point stars. These moon painting ideas show more ways to paint a moon on a galaxy sky.
Good to know: if you want sparkle, use only cosmetic glitter sold for use on skin, never craft glitter, and keep it well away from your eyes.
5. Henna Inspired Patterns
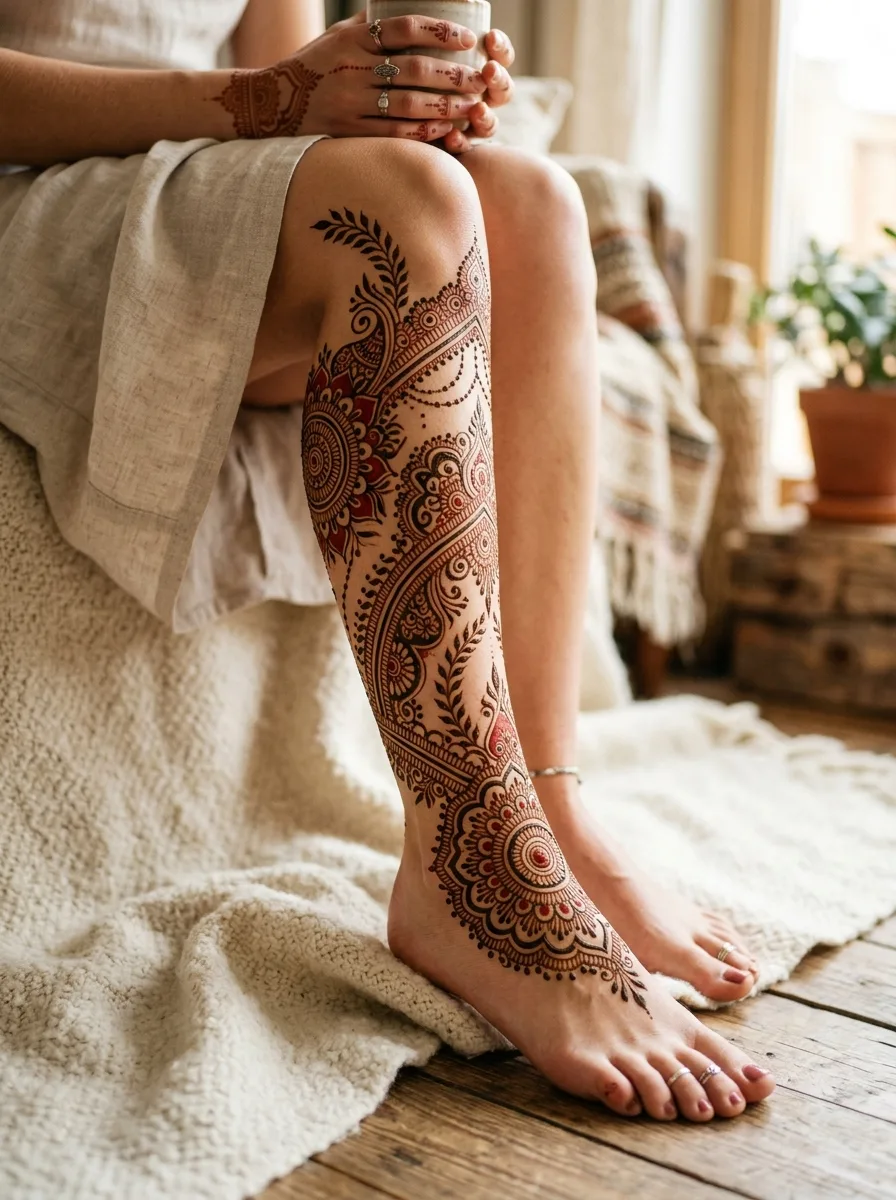
Henna-style designs use paisleys, dots, petals and fine lines that build outward from a central flower. Paint them with a fine liner brush in brown, deep red or black cosmetic body paint, or in white for a lace-like look. Start with a mandala or flower on the shin or ankle, then add vines, dots and curls that taper as they move outward.
Good to know: this look should be painted, not made with henna paste. Avoid “black henna” in particular, at market stalls and beach booths too, because the FDA warns that the PPD often in it can cause dangerous skin reactions.
6. Colorful Butterflies
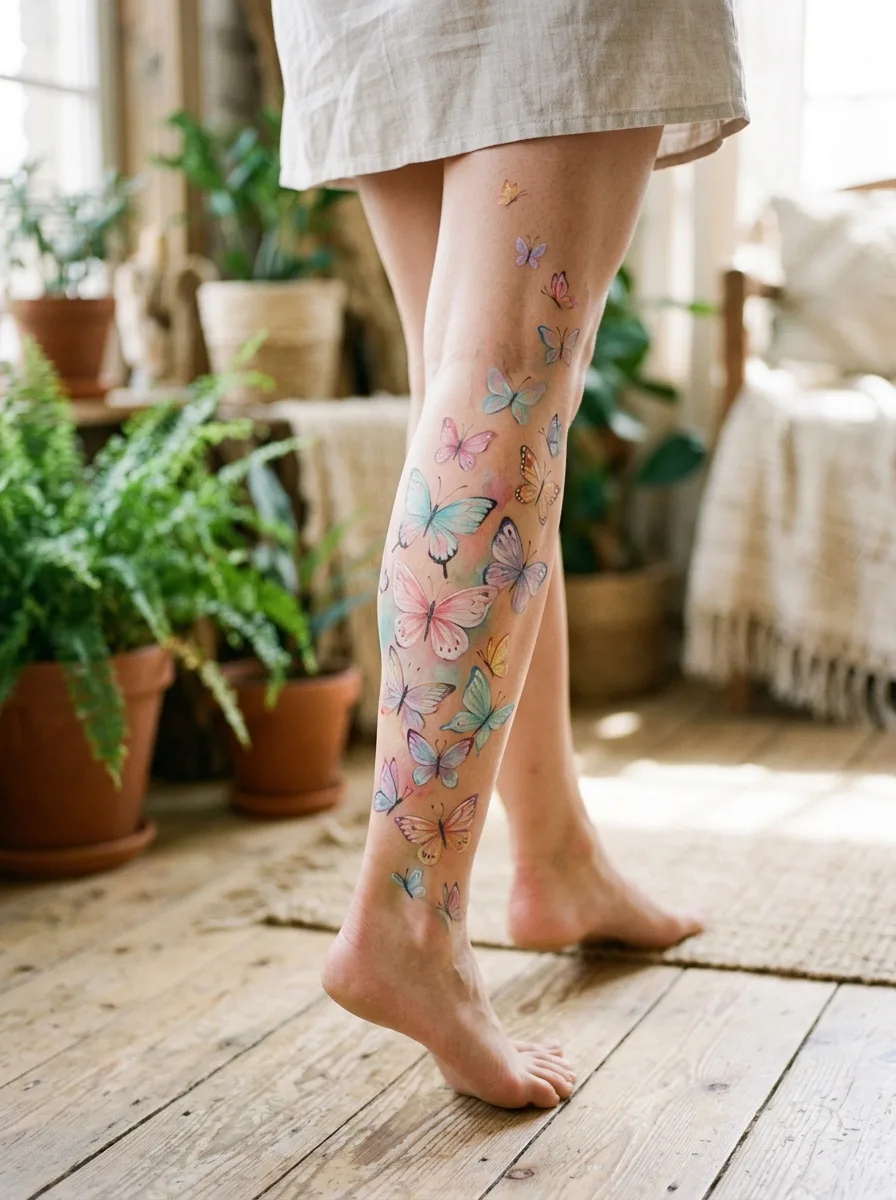
Paint a few butterflies in different sizes climbing up the leg or around the ankle. For each one, paint a thin dark body, two larger upper wings and two smaller lower wings, then blend two colors on each wing while the paint is still damp. Once the base is dry, add dark wing edges, white dots along the borders and thin antennae.
Good to know: finish both sides of one butterfly before starting the next; matching the wings is easier while the same colors are still on your brush.
7. Trailing Vines and Leaves
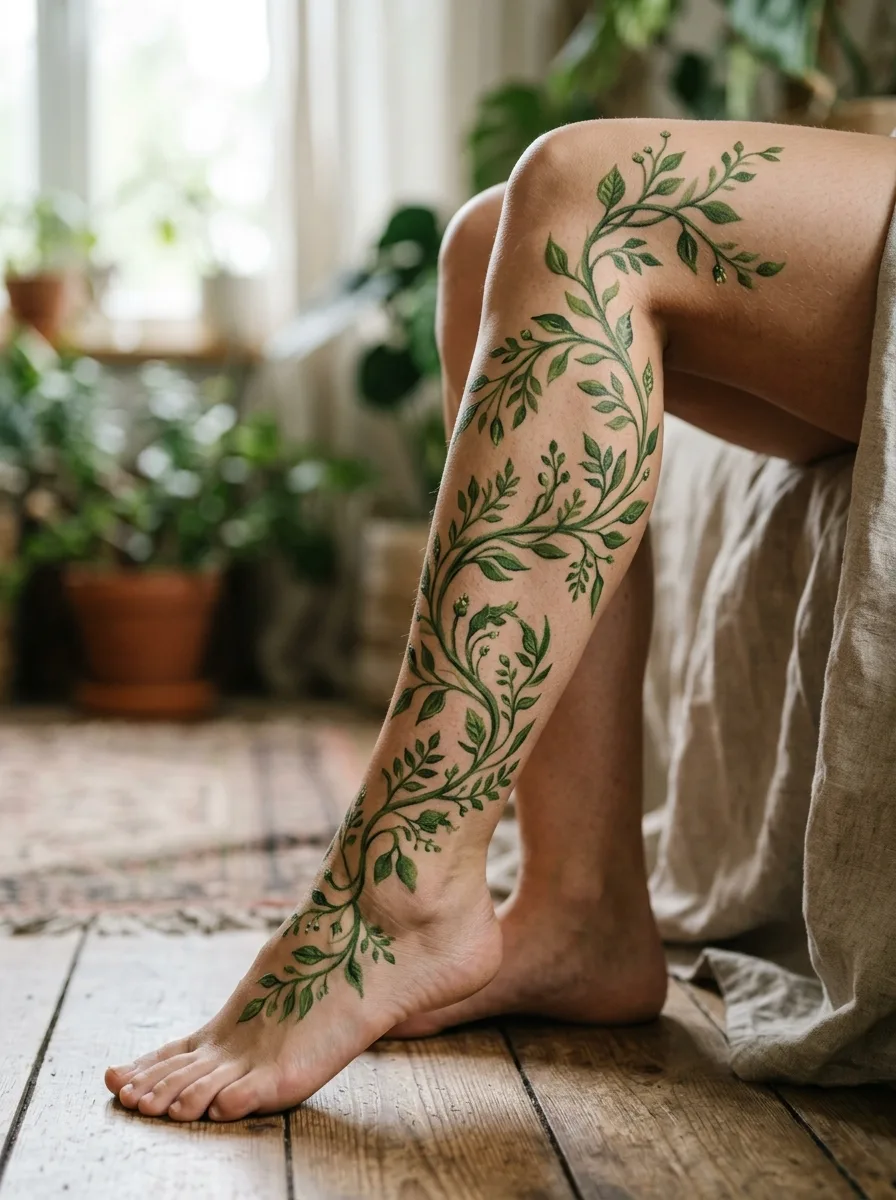
Start at the ankle and paint a thin green vine curving up the leg, following the shape of the calf. Add leaves along it with a single press-and-lift stroke of a round brush: press down for the wide part of the leaf and lift for the tip. Use two or three greens, and add a few small buds or flowers along the vine.
Good to know: practice the press-and-lift stroke on paper first; it’s the same stroke face painters use for petals and teardrops.
8. Bright Watermelon
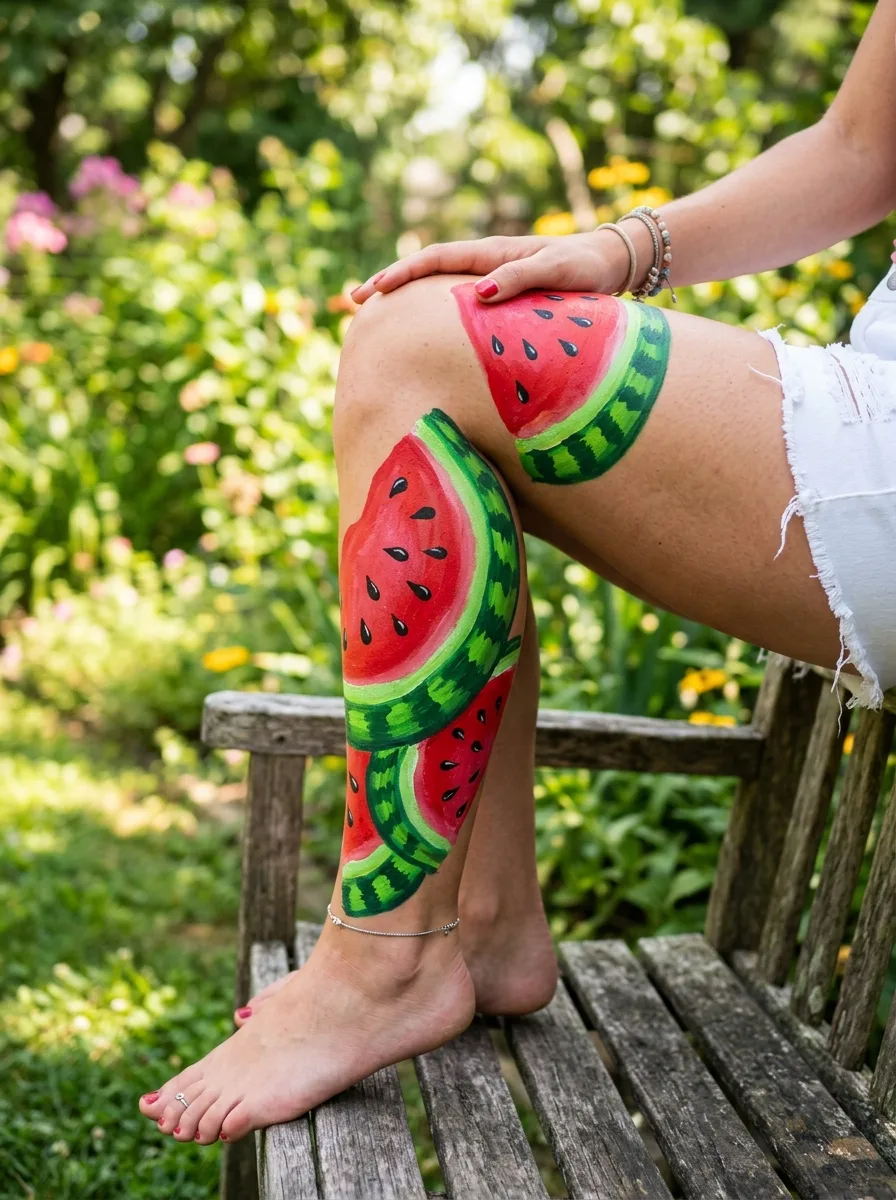
Paint a few watermelon slices as triangles with a curved base. Fill each triangle with red or pink, add a thin pale band along the curve, then a darker green rind outside it. When the red is dry, add black teardrop-shaped seeds with a fine brush. Scatter the slices up the leg, turned at different angles.
Good to know: add the seeds only once the red is dry; painted into wet red, the black smears and turns muddy.
9. Cheerful Sunflowers
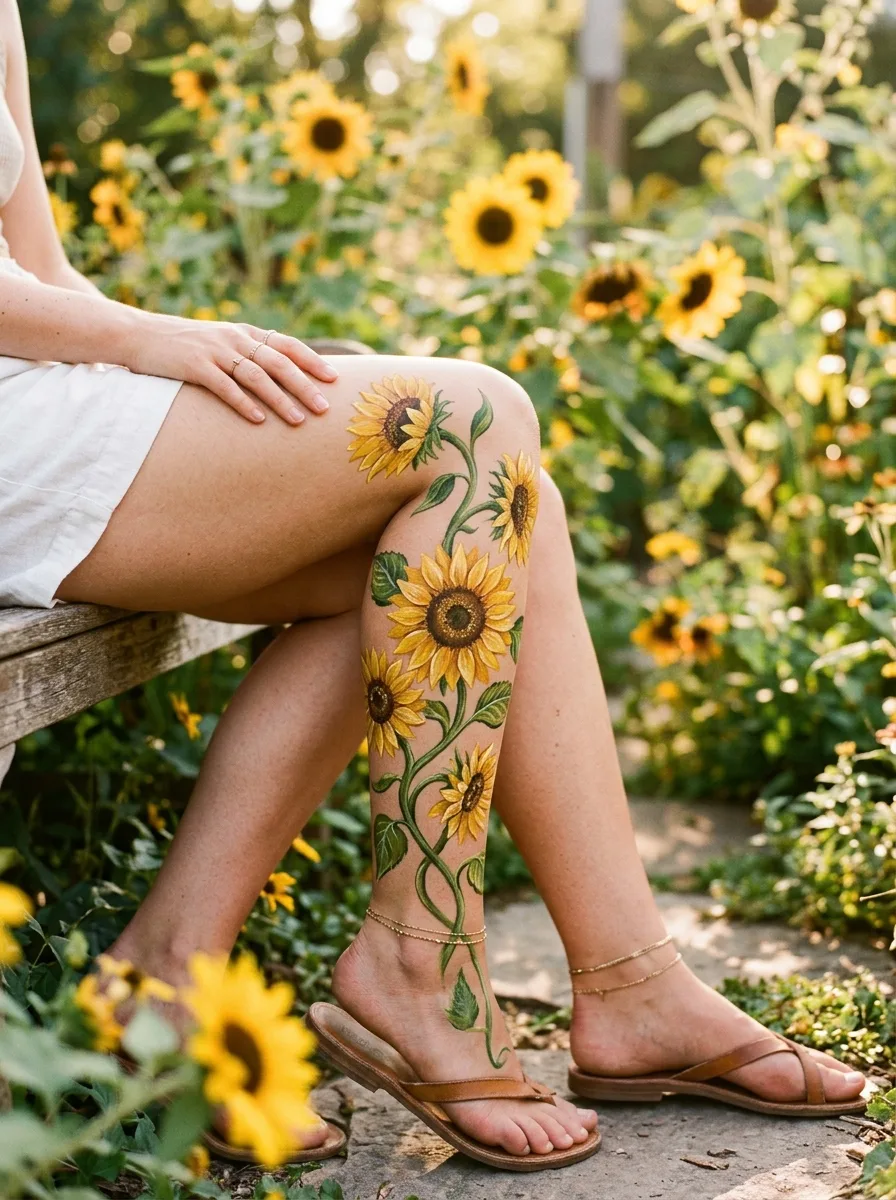
Paint a round brown center first, then two rows of pointed yellow petals around it, the second row peeking out between the first. Add a little orange or brown at the base of each petal for depth, and dot lighter brown seeds into the center. Connect two or three flowers with a green stem and broad leaves.
Good to know: yellow often needs a second layer to look solid on skin, so let the first layer dry, then go over it again.
10. Rainbow Stripes
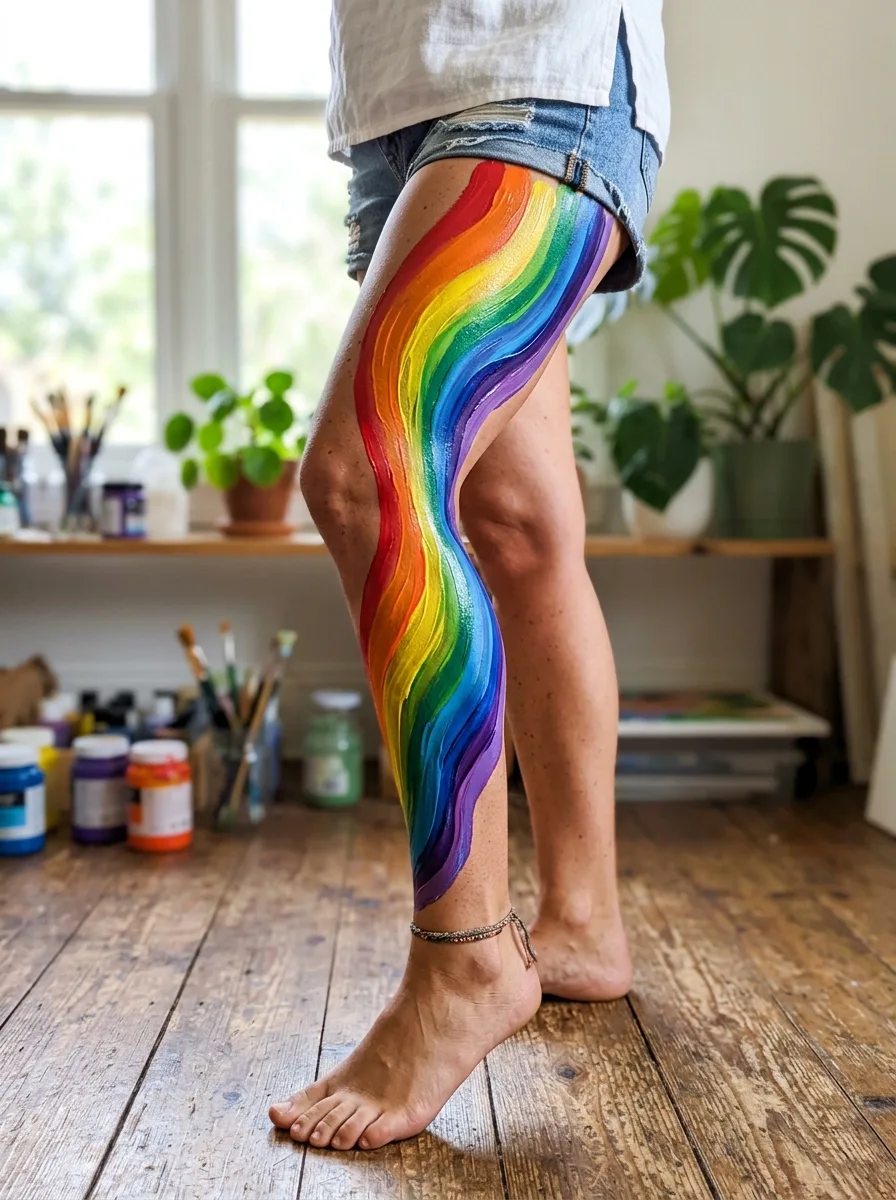
Paint stripes of red, orange, yellow, green, blue and purple around the leg, straight, wavy or diagonal. A flat brush or a wide sponge gives even stripes. Paint the yellow stripe first so darker colors can’t muddy it, then the rest in order. Overlap the edges slightly for a blended look, or leave a hairline gap for crisp stripes.
Good to know: deep colors can be harder to remove, Snazaroo notes, so include the darkest shades in your patch test.
11. Seashells and Starfish
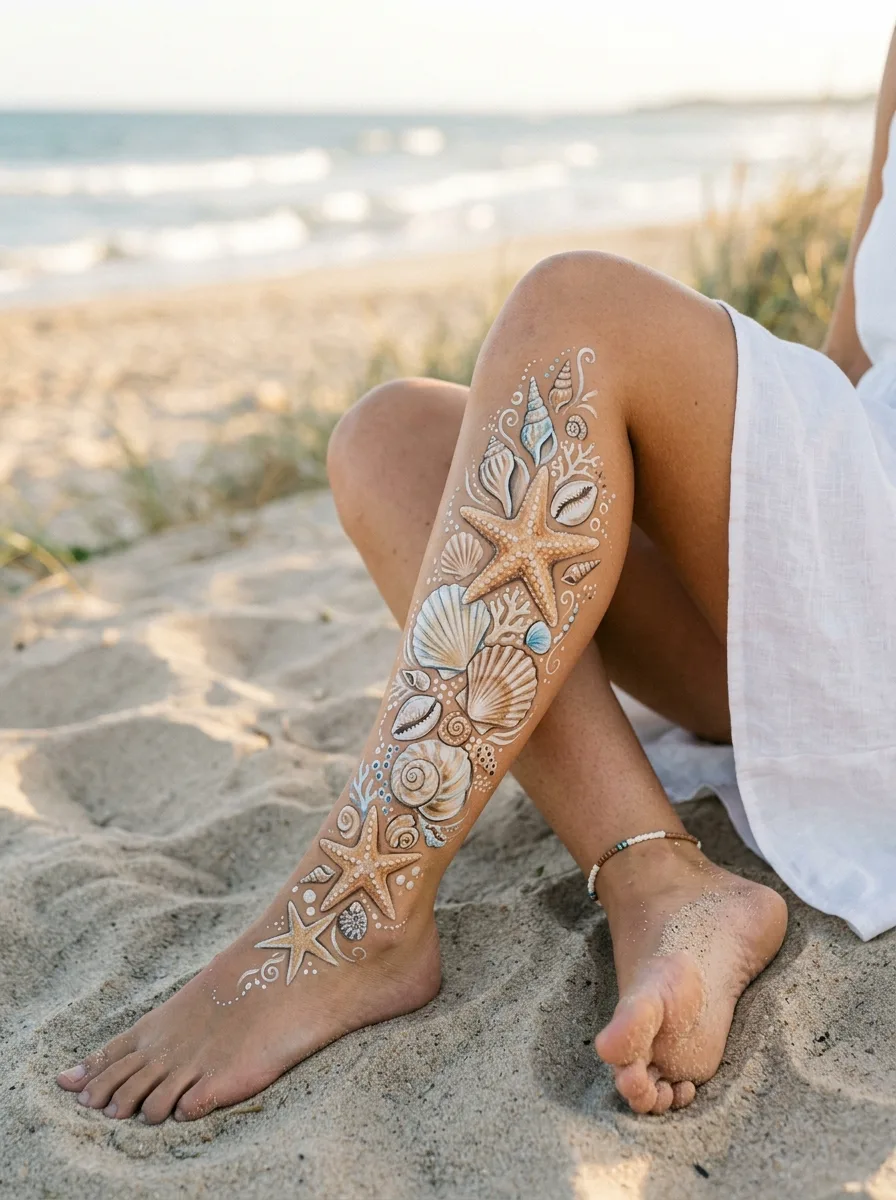
Scatter a few seashells and starfish around the ankle and up the shin. Paint scallop shells as fans with ridges spreading from the base, spiral shells as cones with a curling line, and starfish as five-armed shapes with dotted texture. Soft pink, cream, coral and sandy orange keep the look beachy.
Good to know: outline each shell with a thin line of a darker shade, such as brown or deep coral, so the soft colors stand out against your skin.
12. Boho Geometric Patterns
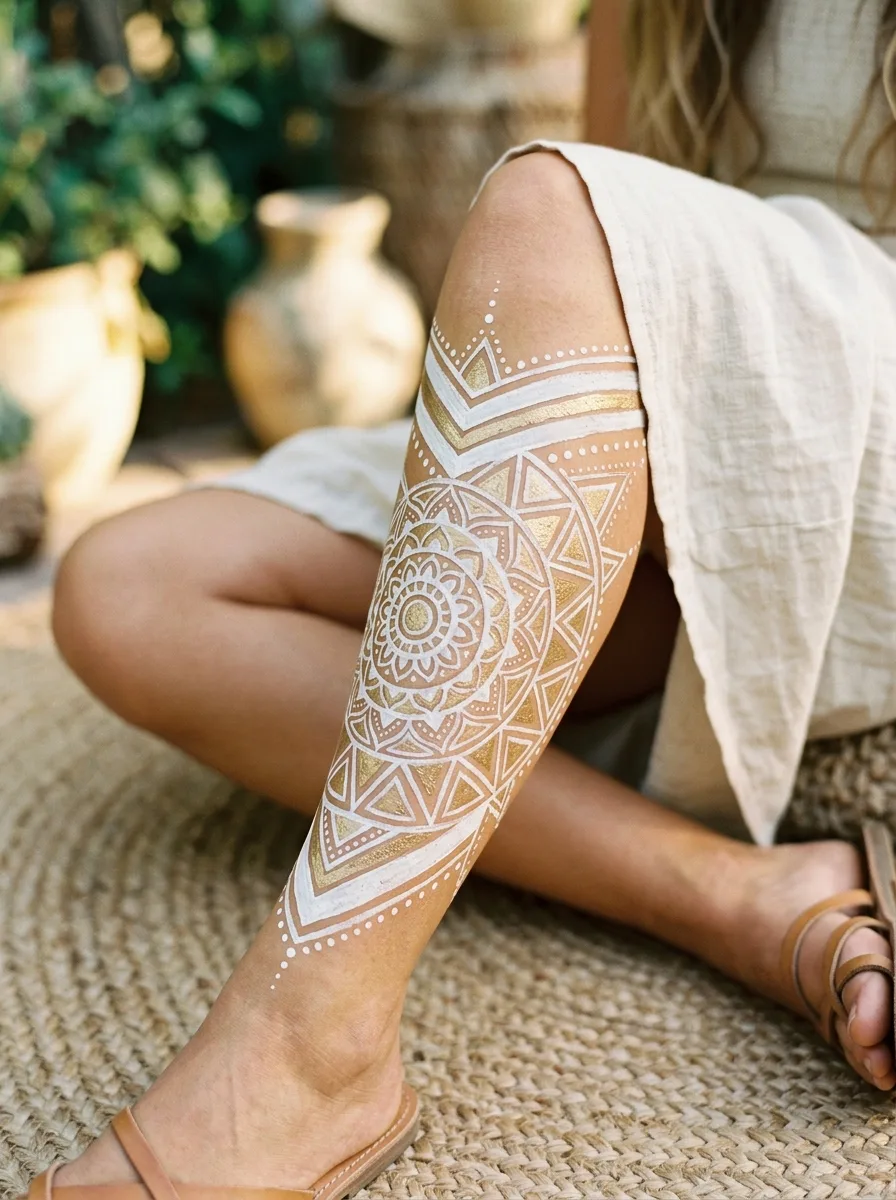
Build a symmetrical pattern of triangles, dots, lines and small mandalas down the front of the shin or around the ankle. Start with one center shape and add rows of repeating shapes outward, keeping both sides matching. White or metallic gold body paint made for skin gives strong contrast, and the end of a brush handle makes even dots.
Good to know: mark the center line with a few tiny dots first so the pattern stays straight as it follows the curve of the leg.
13. Sunset Ombre
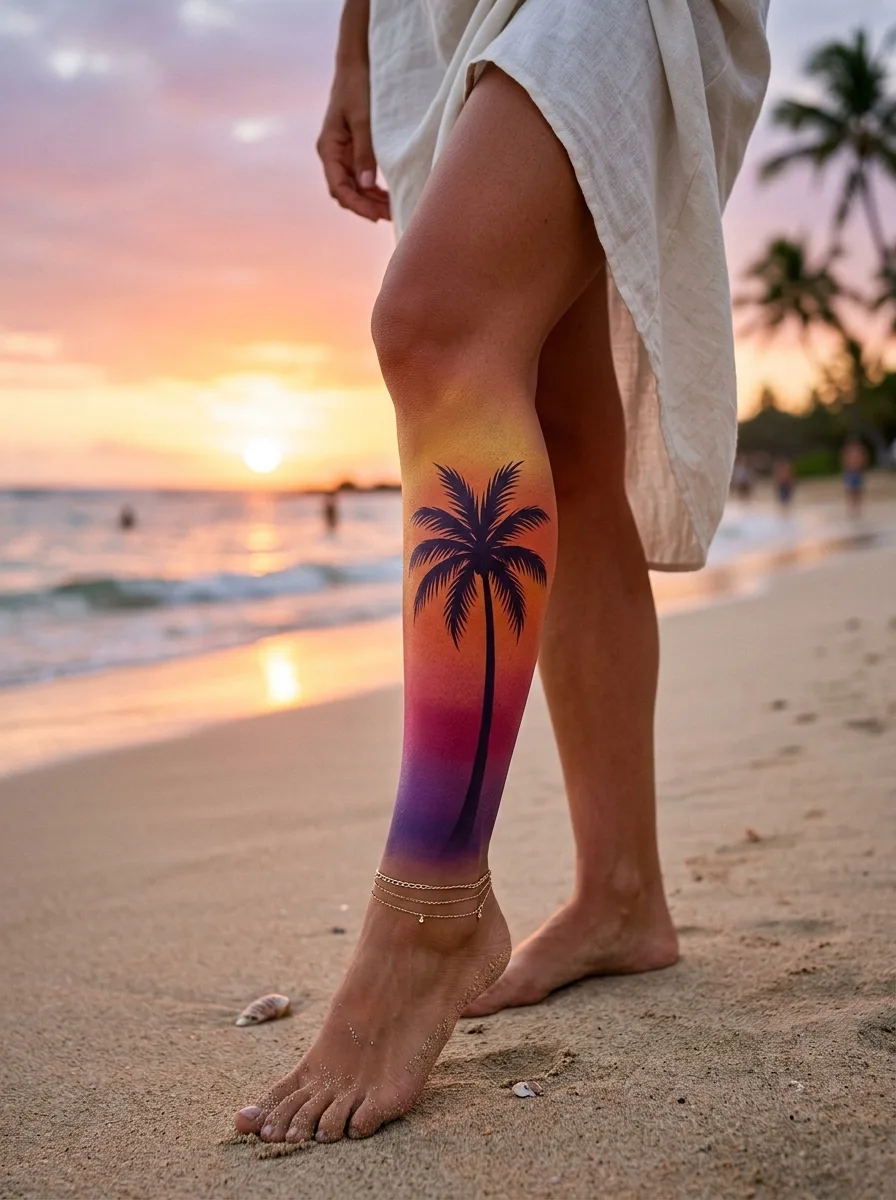
Sponge horizontal bands of yellow, orange, pink and purple from the ankle upward, overlapping the edges and blending them with a clean, barely damp sponge. When the gradient is dry, add the silhouette of a palm tree or a few small birds in black or dark purple with a fine brush.
Good to know: blend by dabbing, not wiping; wiping lifts the color underneath and leaves streaks.
14. Daisy Chain
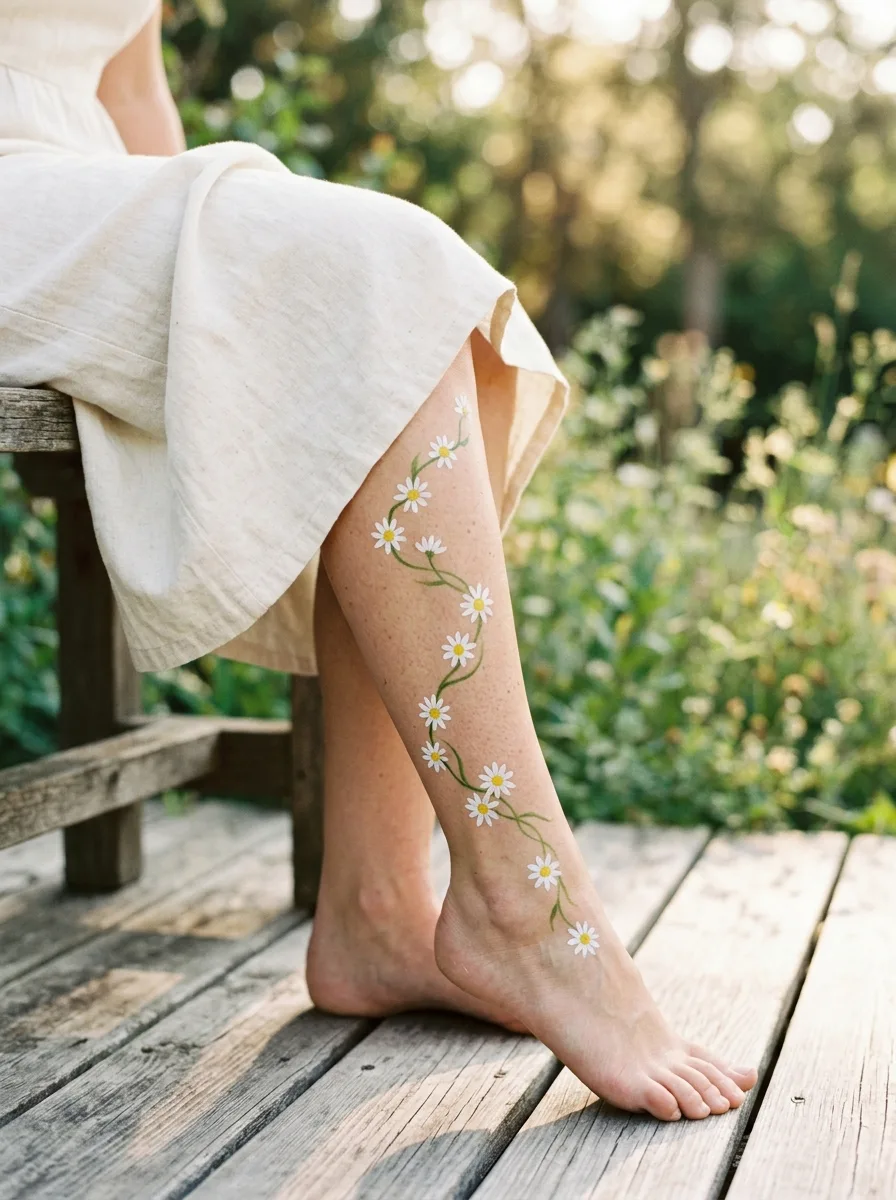
Paint small daisies around the ankle or in a line up the leg. For each one, paint five or six white petals with single press-and-lift strokes of a small round brush, radiating from a center point. When they’re dry, add a yellow center to each, then connect the flowers with a thin green vine and a few small leaves.
Good to know: white is often sheer on skin and may need a second layer; painting the petals before the yellow centers keeps the white clean.
15. Peacock Feathers

Paint a long, slightly curved line for each feather’s shaft, then fine strokes along both sides in green and teal. Near the tip, add the eye: an oval of deep blue inside a ring of teal, then a ring of bronze or gold and a thin outer ring of green. Overlap a few feathers so they fan up the side of the leg.
Good to know: build the eye from the outer ring inward, letting each ring dry before the next, so the colors stay separate.
16. Tropical Pineapple Leg Art
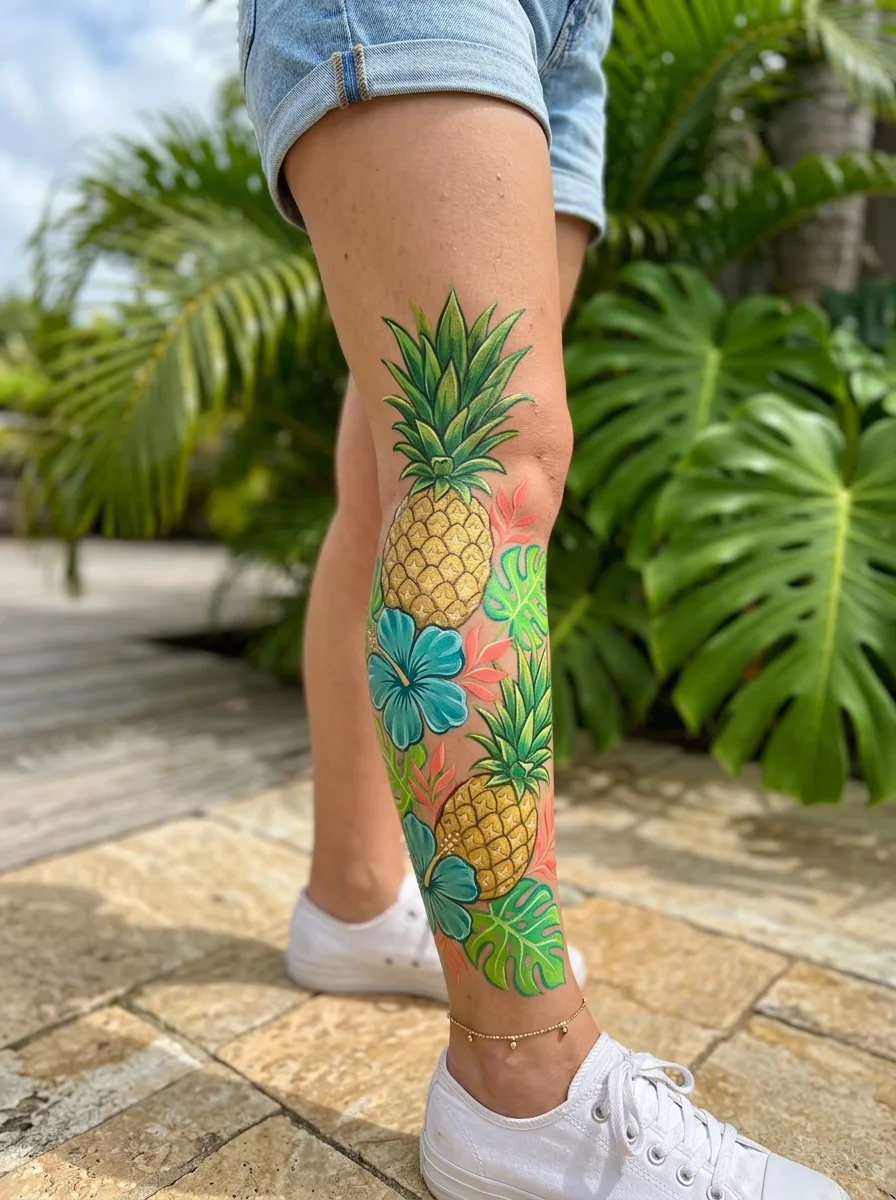
Paint a yellow oval for each pineapple and let it dry. Add a crisscross pattern of thin orange or brown lines, with a small dot in each diamond. Paint a crown of spiky green leaves on top, with the longest in the middle. One large pineapple on the calf, or a few small ones up the shin, both work.
Good to know: a darker orange along one side of the oval makes the fruit look round instead of flat.
17. Cherry Blossom Petals
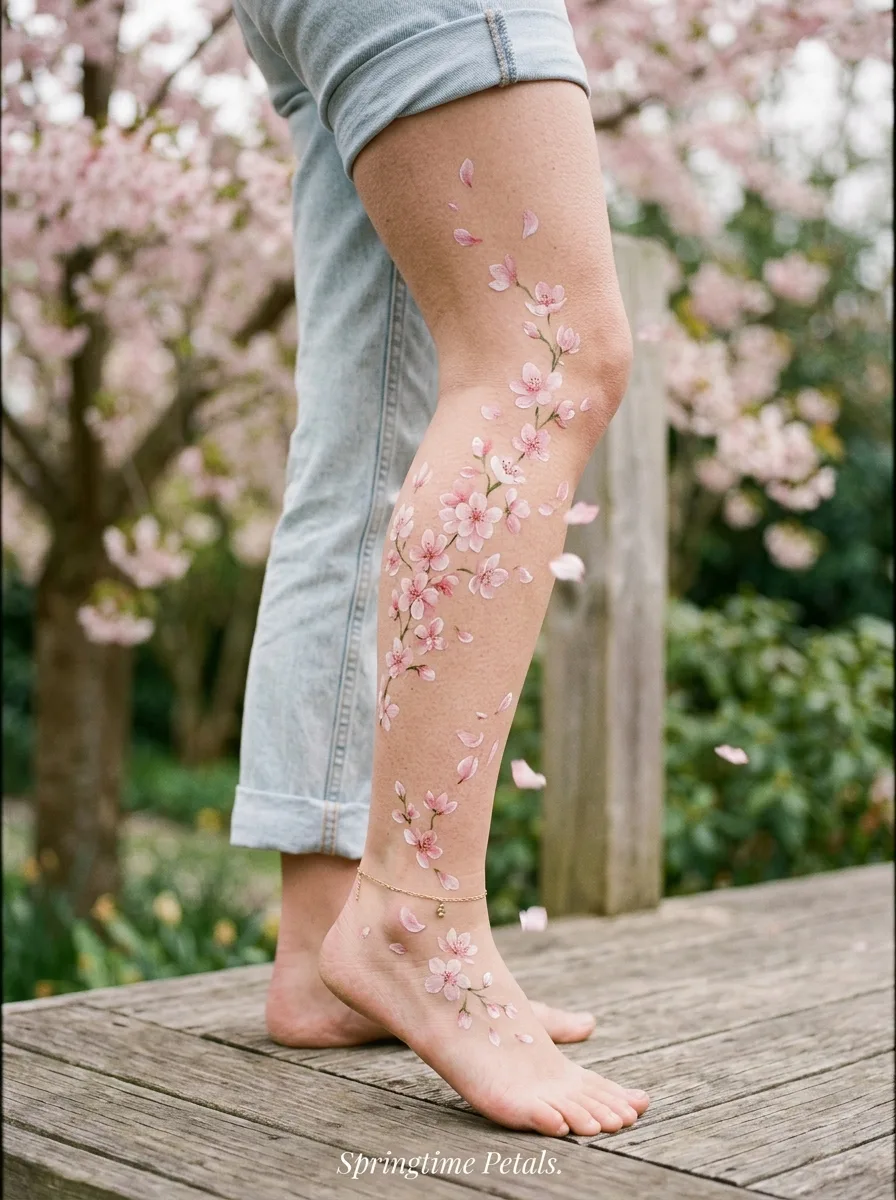
Paint a thin, dark brown branch curving up the leg, then clusters of pale pink blossoms along it. Each blossom has five rounded petals, often with a small notch at the tip, and a deeper pink center with tiny dots. Add a few loose petals drifting away from the branch.
Good to know: mix a little white into the pink for the petals and save the strongest pink for the centers; it adds depth without extra steps.
18. Leopard Print Legs
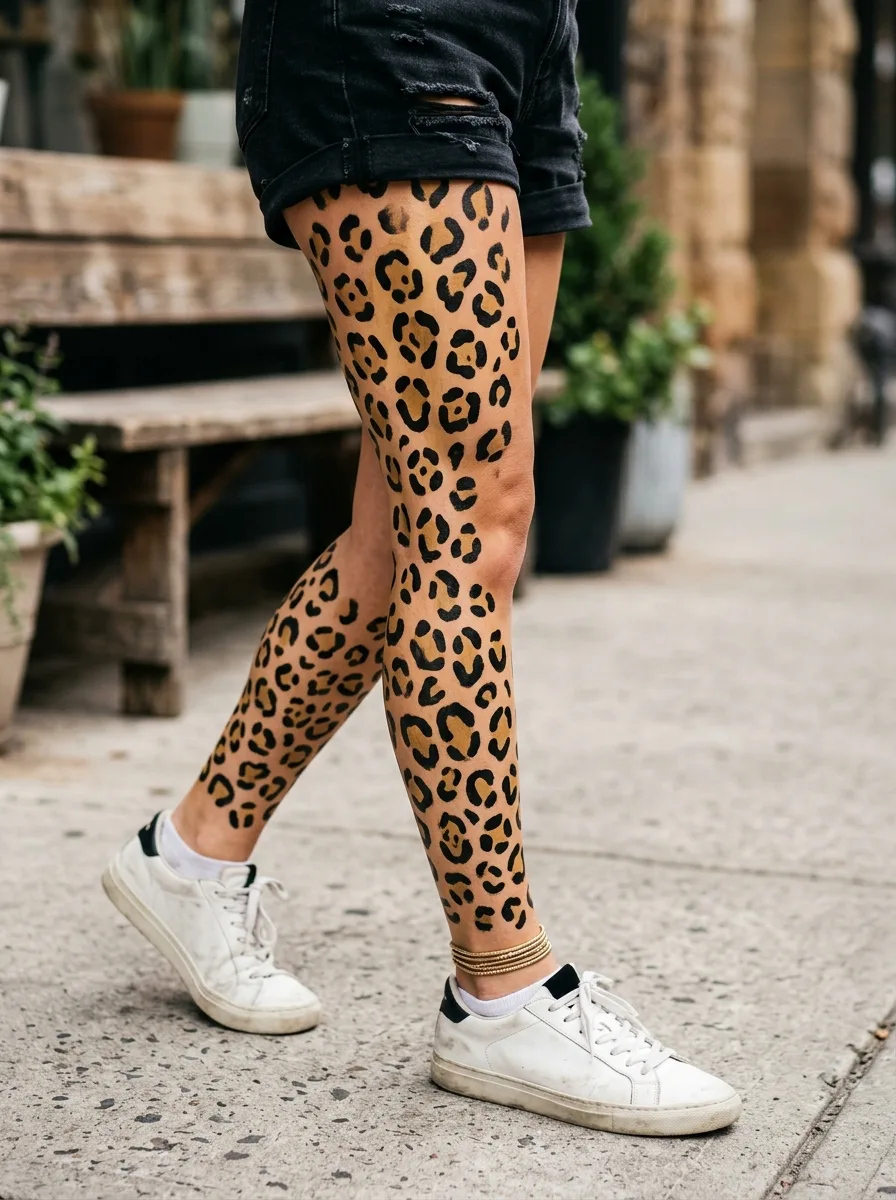
Sponge on a light golden or tan base if you want one, and let it dry. Leopard spots are rosettes: paint small patches of a slightly darker tan or orange, then edge each one with two or three broken, curved black marks rather than a closed ring. Add a few small solid black spots between the rosettes, varying the sizes.
Good to know: keep the black marks broken and irregular; neat, closed circles look like polka dots, not leopard print.
19. Firework Sparkle Leg Art
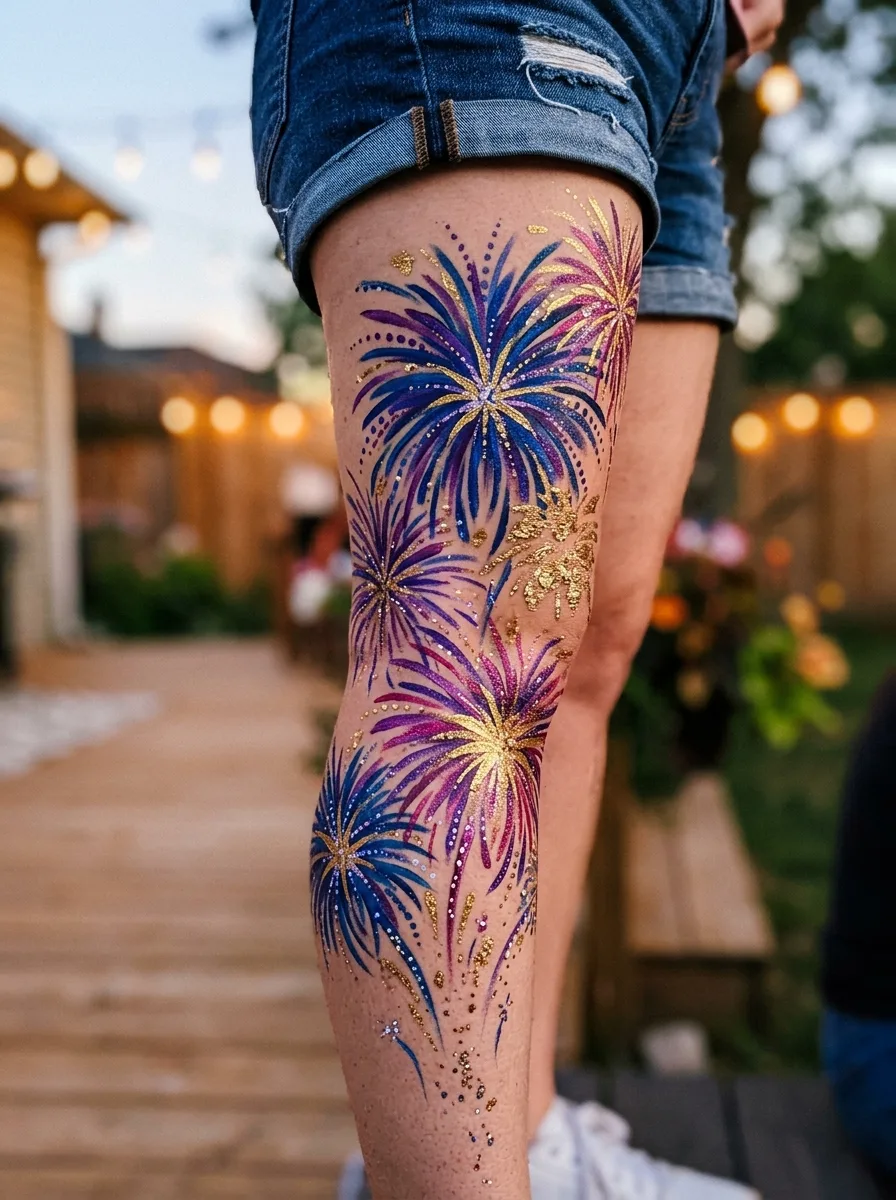
Paint each firework as lines radiating from a center point, with a dot at the end of each line. Use a fine liner brush and two colors per burst, such as gold and pink, with shorter lines inside longer ones. Vary the sizes up the leg and add small white dots and four-point sparkles around them. The starbursts in these star pattern painting ideas work the same way.
Good to know: work from the center of each burst outward, lifting the brush as you go so each line tapers to a point.
20. Citrus Slice Leg Painting
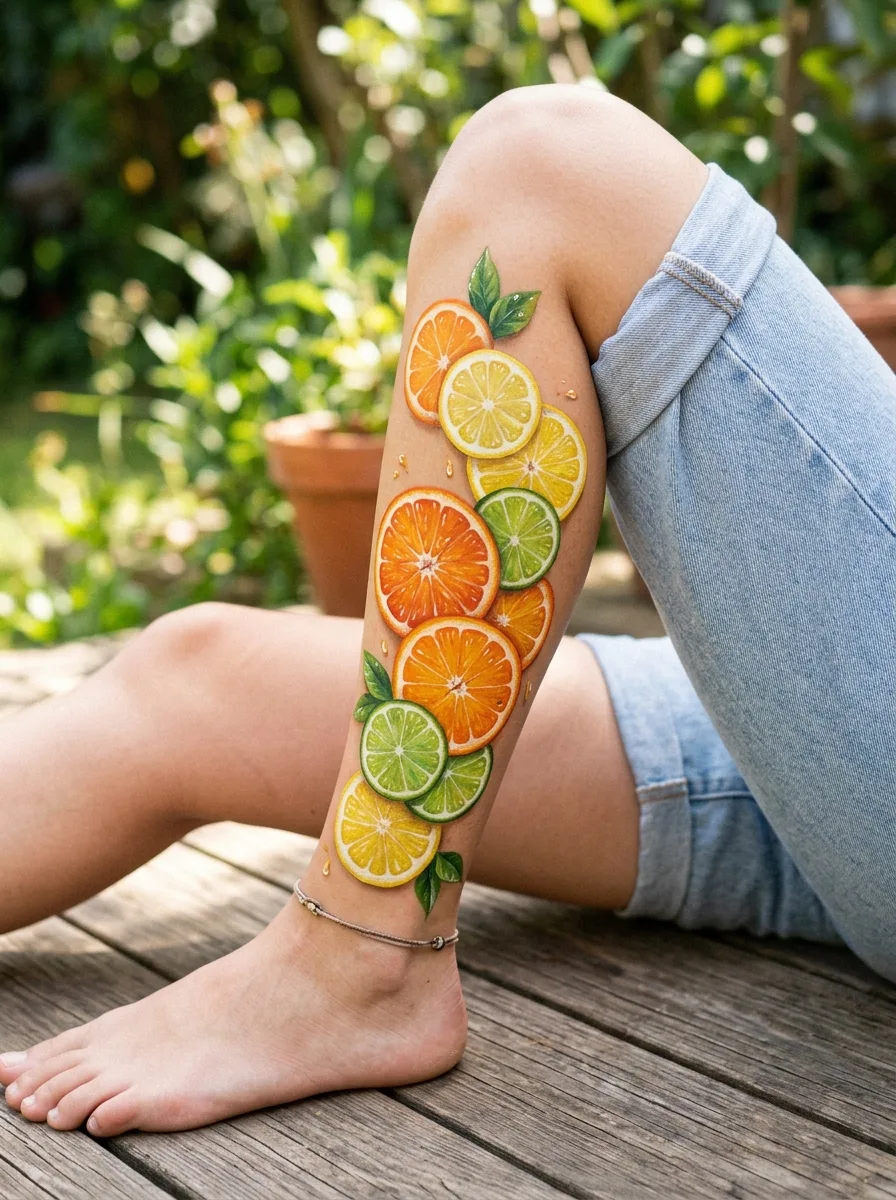
Paint circles in orange, yellow and lime green, and let them dry. Add a thin white ring just inside the edge for the pith and a darker outer rind. Paint thin white lines from the center to the ring, like the spokes of a wheel, to divide the segments, and add a few teardrop seeds. Half and quarter slices add variety.
Good to know: a round sponge dauber gives quick, even circles for the base color.
Common mistakes to avoid
- Using acrylic craft paint, markers or poster paint on skin instead of cosmetic face and body paint.
- Using craft glitter instead of cosmetic glitter, or putting glitter near the eyes.
- Getting a “black henna” design at a market stall or beach booth.
- Skipping the patch test, or painting over cuts, rashes or irritated skin.
- Painting a new layer over wet paint, which smears the design.
- Sleeping in body paint instead of removing it the way the label directs.
Leg painting FAQs
What paint should I use for leg painting?
Cosmetic face and body paint made for skin, used as its label directs. Check that the colors listed are on the FDA’s list of color additives permitted in cosmetics, and never use acrylic craft paint, markers or poster paint.
How do I remove leg paint?
Follow the label. Most water-activated face paints come off with warm water and soap. Scrub gently, and stop if your skin gets irritated.
Can I wear leg paint to the beach or pool?
Water-based face paint can rub off when it gets wet, so it suits dry days better than swimming. Body paint isn’t sunscreen, so protect the rest of your skin, and remove the paint before bed.
Can kids have their legs painted?
Yes, with cosmetic face paint and an adult doing the painting. Snazaroo recommends face painting for children 3 and over. Patch-test first and keep paint away from the eyes and any broken skin.


