

24 Colorful Summer Art Projects for Kids
The best summer art projects for kids are quick to set up, a little messy and easy to take outside. Most of the 24 projects below use washable paint, paper and glue, plus things you probably have already, such as ice cube trays, bubble wrap, sponges and cardboard tubes.
Each project has what you need, how to do it and one practical tip, including age notes and safety points where they matter. Start with the basics on supervision, materials and summer heat.
Safety basics first
Supervise and do the adult steps
Stay close, especially with toddlers, and match the project to the child: younger children need help with cutting, and some projects below have age notes. Do anything sharp or hazardous yourself, such as cutting produce, trimming foil or using spray sealers.
Choose child-safe art materials
Look for the ACMI AP seal on paint, glue, chalk and markers: ACMI recommends AP-seal products for children in sixth grade and younger, and says never to give children in grade 6 or lower a product with its CL seal. Washable paint makes cleanup easier.
Keep small parts away from under-3s
Marbles, pebbles, beads and bottle caps are choking hazards for babies and toddlers. The CPSC small parts rule exists because children under 3 can choke on, inhale or swallow small objects, and federal rules ban balls 1.75 inches across or smaller for children under 3.
Plan for sun and heat
For outdoor projects, the CDC advises seeking shade, especially between 10 a.m. and 4 p.m., and using broad-spectrum sunscreen with SPF 15 or higher, reapplied after 2 hours outdoors or after swimming or sweating. The CDC doesn’t recommend sunscreen for babies 6 months and younger, so keep them in the shade. Offer water often, and feel pavement and play equipment before kids sit or kneel on it, since sun-heated surfaces can burn.
The 24 projects at a glance
| Project | Best for | Mess level | Adult help |
|---|---|---|---|
| Ice cube painting | Toddlers and up | High | Freezing the cubes |
| Bubble wrap printing | Toddlers and up | Medium | Taping down the wrap |
| Salt painting | Preschool and up | Medium | Squeezing glue for little ones |
| Coffee filter butterflies | Preschool and up | Low | Twisting pipe cleaners |
| Splatter painting | Preschool and up | High | Setting up outdoors |
| Marble painting | Age 3 and up (marbles) | Low | Counting marbles back in |
| Sponge painting | Toddlers and up | Medium | Cutting sponge shapes |
| Crayon resist | Preschool and up | Low | None |
| Sidewalk chalk | Toddlers and up | Low | Checking pavement heat |
| Straw blow painting | Preschool and up | Medium | Showing how to blow |
| Sun catchers | Preschool and up | Low | Cutting frames |
| Puffy paint | Preschool and up | Medium | Dispensing shaving cream |
| Fruit and veggie stamping | Toddlers and up | Medium | All the cutting |
| Painted rocks | Preschool and up | Medium | Sealing |
| Sun prints | Preschool and up | Low | Timing and rinsing |
| Leaf rubbing | Preschool and up | Low | Taping paper down |
| Squirt gun painting | Preschool and up | High | Mixing paint, setting rules |
| Cotton swab dots | Preschool and up | Low | Drawing outlines |
| Cardboard tube stamping | Toddlers and up | Medium | Shaping tubes |
| Tissue paper collage | Preschool and up | Medium | Mixing thinned glue |
| Chalk pastel blending | School age | Medium | None |
| Foil texture art | Preschool and up | Medium | Folding sharp edges |
| Ribbon painting | Preschool and up | High | Cutting and putting ribbons away |
| Yarn-wrapped sticks | School age | Low | Starting the first knot |
1. Frozen Ice Cube Painting
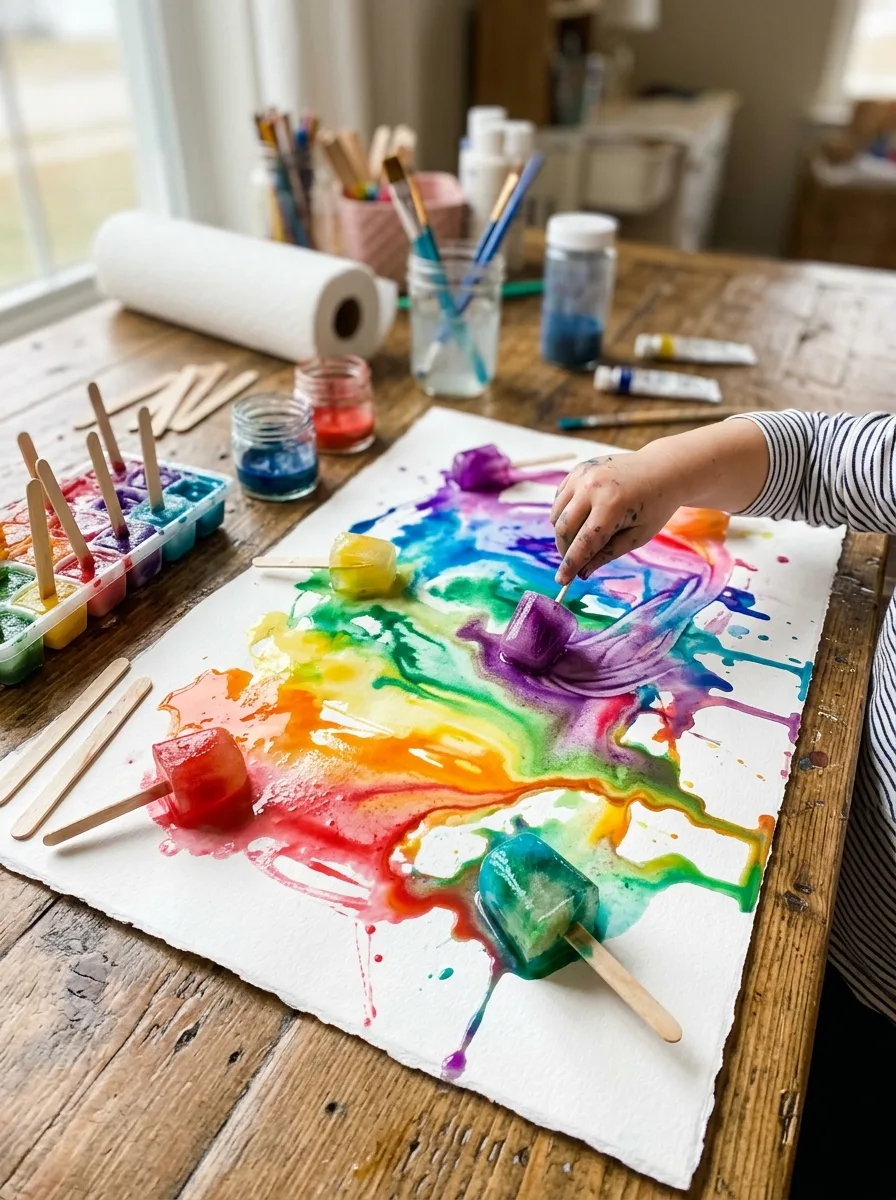
Fill an ice cube tray with washable tempera thinned with a little water, or water tinted with food coloring. Freeze it until the cubes are slushy, push a craft stick into each one as a handle, then freeze until solid. Give children thick paper on a tray and let them slide the melting cubes across it, mixing colors as they go.
Good to know: the cubes look like ice pops, so remind young children they’re for painting, not eating, and use paint with the ACMI AP seal. Food coloring stains hands and clothes, so cover up.
2. Bubble Wrap Printing
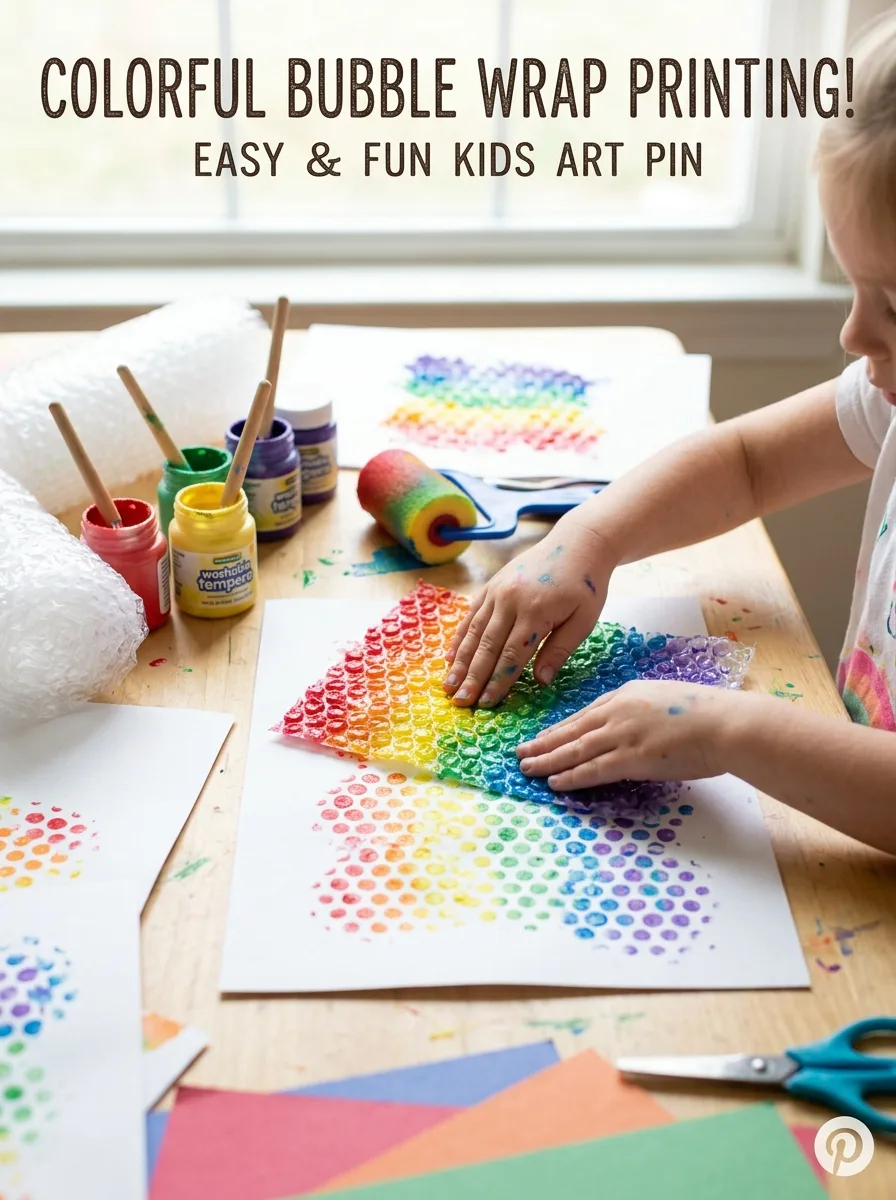
Tape a sheet of bubble wrap to the table, bubbles up, and let children brush or roll paint over it in several colors. Press a sheet of paper on top, rub gently all over, then peel it back to reveal a dotted print. Once the prints are dry, cut them into jellyfish, fish scales, flower centers or honeycomb shapes.
Good to know: a thin coat of paint gives clear dots; thick paint fills the gaps between the bubbles and blurs the pattern.
3. Salt Painting
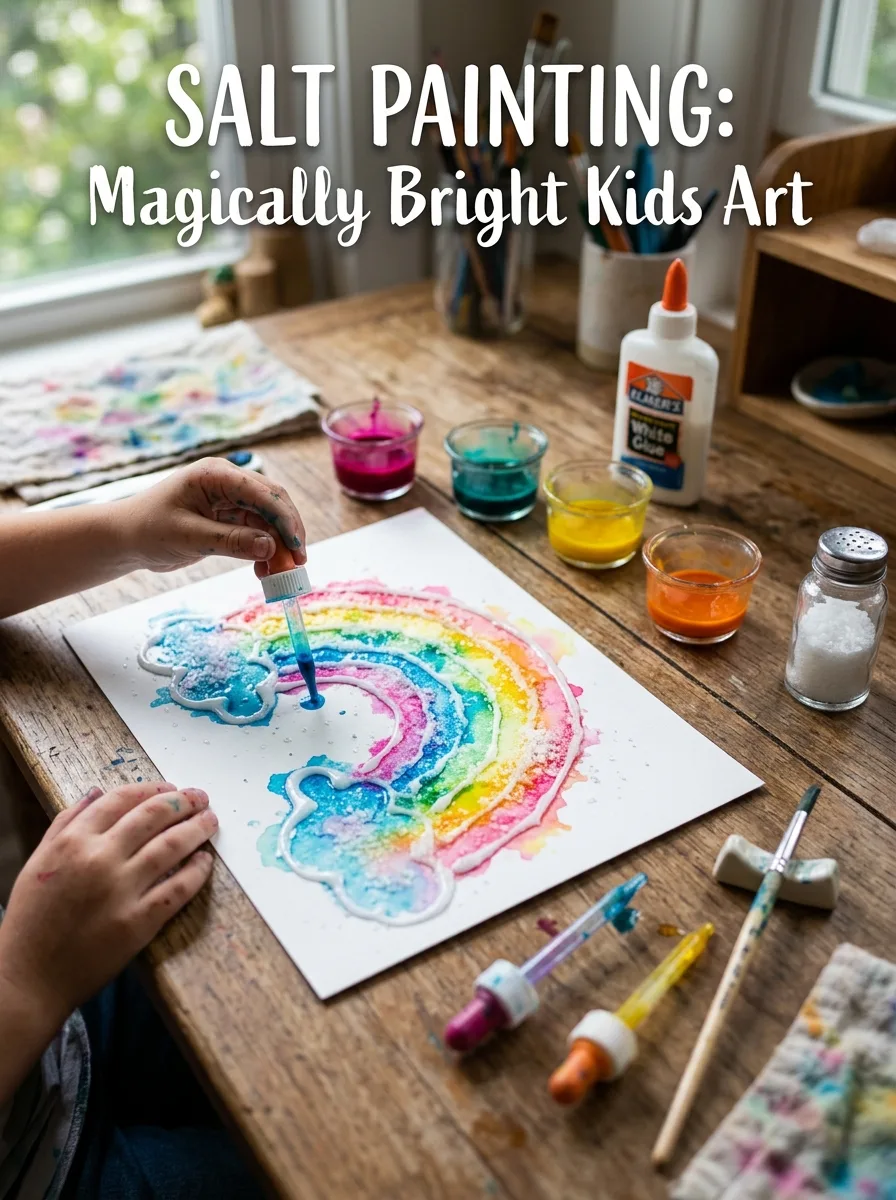
Squeeze white glue in lines and shapes, such as suns, waves or names, onto thick card, and cover the wet glue with table salt. Tip the extra salt off over a tray. Then touch a brush loaded with liquid watercolor, or water tinted with food coloring, to the salty lines and watch the color travel along them. Let the card dry flat before moving it.
Good to know: salty crafts can raise the sodium level in pets that eat them, the ASPCA warns, so keep the salt bowl and drying artwork out of reach of dogs and cats.
4. Coffee Filter Butterflies
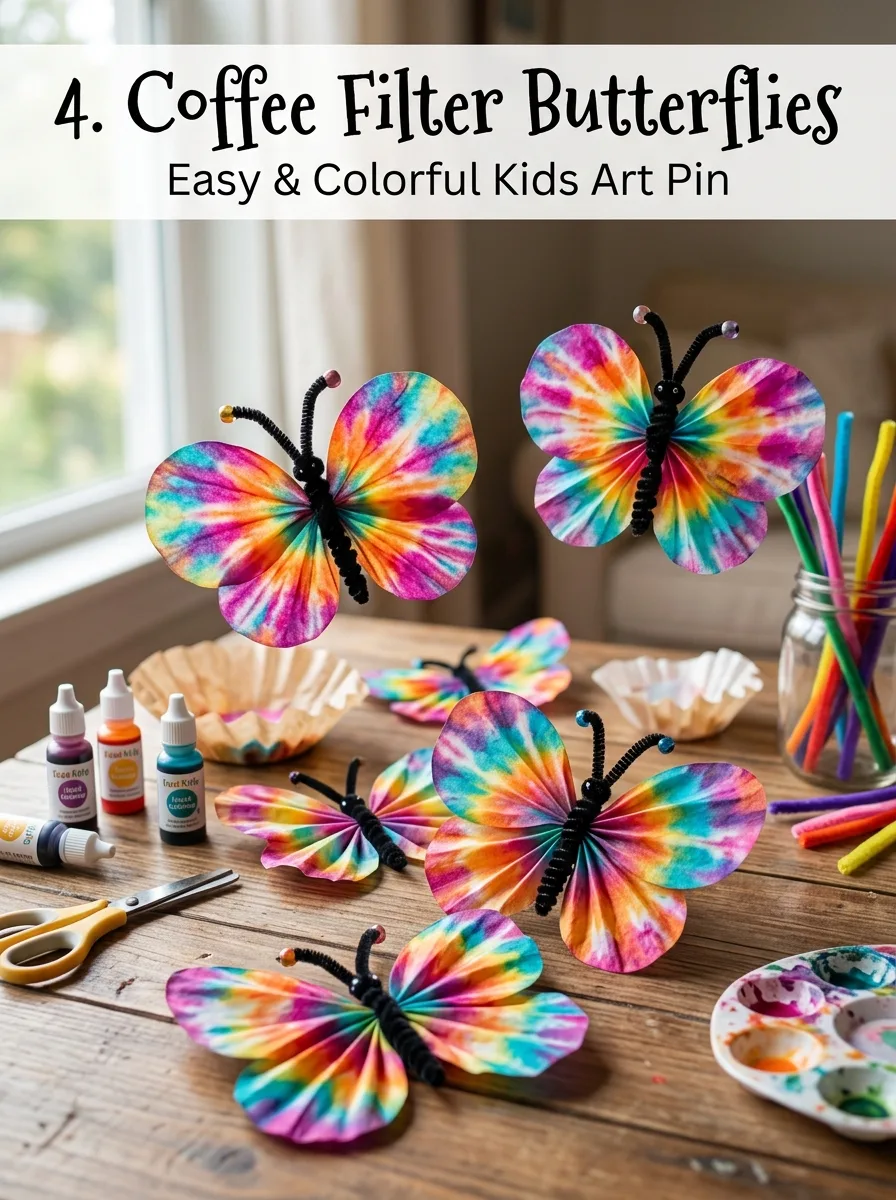
Flatten a round coffee filter and let children color it with washable markers, covering most of the paper. Spray it lightly with water, or brush water on, and watch the colors spread. When it’s dry, gather the middle into a wing shape and twist a pipe cleaner around the center for the body, curling the ends into antennae.
Good to know: use washable markers, which bleed when wet; permanent markers barely run. Fold over the cut ends of pipe cleaners, which can be sharp.
5. Splatter Painting
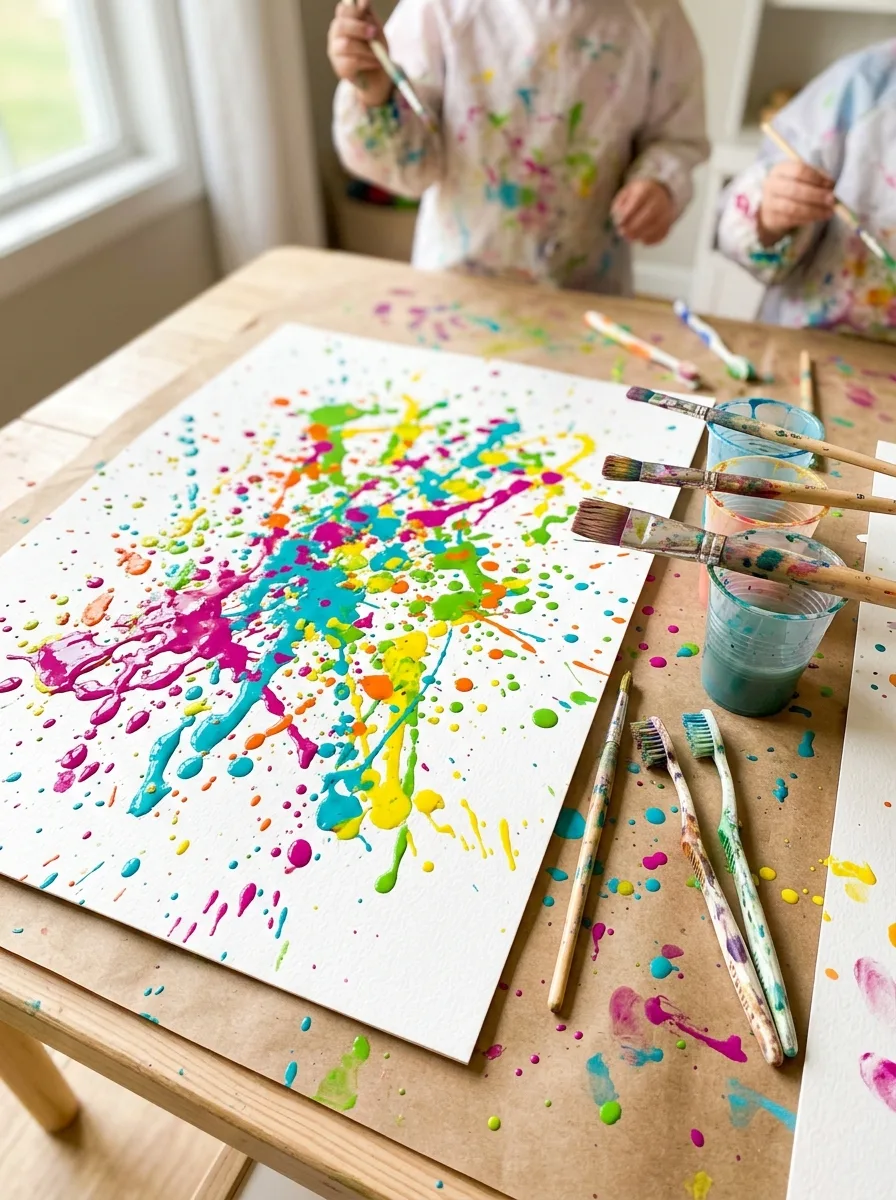
Lay big sheets of paper on the grass or a covered table outdoors, and give children brushes and cups of slightly thinned washable paint. Show them how to flick the brush with a quick wrist movement, tap it against a finger, or drip paint from above. Jackson Pollock’s drip paintings are a good example to look at together first.
Good to know: put children in old clothes and keep the flicking pointed at the paper, away from faces; outdoors, stray splatter doesn’t matter.
6. Marble Painting
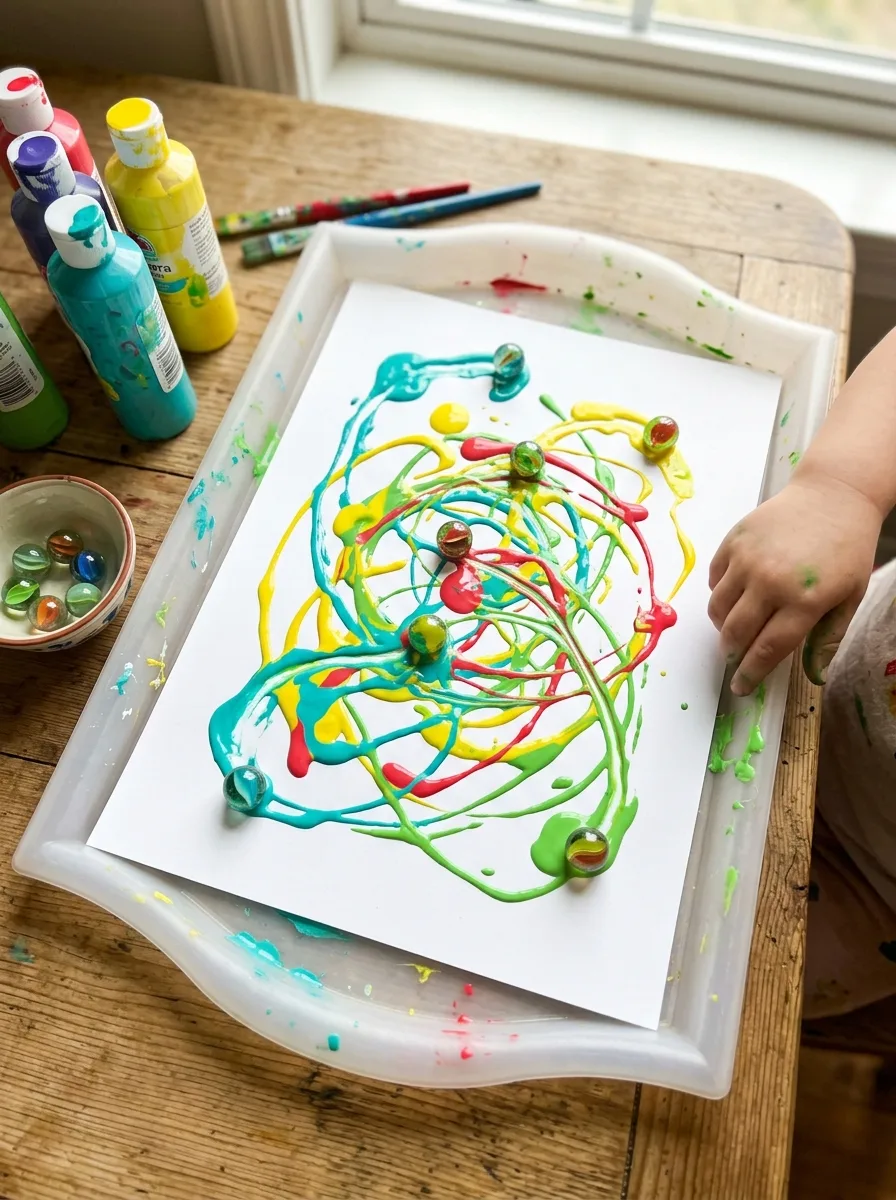
Put a sheet of paper in a shallow box or baking tray, add a few drops of washable paint, then drop in two or three marbles. Children tilt the box to roll the marbles through the paint, leaving colored tracks. Add another color and roll again. A container with a lid keeps the marbles from escaping.
Good to know: marbles are a choking hazard for children under 3. For toddlers, use a ball larger than 1.75 inches across, such as a tennis ball, in a lidded box, and count the marbles back in afterward.
7. Sponge Painting
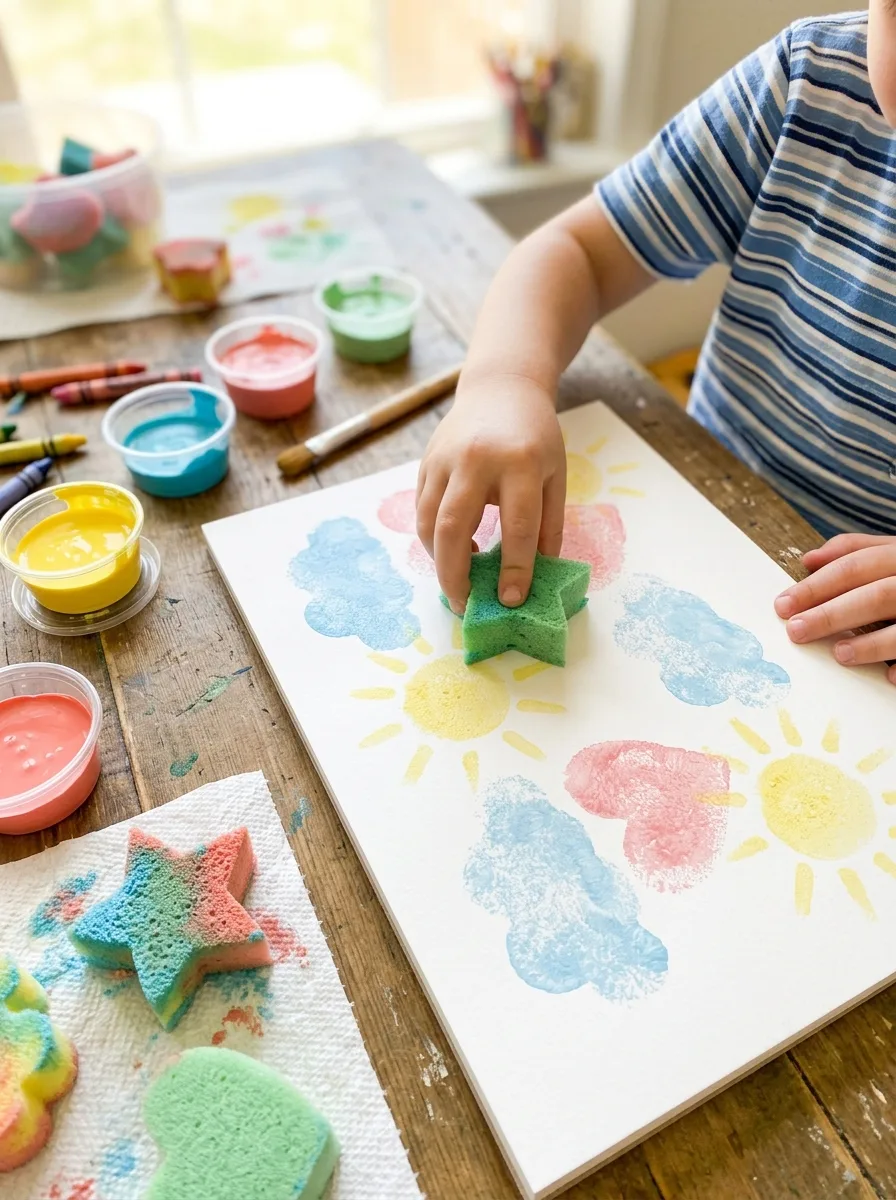
Cut kitchen sponges into simple shapes, such as circles, clouds, stars or squares, and clip a clothespin to each one as a handle. Pour a little paint onto paper plates, and let children dab the sponges in it and press them onto paper. Layer colors to make a summer sky, a garden or a sunset.
Good to know: this suits toddlers who can’t hold a brush yet, but use large shapes and watch closely, since small children may chew sponges and bite off pieces.
8. Watercolor Crayon Resist
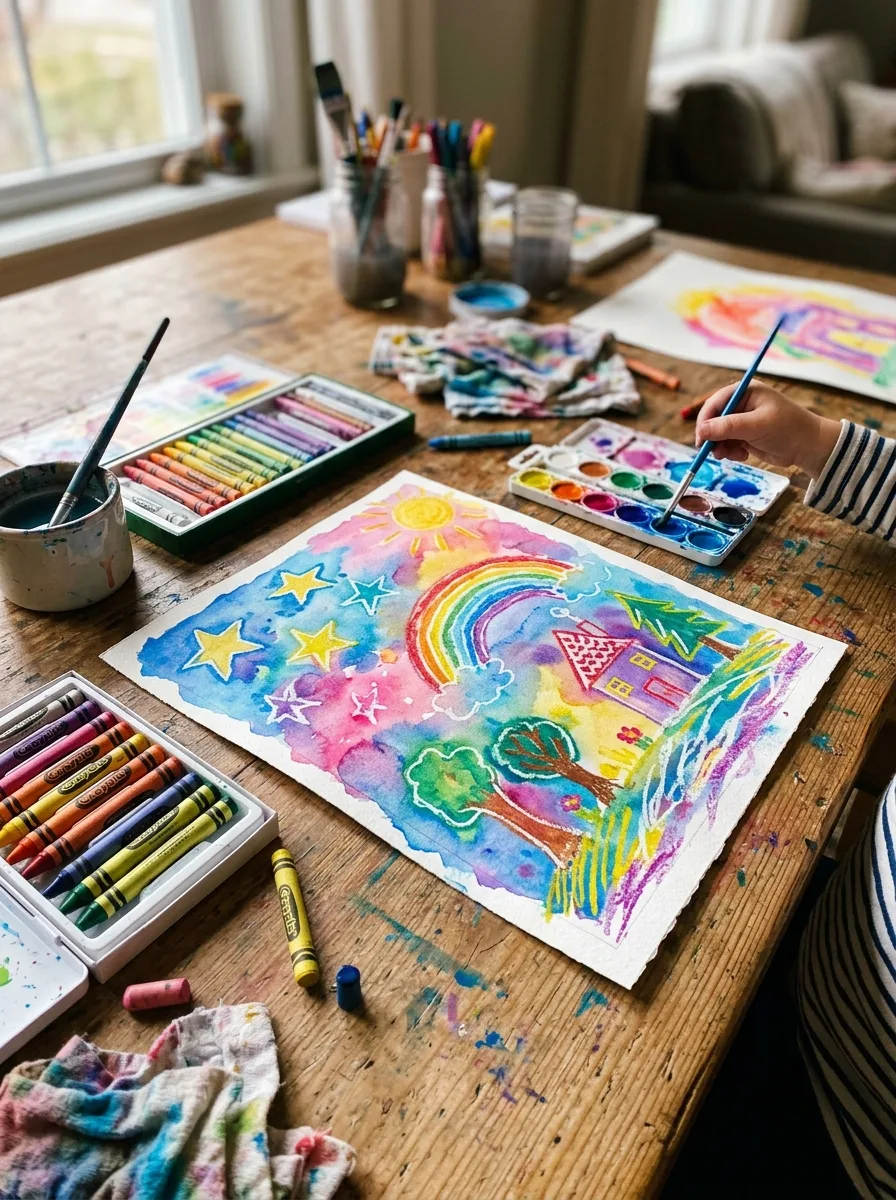
Children draw on thick paper with a white or light-colored crayon, pressing firmly, then paint over the whole sheet with watercolor. The wax repels the water, so the drawing appears through the paint. Try suns, waves and shells, or write a secret message for someone else to reveal.
Good to know: press hard with the crayon, because light lines don’t leave enough wax to resist the paint; cardstock or watercolor paper buckles less than printer paper.
9. Sidewalk Chalk Art
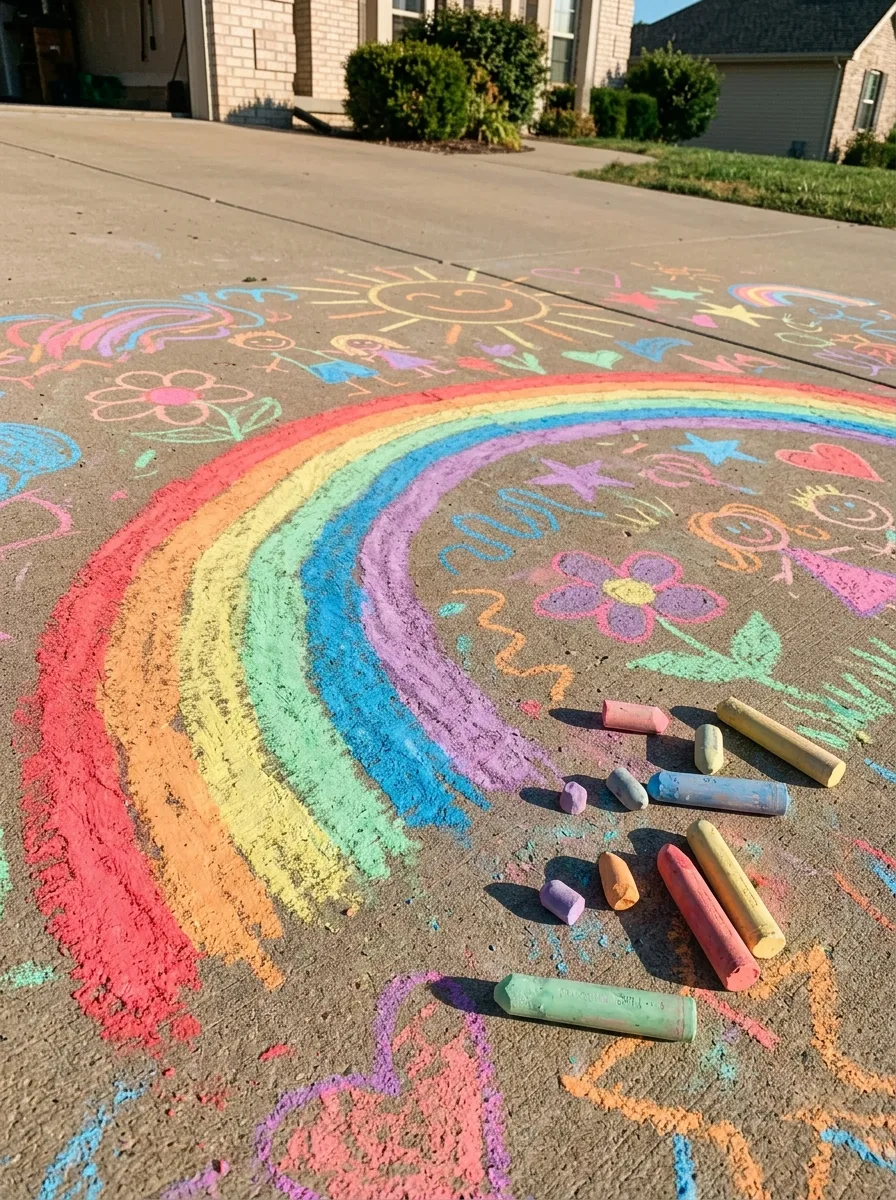
Give children thick sidewalk chalk and a stretch of driveway or patio, and encourage big drawings using the whole arm. Dipping the chalk in water, or wetting the pavement first, gives brighter, paint-like colors. Trace each other’s shadows, draw a hopscotch grid or make a giant summer scene, then hose it off when you’re done.
Good to know: pavement can get hot enough to burn in strong sun, so feel it with your hand first and save chalk art for the morning, evening or a shady spot.
10. Straw Blow Painting
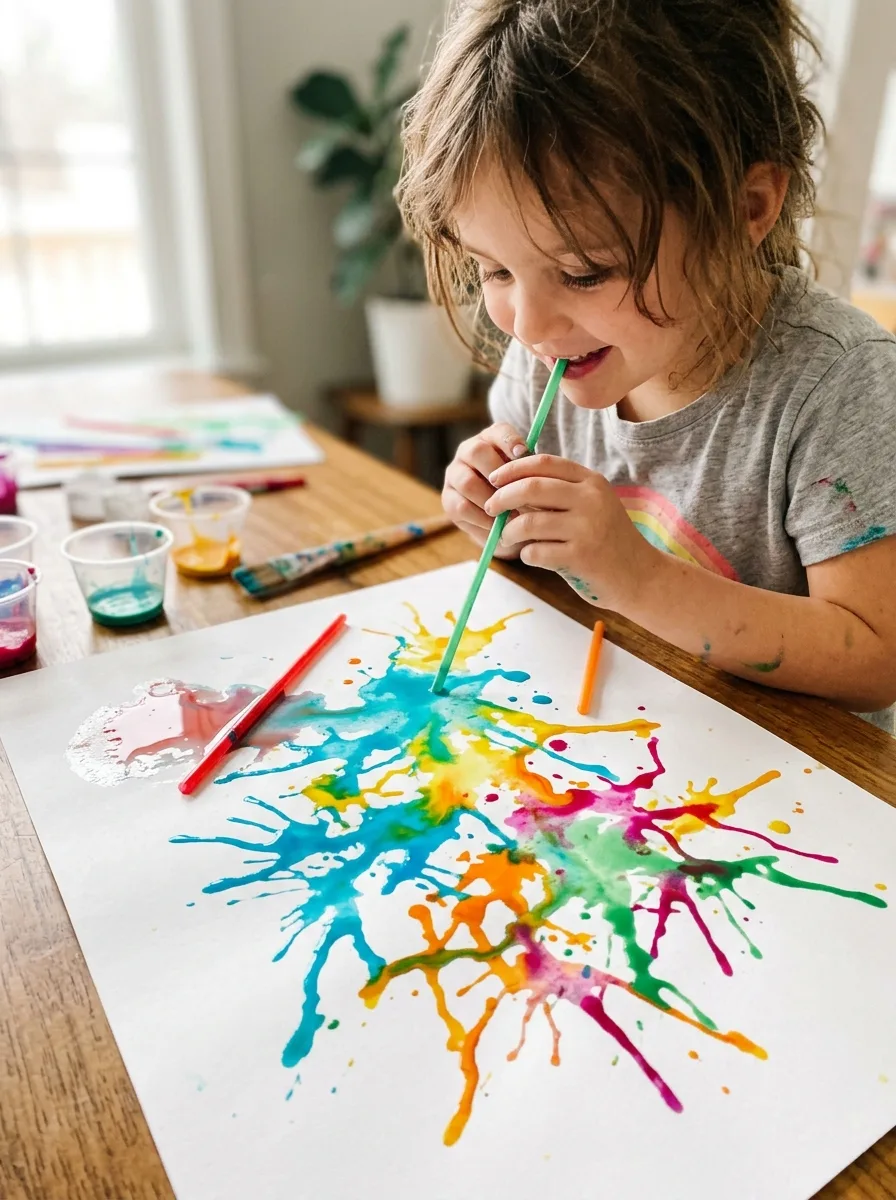
Drop a few spoonfuls of runny, watered-down paint onto paper. Children blow through a straw to push the paint across the page into branching shapes, then add another color and repeat. Once the paint is dry, turn the shapes into trees, fireworks, monsters or seaweed with markers.
Good to know: practice blowing through the straw onto a hand first, since young children sometimes suck instead of blow; use AP-seal washable paint and take a break if anyone feels dizzy.
11. Sun Catchers
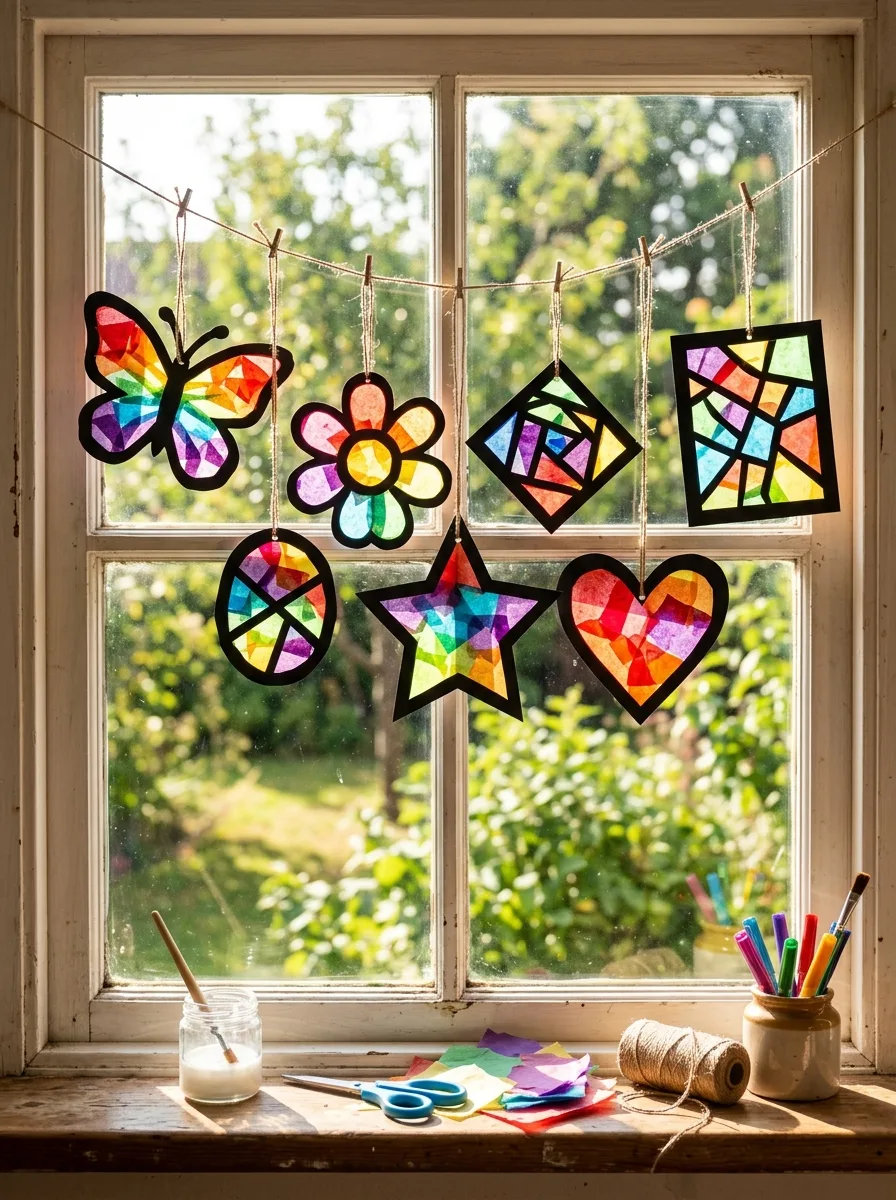
Cut a frame from card, or cut the center out of a paper plate, and stick clear contact paper across the back, sticky side up. Children press small pieces of colored tissue paper onto the sticky side. Cover with a second sheet of contact paper, trim to shape and hang it in a sunny window. These summer window painting ideas pair well with sun catchers.
Good to know: tape the contact paper to the table sticky side up, with the backing peeled off, so it doesn’t curl while small hands work.
12. Puffy Shaving Cream Paint
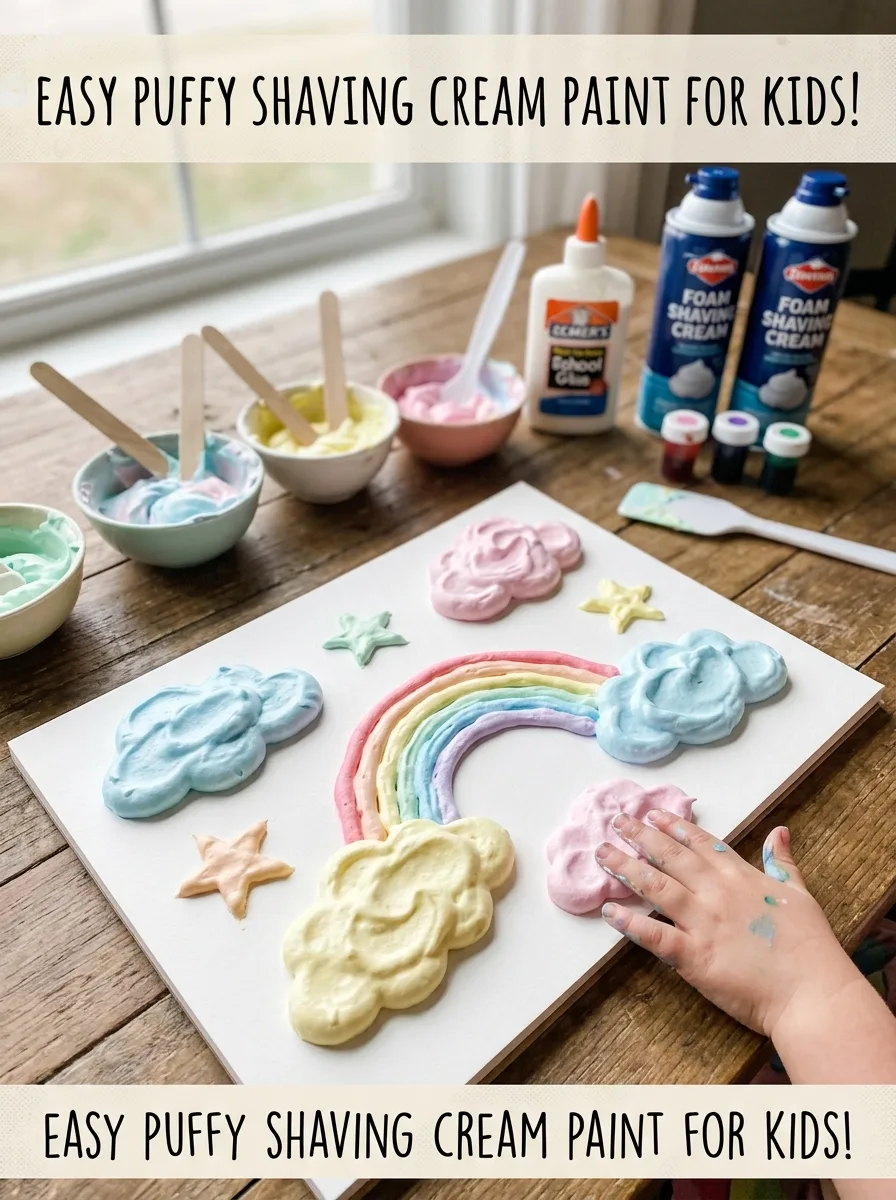
Mix roughly equal amounts of foam shaving cream and white school glue in a bowl, then stir in a little washable paint for color. Children spread or squeeze the mixture onto card to make clouds, ice cream scoops or waves. It dries raised and puffy; leave it lying flat until it has hardened.
Good to know: an adult should dispense the shaving cream; many labels warn to avoid contact with eyes and to keep it out of children’s reach, so skip this project for children who still put things in their mouths.
13. Fruit and Veggie Stamping
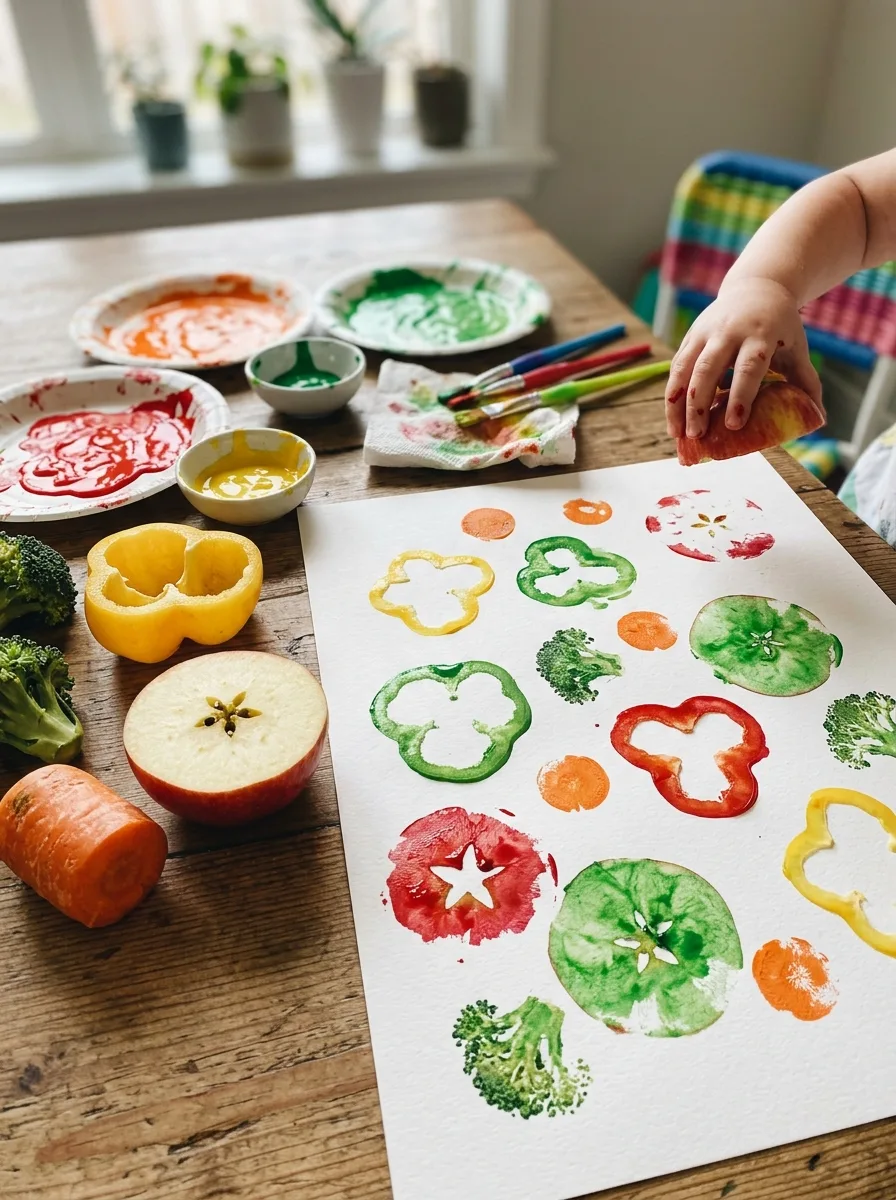
Cut produce in half to show its pattern: an apple cut across the middle shows a star around the seeds, the base of a celery bunch prints like a rose, and a bell pepper cut across prints a clover shape. Blot the cut sides dry, dip them in paint and press onto paper. An adult does all the cutting.
Good to know: pat the cut surface dry with a paper towel before painting, or the juice waters the paint down; throw the painted produce away afterward instead of eating it.
14. Painted Rocks
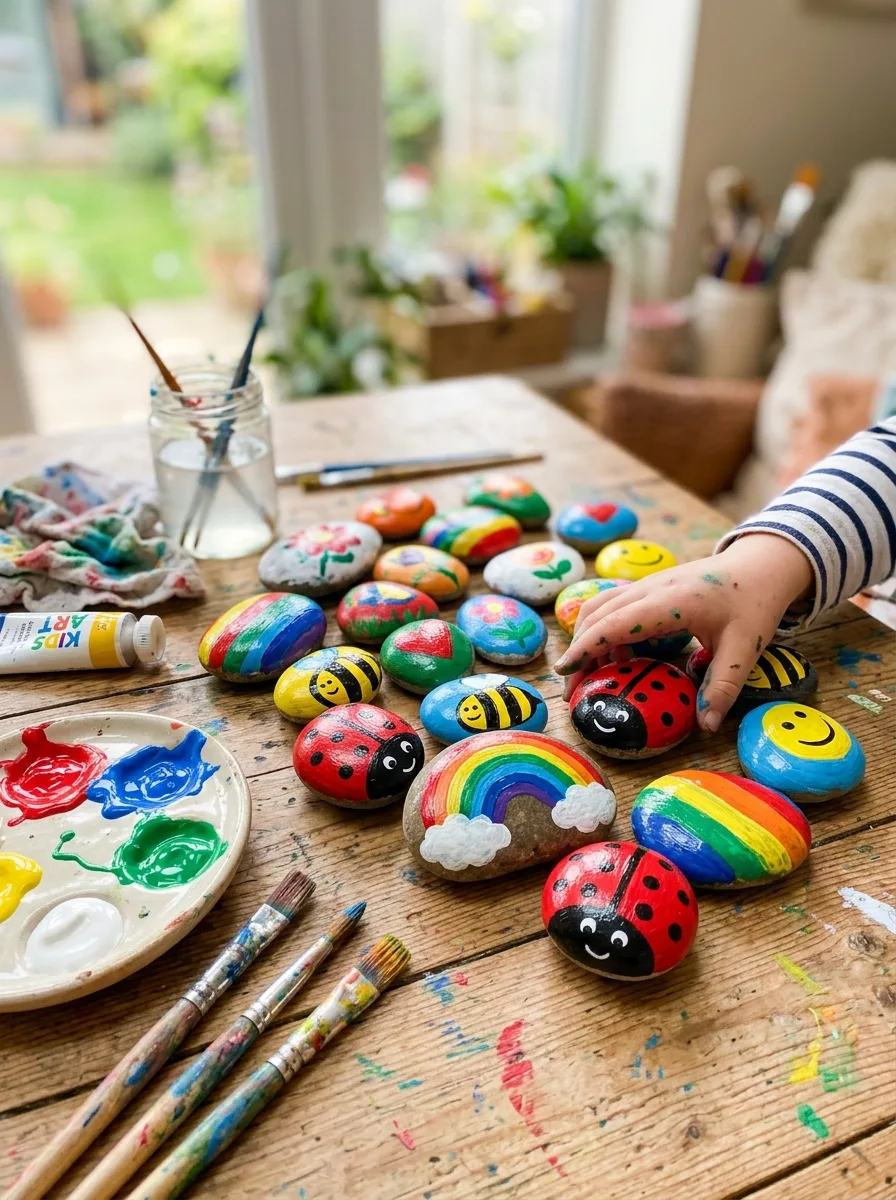
Collect smooth, flat rocks, wash them and let them dry. Children paint a base color, then add faces, ladybugs, patterns or short words once it’s dry. Acrylic or paint markers last longest on stone; washable tempera is easier for young kids if the rocks stay indoors. The painted rock turtle in these turtle painting ideas is an easy design to copy.
Good to know: an adult should apply any spray sealer, outdoors and following the label. Keep rocks small enough to swallow away from under-3s, and don’t leave painted rocks in national parks, where rangers have asked visitors not to.
15. Sun Print Art
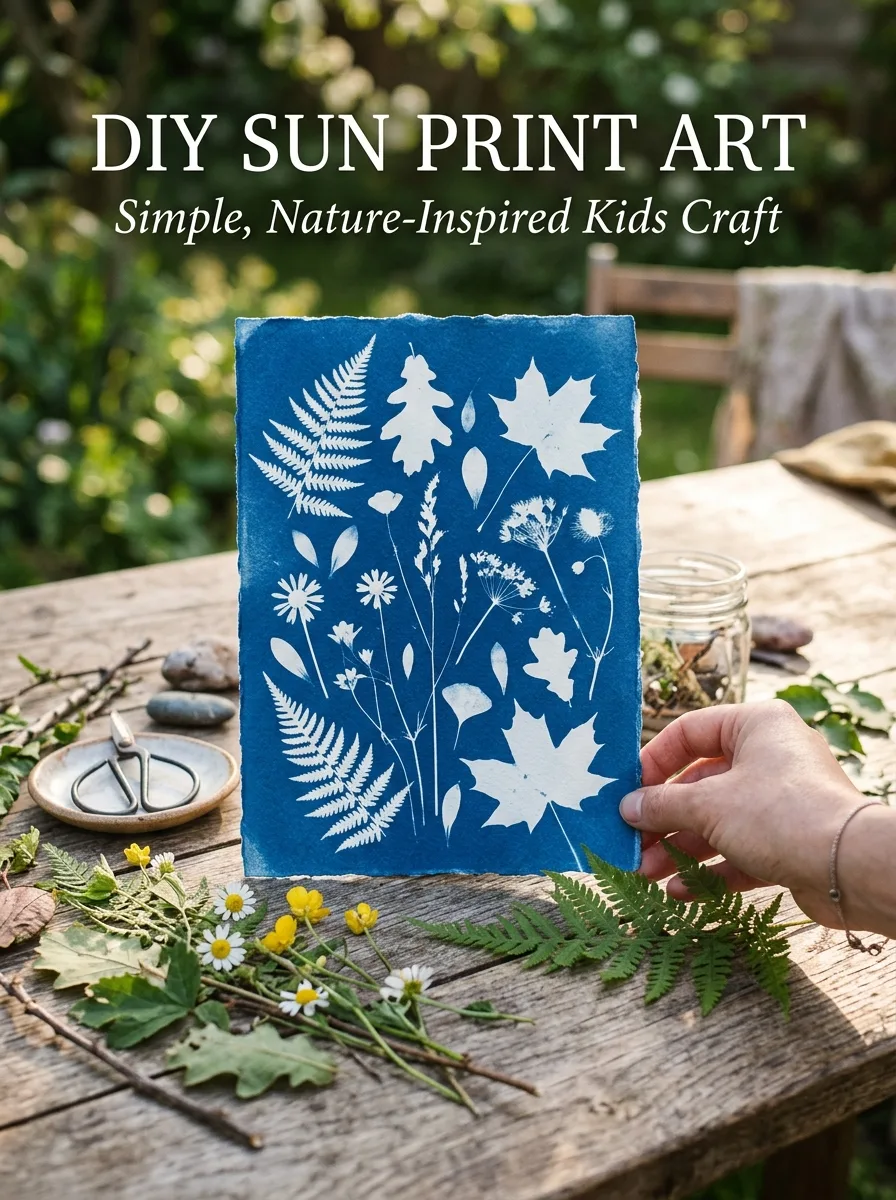
Sun print paper, sold in kits, changes color in sunlight. In the shade, lay leaves, flowers or small flat objects on the blue side, then carry it into direct sun. When the paper has faded to a very pale blue, take it back to the shade, remove the objects and rinse the paper in water. The background turns deep blue and the shapes stay white.
Good to know: exposure time depends on how bright the sun is, from a few minutes in strong sun to much longer under clouds, so follow the times on the package.
16. Nature Leaf Rubbing
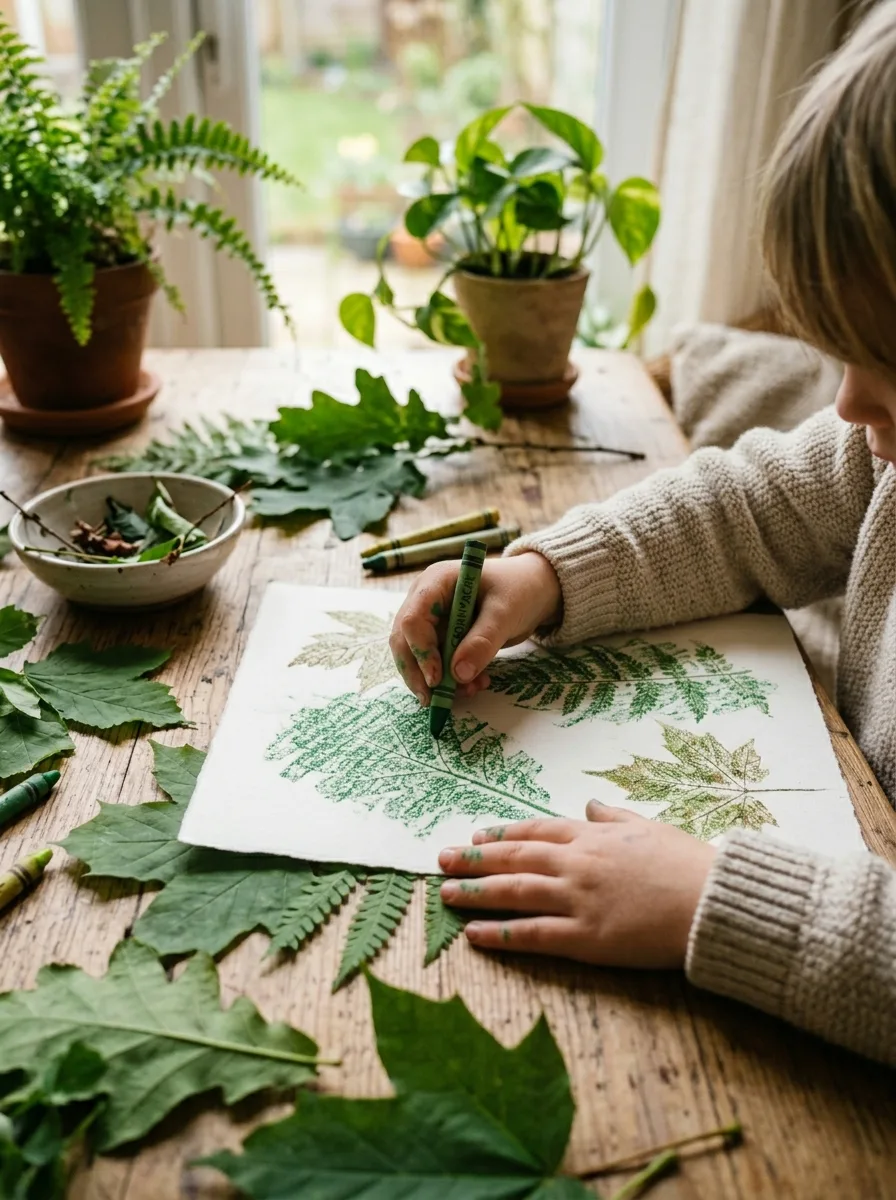
Collect leaves of different shapes and sizes. Place one under thin paper, vein side up, and rub over it with the side of a peeled crayon until the outline and veins appear. Move the paper and repeat with other leaves and colors to fill the page, overlapping some shapes.
Good to know: fresh, flexible leaves print better than dry ones, which crumble; tape the paper down so it doesn’t slide while children rub.
17. Squirt Gun Painting
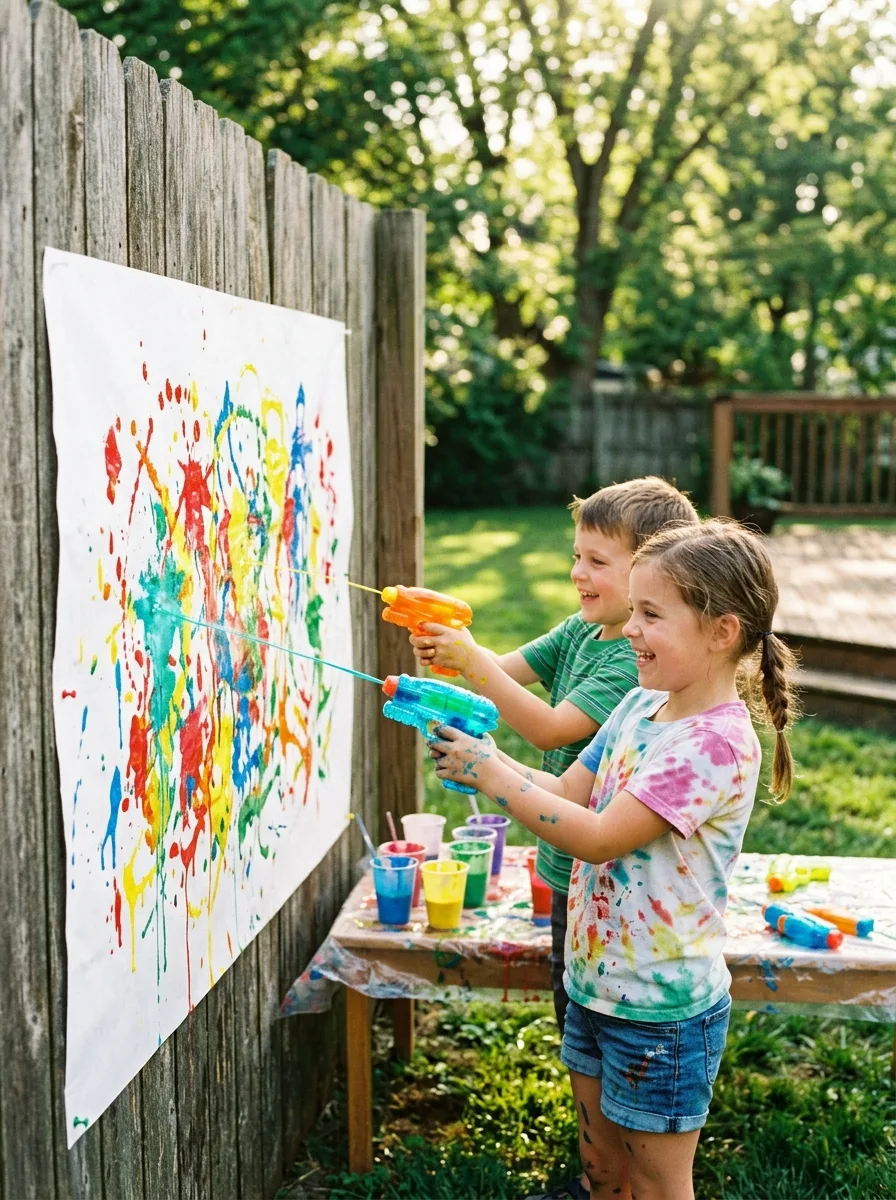
Fill squirt guns or spray bottles with washable paint thinned with water until it sprays easily. Clip large paper or an old sheet to a fence, or lay it on the grass, and let children spray it from a short distance. Layer colors to see how they mix where they overlap.
Good to know: set one rule before you start: aim only at the paper, never at people or pets, since paint stings in the eyes. Rinse the squirt guns with clean water straight after so they don’t clog.
18. Q Tip Pointillism
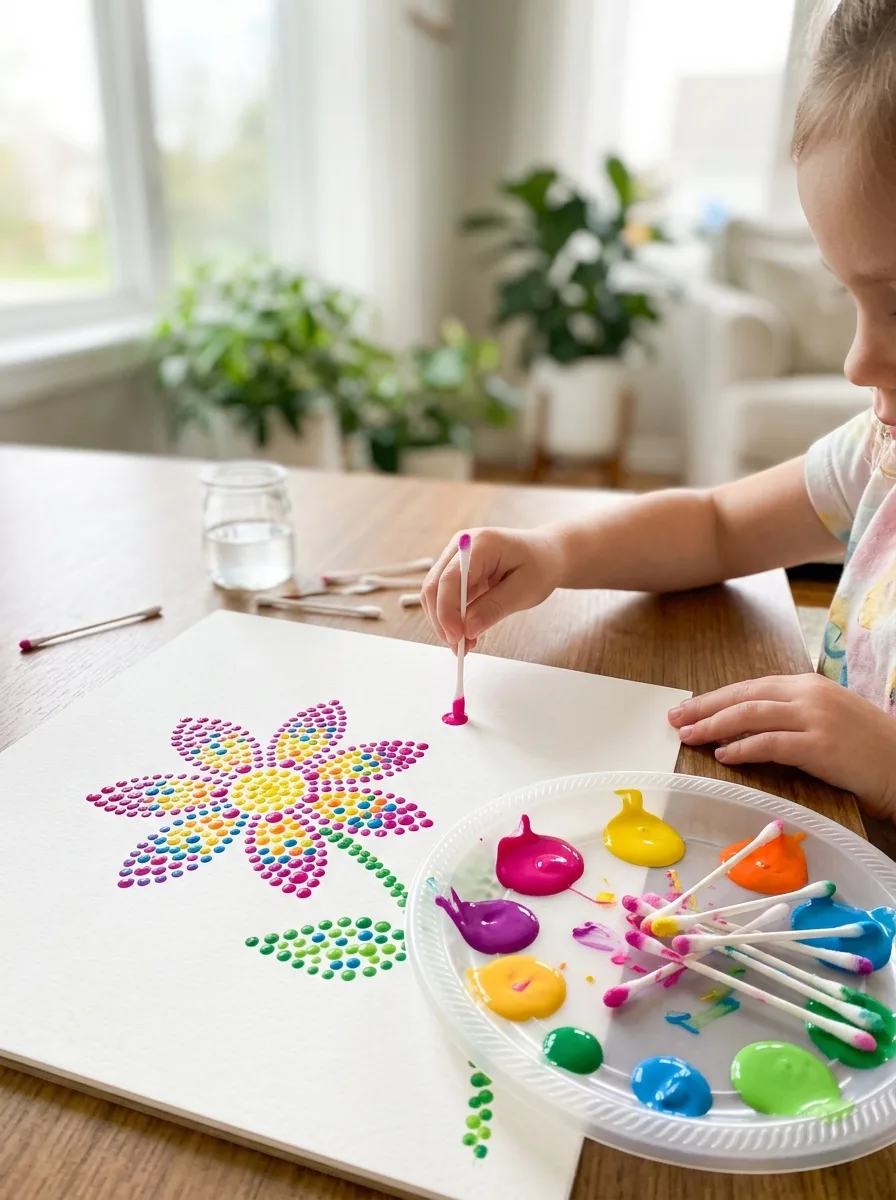
Draw a simple outline, such as a sun, a fish or a flower, on paper. Children dip cotton swabs in paint and fill the shape with dots, using a separate swab for each color. Dots of two colors placed close together, such as blue and yellow, look like a mixed color from a distance.
Good to know: before you start, show children a picture of Georges Seurat’s A Sunday on La Grande Jatte, a famous painting made from small dots of color.
19. Cardboard Roll Stamping
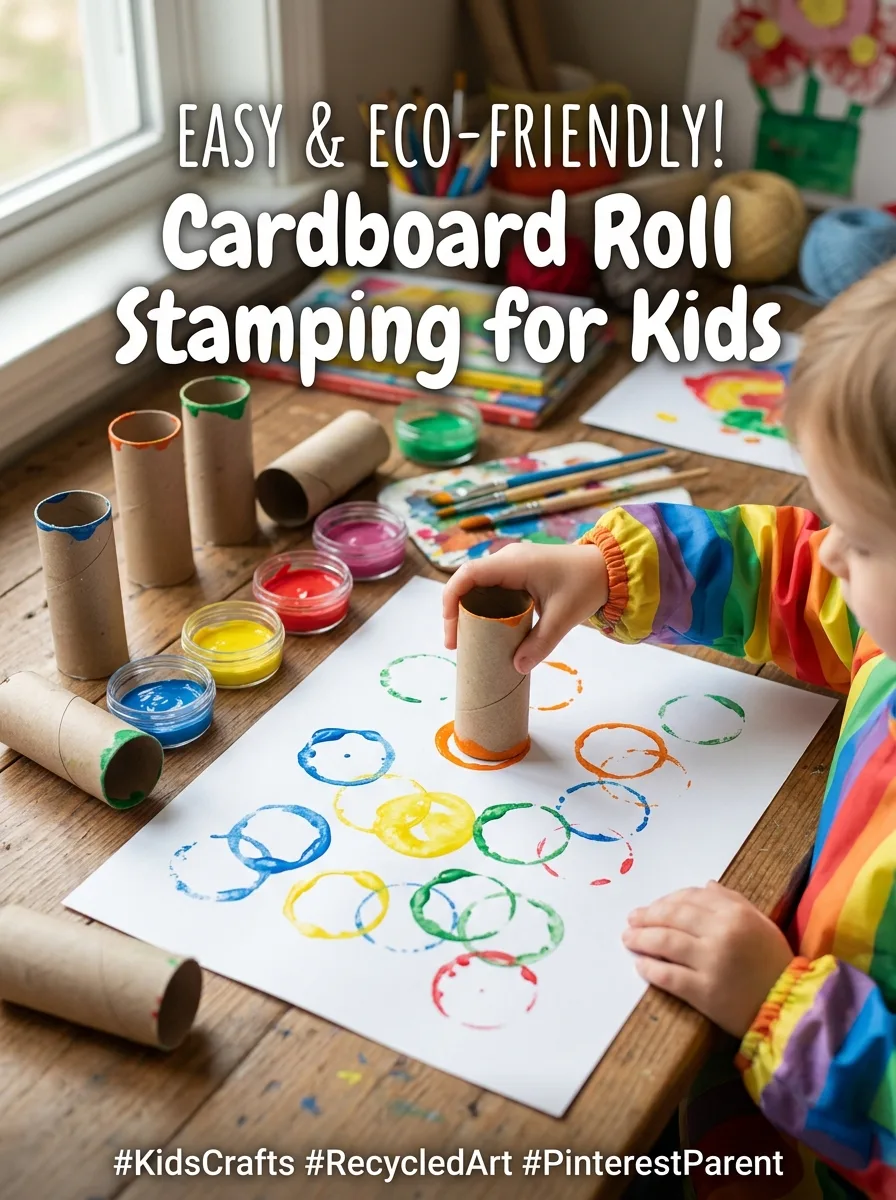
Use empty toilet paper or paper towel tubes as stamps. Dip the end in paint and press it onto paper for circles, or pinch the tube into a heart, oval or teardrop shape first. Overlap rings to make bubbles, flowers or planets, and add details with markers once the paint is dry. These train crafts for preschoolers use cardboard tubes too.
Good to know: pour a thin layer of paint onto a paper plate for dipping; a thick puddle clogs the tube end and blurs the print.
20. Tissue Paper Collage
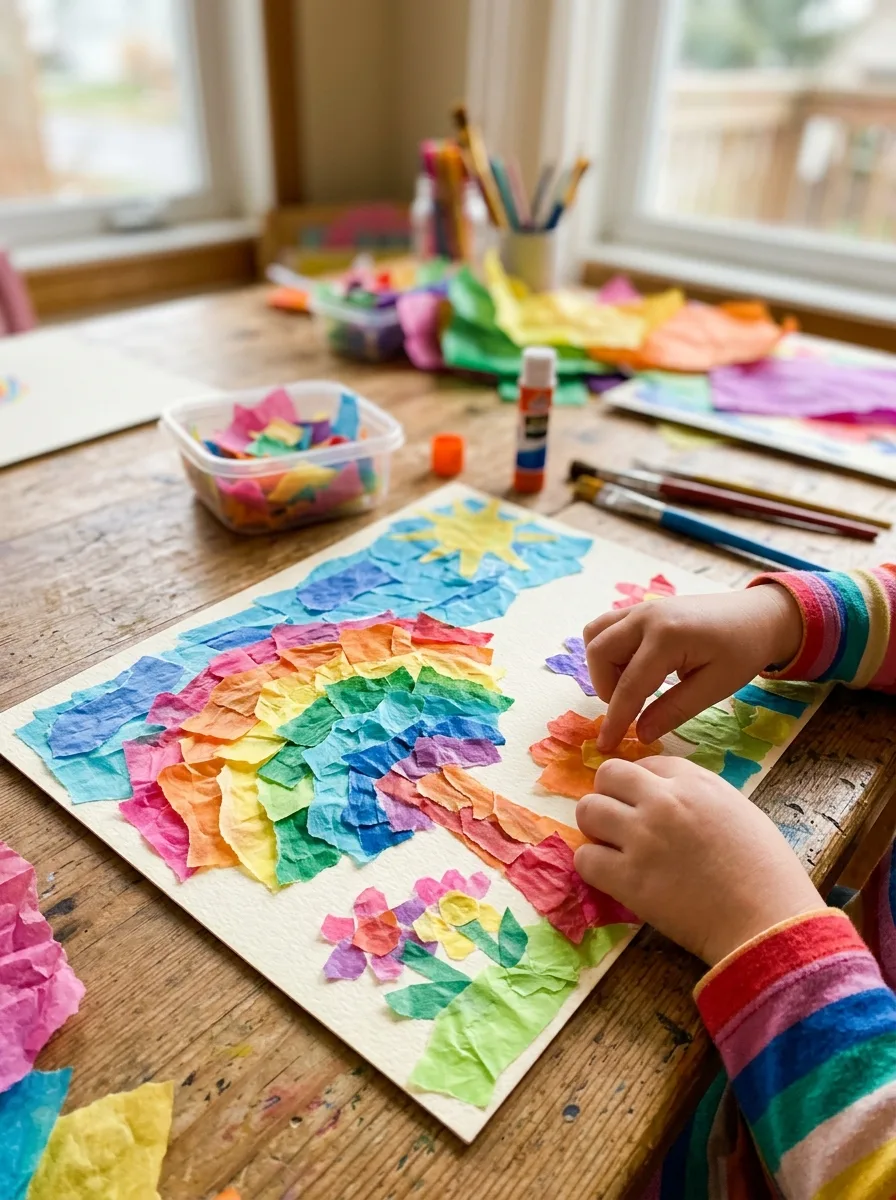
Children tear tissue paper into small pieces and stick them onto card, overlapping colors to make new shades. Brush a thin layer of white glue thinned with a little water onto the card, press the tissue down, then brush another thin coat over the top. Try a sunset, an ocean or a garden.
Good to know: some tissue paper bleeds color when wet, which can stain hands and tables but also gives a watercolor look, so test a scrap first.
21. Chalk Pastel Blending
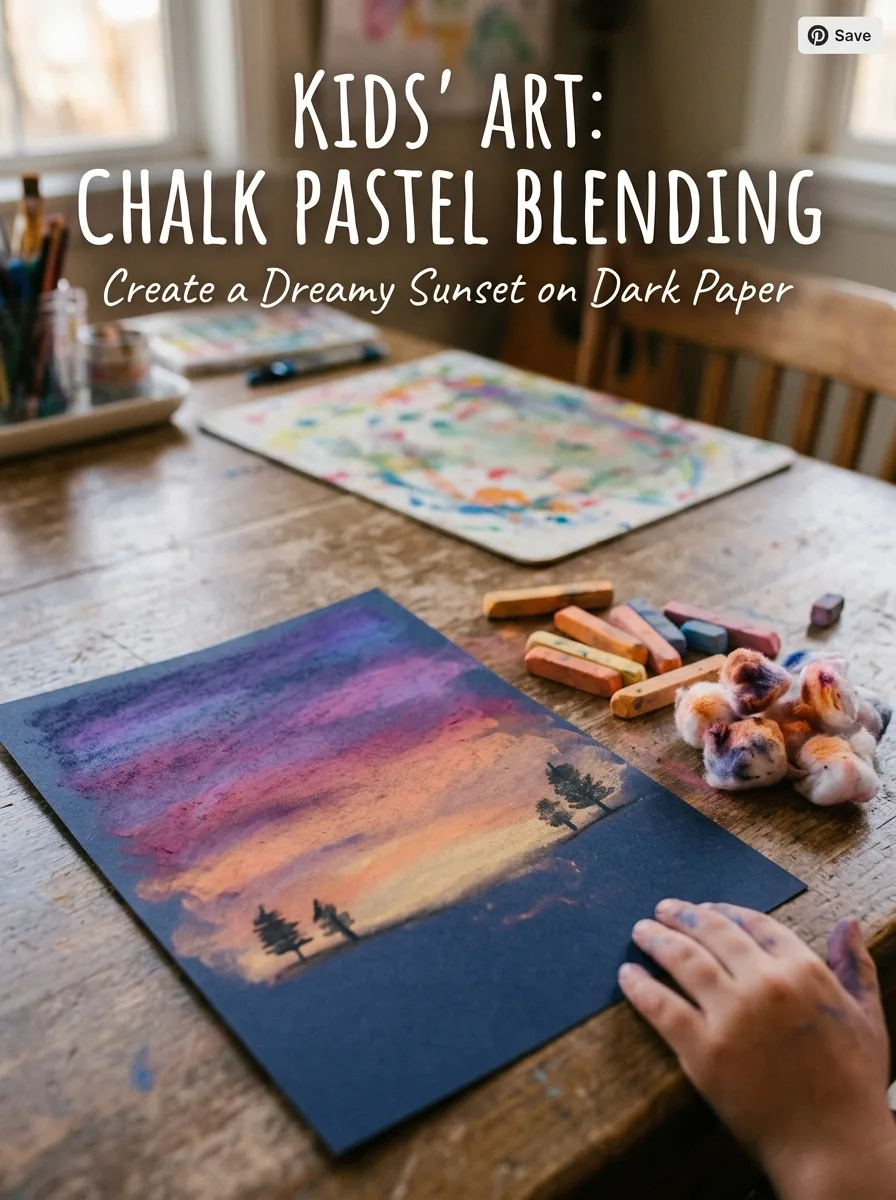
Chalk pastels show up brightly on dark or colored paper. Children draw bands of color, such as orange, pink and purple for a sunset, then blend them with a fingertip, cotton ball or tissue. Add palm trees or birds on top in black as silhouettes.
Good to know: choose pastels with the AP seal and tap the dust off outdoors instead of blowing it. Fixative and hairspray are aerosols for adults to use outside; it’s simpler to store the art between sheets of paper.
22. Foil Texture Art
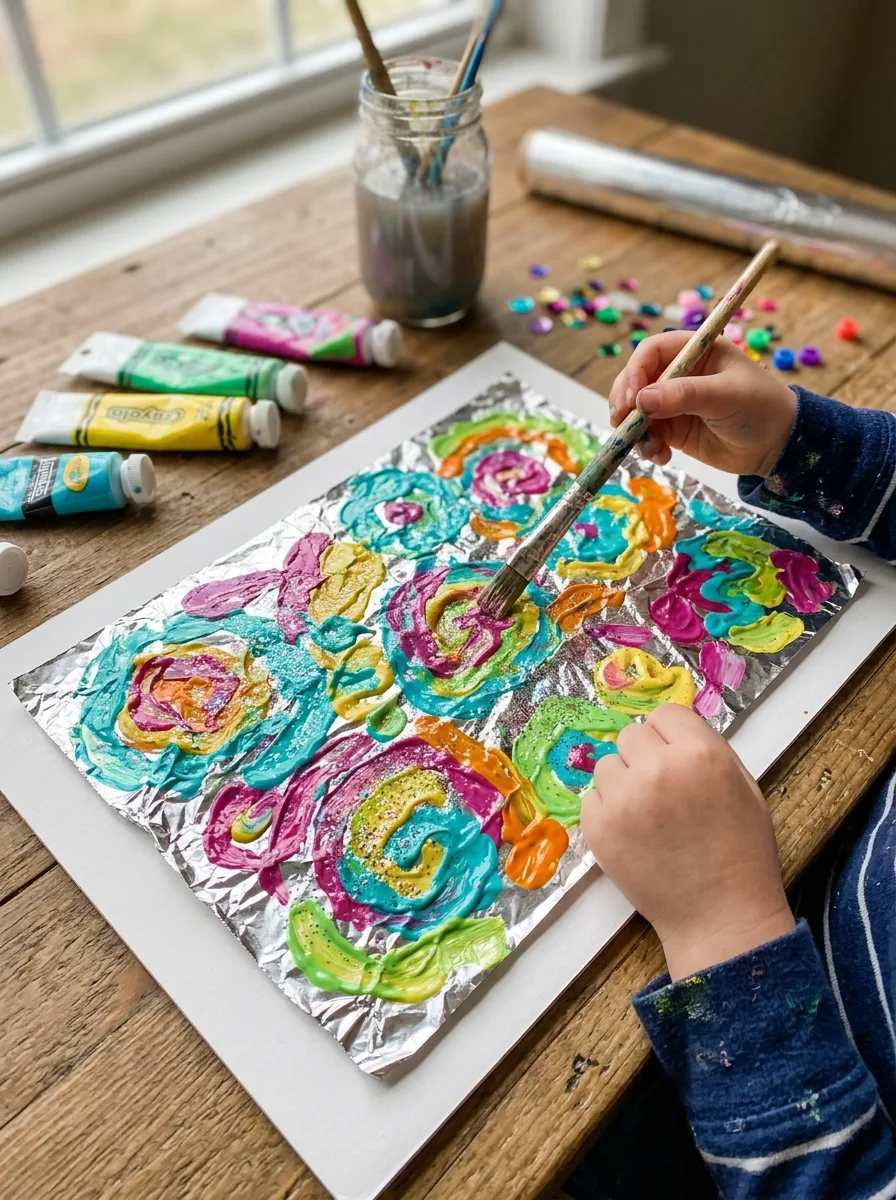
Wrap a sheet of aluminum foil smoothly around a piece of cardboard and tape it at the back. Children paint fish, suns, fireworks or patterns on the shiny side. For a raised design, draw on the cardboard with thick glue first, let it dry, then press the foil over it so the lines show through.
Good to know: washable paint tends to bead up on foil, and a common fix is mixing in a drop of dish soap. Fold the foil edges to the back, since cut edges can be sharp.
23. Ribbon Dancing Paint
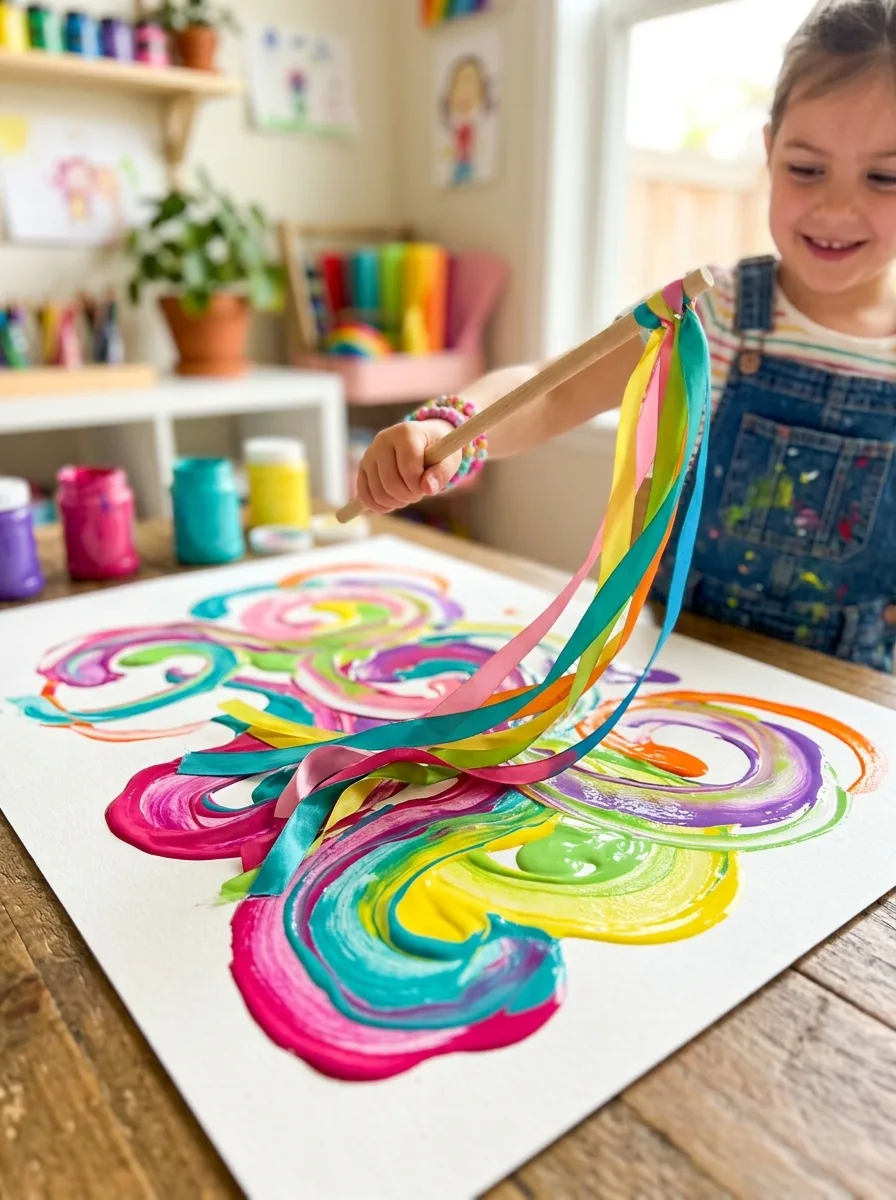
Cut ribbon or strips of fabric into short lengths, and tape a few to a craft stick for a handle. Children dip the ribbon ends in paint and drag, swirl and flick them across large paper on the ground, making looping lines. Put on music and let them paint to the beat.
Good to know: do this outdoors, keep the ribbons short, and don’t let young children wrap them around their necks; put the ribbons away after use.
24. Yarn Wrapped Sticks
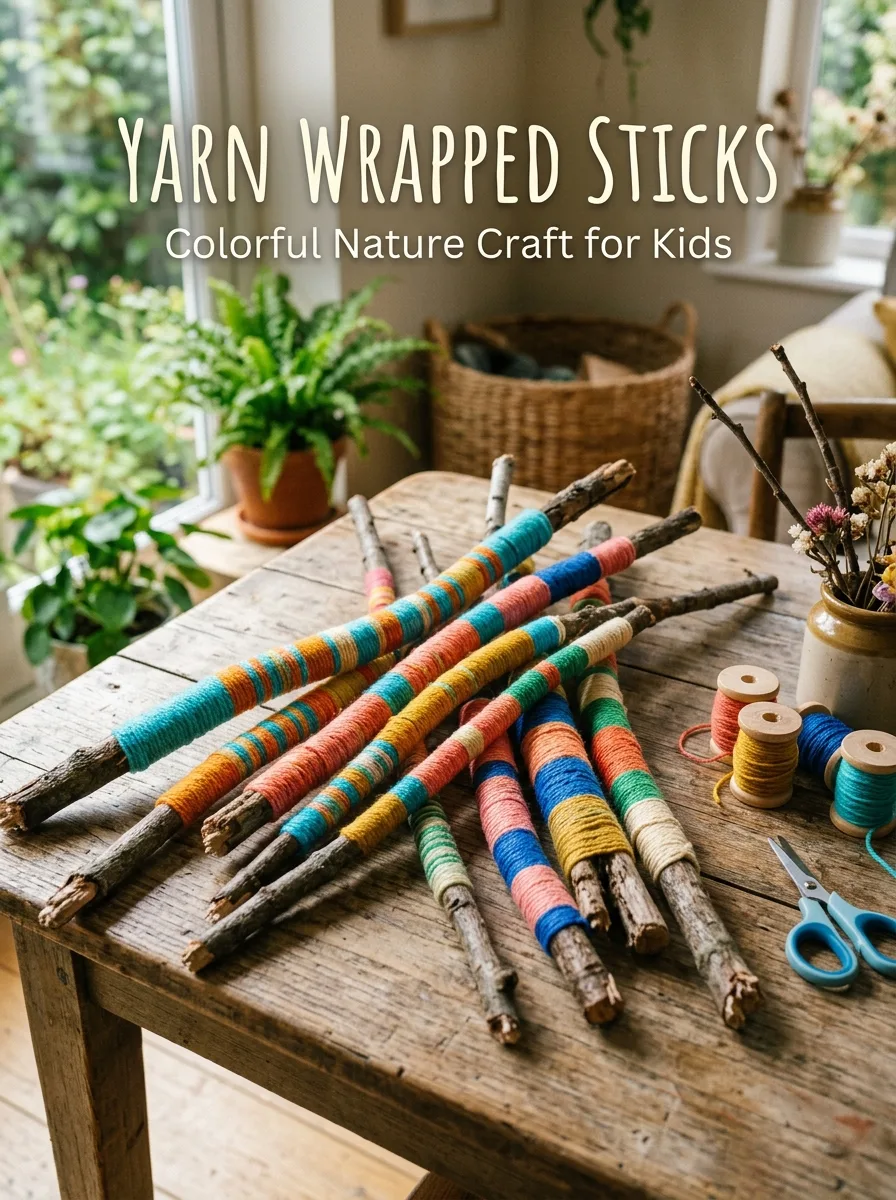
Collect a few sticks from the ground, snap off sharp twigs and peel off loose bark. Tie a piece of yarn near one end of a stick, then wrap it tightly, changing colors to make stripes, and tie off or tuck the end under the last few wraps. Hang several from a longer stick with string for a wall hanging.
Good to know: a dab of glue under the first and last wraps keeps the yarn from sliding; this one suits school-age children who can tie knots.
Common mistakes to avoid
- Giving marbles, pebbles or other small parts to children under 3.
- Using art materials without the ACMI AP seal with young children, or any product with the CL seal.
- Doing outdoor projects in the midday sun or on pavement that’s too hot to touch.
- Letting children use aerosol sprays such as sealers, fixative or hairspray.
- Leaving paint-filled ice cubes where little ones might mistake them for ice pops.
- Skipping old clothes and a covered workspace before messy projects.
Summer art FAQs
Which summer art projects suit toddlers?
Sponge painting, bubble wrap printing, ice cube painting, cardboard tube stamping and sidewalk chalk, with an adult close by and no small parts.
What paint should I use for kids’ art projects?
Washable tempera or watercolor with the ACMI AP seal. Acrylic doesn’t wash out of clothes once it dries, so save it for older children and projects such as painted rocks.
How do I keep kids safe doing art outside in summer?
Work in the shade, avoid the midday sun, use broad-spectrum sunscreen and reapply it, offer water often, and check that pavement and play equipment aren’t too hot to touch.


2 Comments