

23 Easy DIY Girls’ Night Craft Ideas You’ll Love
A craft gives a girls’ night something to do with your hands while you talk, and everyone goes home with something they made. The right choice depends on how much time you have, how much space and mess your group can handle, and whether anyone wants to deal with heat or fumes.
Below are 23 ideas, from no-heat projects like friendship bracelets and vision boards to ones that need more care, such as candles, resin and polymer clay. Each one covers what you need, how to make it, and one thing worth knowing before you start.
Before you set up
Read the labels
Look for the Art & Creative Materials Institute (ACMI) AP seal on paints, markers and glues: it means a toxicologist has reviewed the product and found it non-toxic. Products with ACMI’s CL (Cautionary Labeling) seal carry specific warnings and are meant for adults, so read the whole label before opening them.
Give heat its own station
Candle wax, melt-and-pour soap, polymer clay and hot glue all involve heat. Keep them in one spot that a sober adult looks after, and never leave melting wax or soap unattended. Treat a wax fire like a grease fire: cover the pot with a lid, turn off the heat and never use water. Open a window or run a fan for clay, resin and adhesives.
Keep crafts and drinks apart
Put drinks and snacks on a separate table. Cups of paint water look a lot like drinks, and pots, spoons and baking sheets used for wax, soap, resin or clay should not go back to cooking afterward.
Protect the table and clothes
Cover the table with a plastic cloth or kraft paper, put paper towels and a trash bag within reach, and ask guests to wear clothes they don’t mind staining if you’re painting or tie-dyeing.
The 23 crafts at a glance
| Craft | Skill | Heat, fumes or irritants | Ready to take home |
|---|---|---|---|
| Sip and paint canvas | Beginner | None | Same night |
| Candles | Intermediate | Hot wax | Once the wax sets |
| Bath bombs | Beginner | Powders irritate eyes | After drying |
| Friendship bracelets | Beginner | None | Same night |
| Polymer clay earrings | Intermediate | Oven baking | After baking and cooling |
| Painted wine glasses | Beginner | Oven, for some paints | After the paint cures |
| Lip gloss | Beginner | Some recipes melt wax | Once set |
| Tie-dye shirts | Beginner | Dye; wear gloves | After the dye sets and is rinsed |
| Clay trinket dishes | Beginner | None | After drying |
| Scrunchies | Intermediate (sewing) | None | Same night |
| Vision boards | Beginner | None | Same night |
| Flower crowns | Beginner | None | Same night |
| Resin coasters | Advanced | Resin; gloves and ventilation | After full cure |
| Macrame keychains | Beginner | None | Same night |
| Painted tote bags | Beginner | Iron, for some paints | After drying |
| Melt-and-pour soap | Beginner | Hot soap | Once hardened |
| Embroidery hoop art | Beginner | None | Same night or later |
| Mini terrariums | Beginner | None | Same night |
| Mosaic tile coasters | Intermediate | Grout; gloves | After the grout cures |
| Beaded wine charms | Beginner | None | Same night |
| Pressed flower frames | Beginner | None | Same night, if flowers are pressed ahead |
| Phone case decorating | Beginner | Some adhesives | After drying |
| Mini wreaths | Beginner | Hot glue | Same night |
1. Sip and Paint Canvas Night
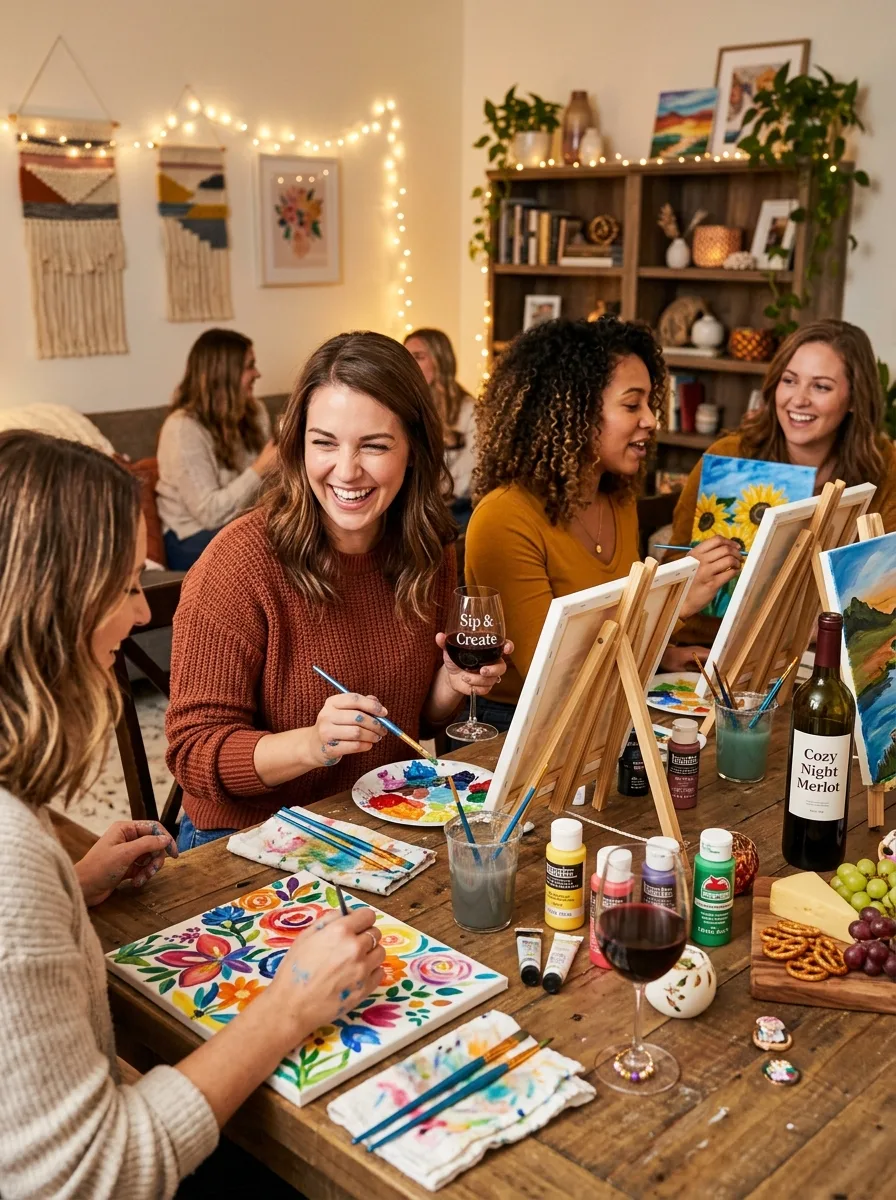
Give each guest a small canvas, two or three brushes, a cup of water and a palette of acrylic paints. Pick one simple subject, such as a sunset, a vase of flowers or blocks of color, and sketch it lightly in pencil first. Paint the background before the details, and let each layer dry for a few minutes before painting over it. For a theme, these moon painting ideas work well on small canvases.
Good to know: acrylic paint rinses out of brushes and clothes with water while it’s wet but is hard to remove once dry, so rinse brushes often and wipe spills right away.
2. Homemade Candle Making
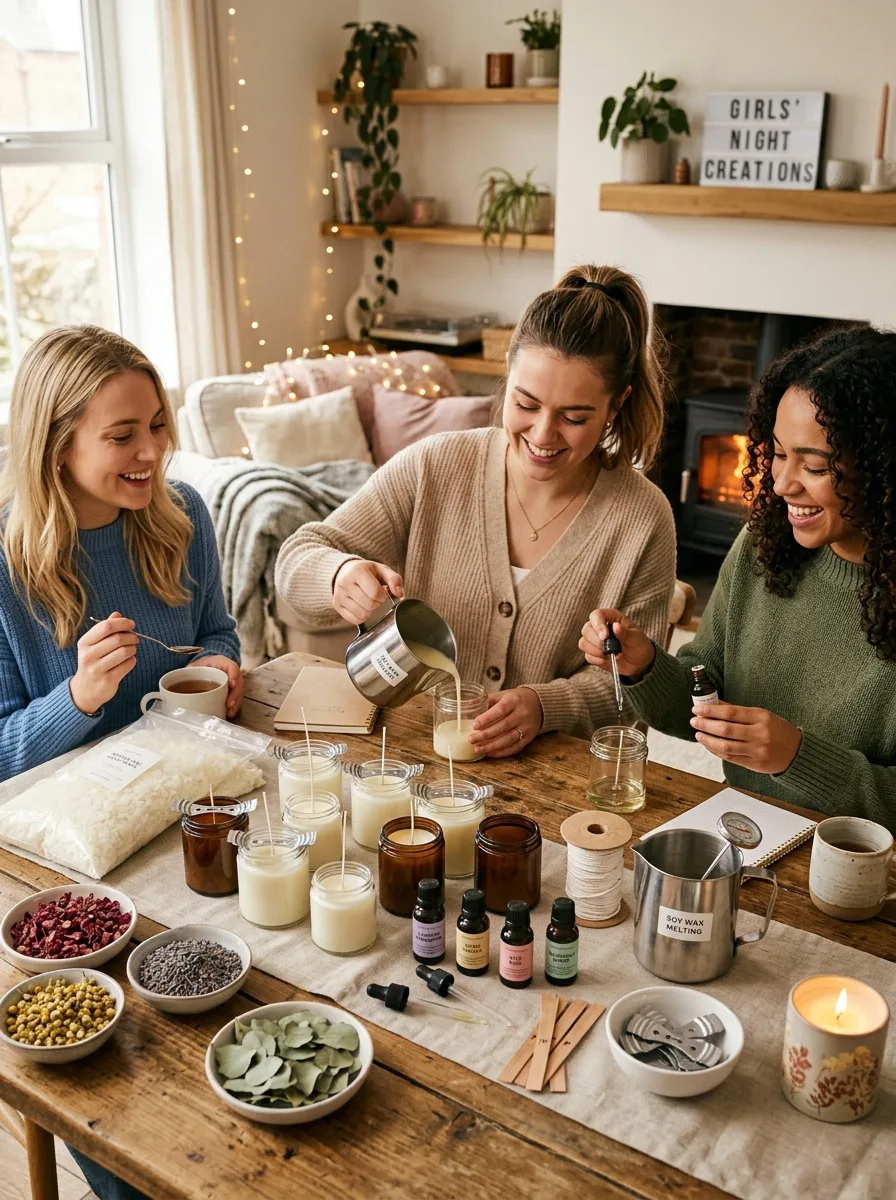
Melt soy wax in a double boiler, such as a pouring pitcher set in a pan of simmering water, rather than over direct heat. Use a thermometer so you can follow the wax maker’s temperatures for adding fragrance and pouring. Stick a pre-tabbed wick to the bottom of each heat-safe jar, stir in a fragrance oil made for candles at the rate the supplier gives, then pour slowly and keep the wick centered while the wax sets.
Good to know: leave dried flowers and herbs out of the wax. The National Candle Association found that candles with embedded botanicals can be a fire hazard, because the plant material ends up in the melted wax near the flame. A pan used for wax shouldn’t be used for food again.
3. DIY Bath Bombs
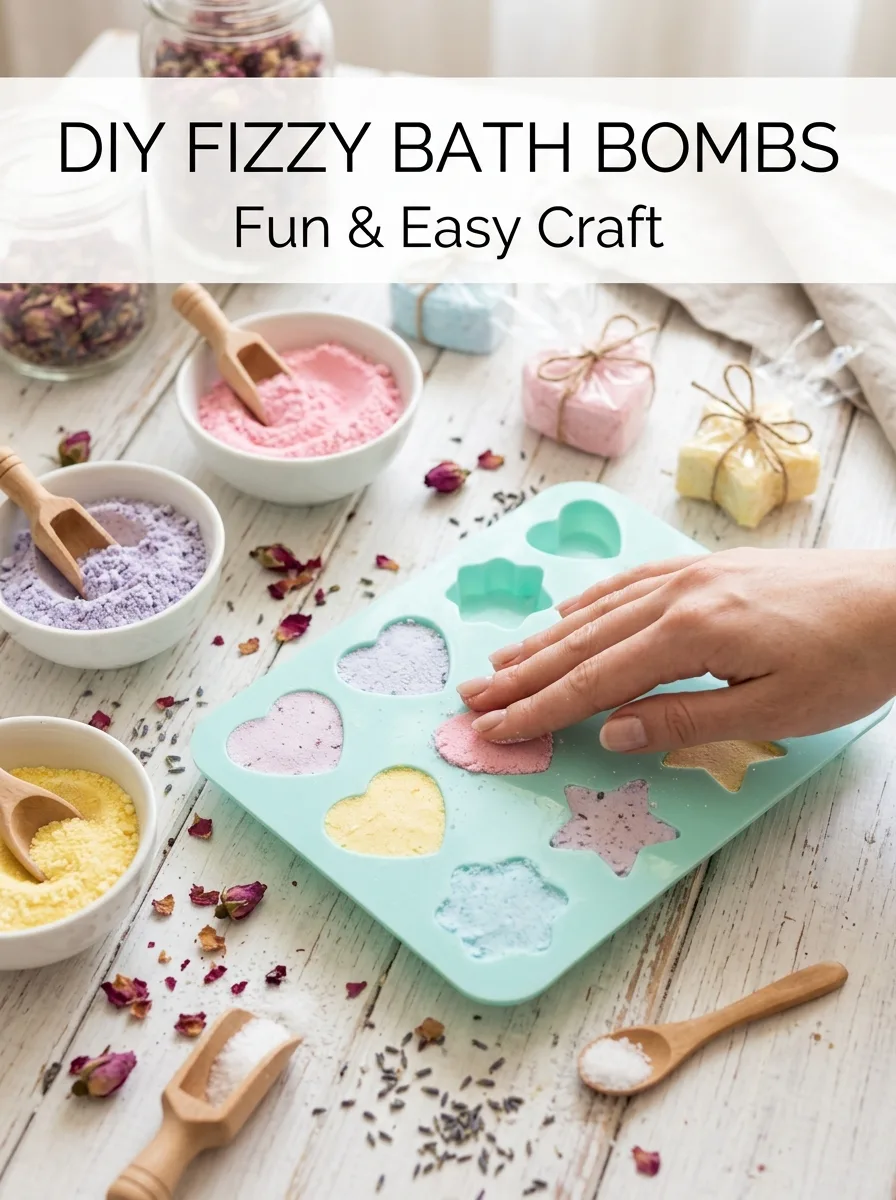
A basic bath bomb is baking soda and citric acid, often with cornstarch, a little oil and a fragrance, held together with a light mist of water or witch hazel. Mix the dry ingredients well, add the oil and scent, then spritz and stir until the mix holds its shape when squeezed. Pack it firmly into molds, unmold carefully and let the bombs dry until hard before wrapping them.
Good to know: wear gloves and keep the powder away from eyes; citric acid safety data sheets list it as an eye irritant. Use only colorants sold for bath products, and if you give bath bombs away, FDA treats the maker as responsible for a homemade cosmetic’s safety and labeling.
4. Friendship Bracelets
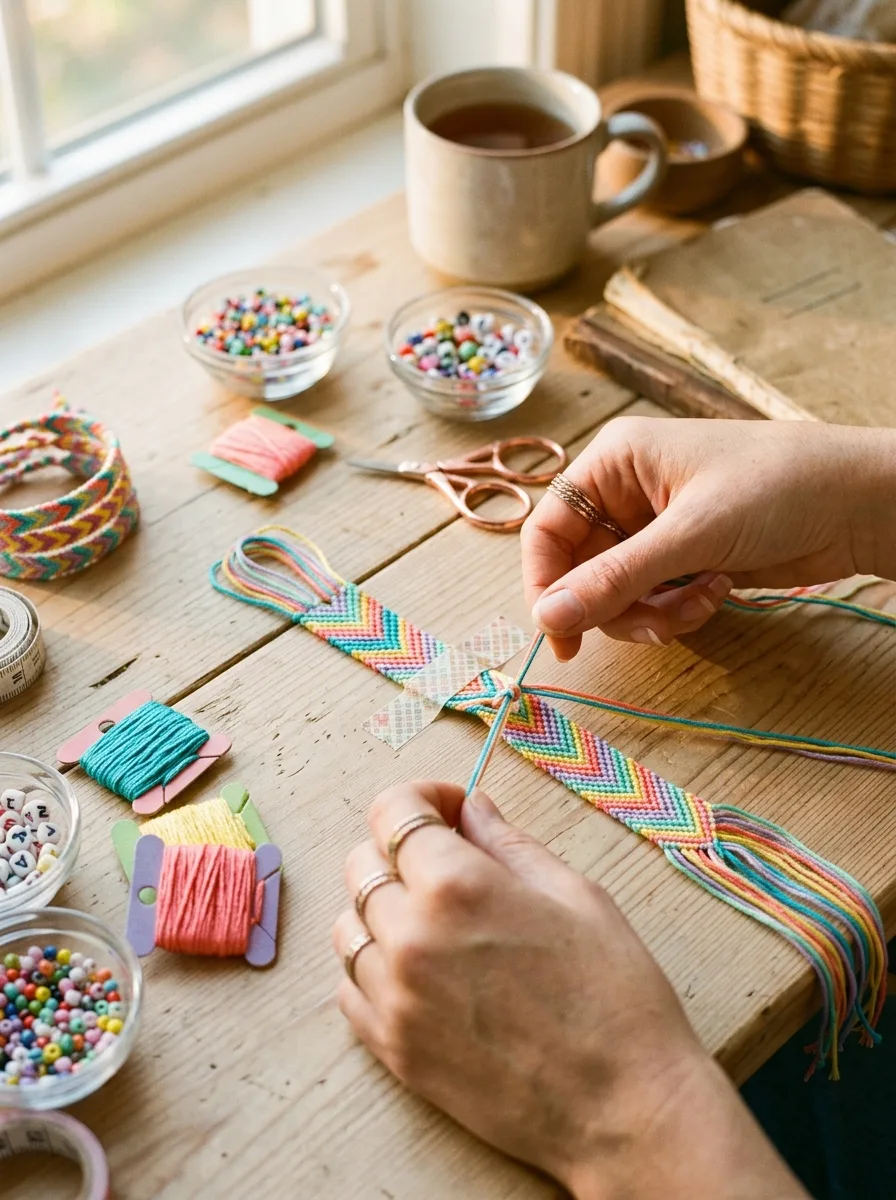
Cut several lengths of embroidery floss, knot them together at one end, and tape the knot to the table or clip it to a clipboard so it stays put while you work. Beginners can start with a simple braid or the forward knot used for candy-stripe bracelets. Anyone who wants a faster project can string beads on stretch cord instead. Swap bracelets at the end of the night.
Good to know: cut each strand longer than you think you need. Knotting uses up floss quickly, and adding thread partway through is fiddly.
5. Polymer Clay Earrings
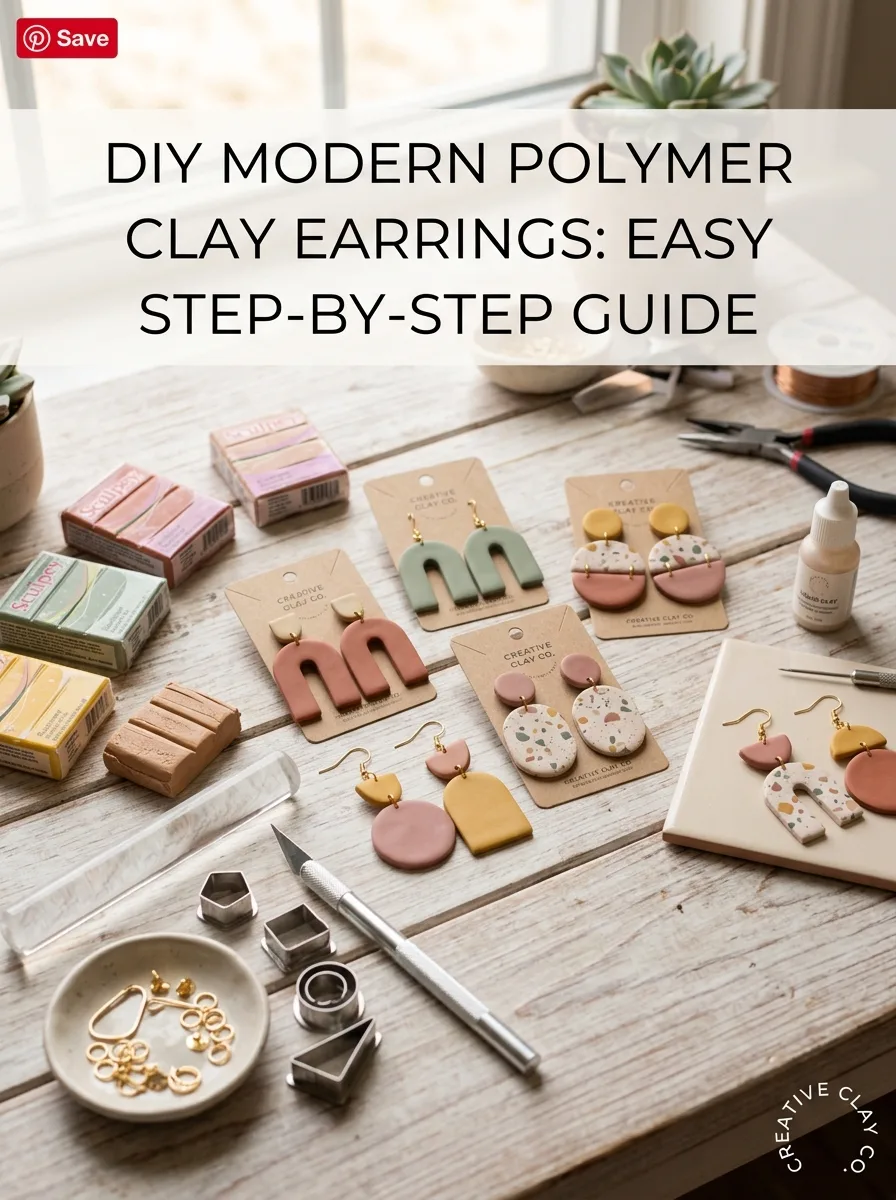
Knead the clay until it’s soft, roll it to an even thickness, and cut shapes with small cutters or a craft knife. Pierce holes for jump rings before baking. Bake on a ceramic tile, glass dish, metal sheet or oven-safe clay mat at the temperature and time on the package, let the pieces cool, then sand rough edges and attach jump rings and ear wires with flat-nose pliers.
Good to know: use an oven thermometer, since ovens often run hotter than the dial, and overheated clay can scorch and give off irritating fumes. Sculpey advises good ventilation while baking, an adult in charge of the oven, and keeping clay off surfaces used for food.
6. Painted Wine Glasses
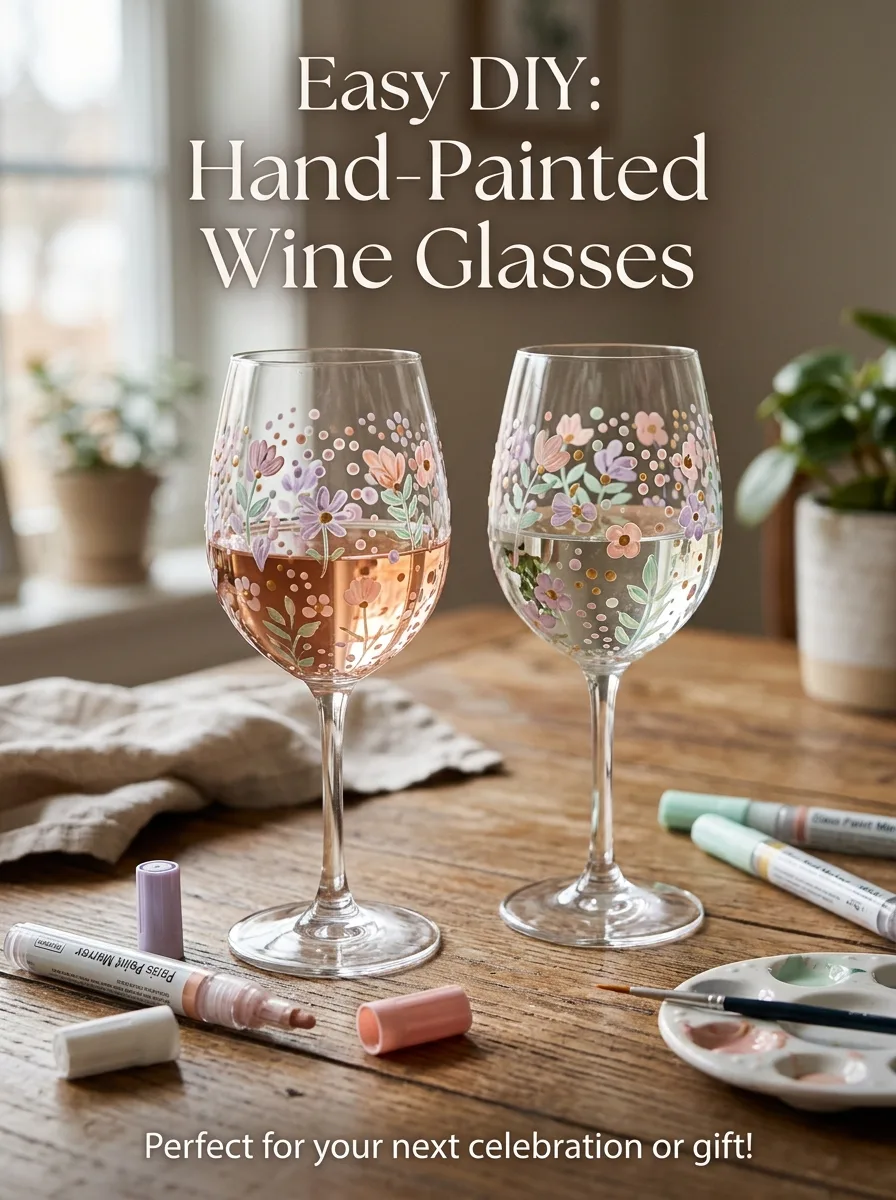
Wash the glasses, then wipe the area you plan to paint with rubbing alcohol so the paint grips. Use paint or paint markers made for glass and keep the design on the lower bowl, the stem or the base. Dots, initials, stripes and small flowers are easy for beginners, and these heart pattern painting ideas have more simple patterns. Let the paint dry, then cure it exactly as the label says.
Good to know: leave the rim bare. Plaid, which makes FolkArt glass paints, recommends keeping the top 3/4 inch of the glass free of paint, because food and drinks shouldn’t touch painted areas. If the paint needs baking, put the glass in a cool oven and let it cool inside, since heating gradually avoids breakage.
7. DIY Lip Gloss
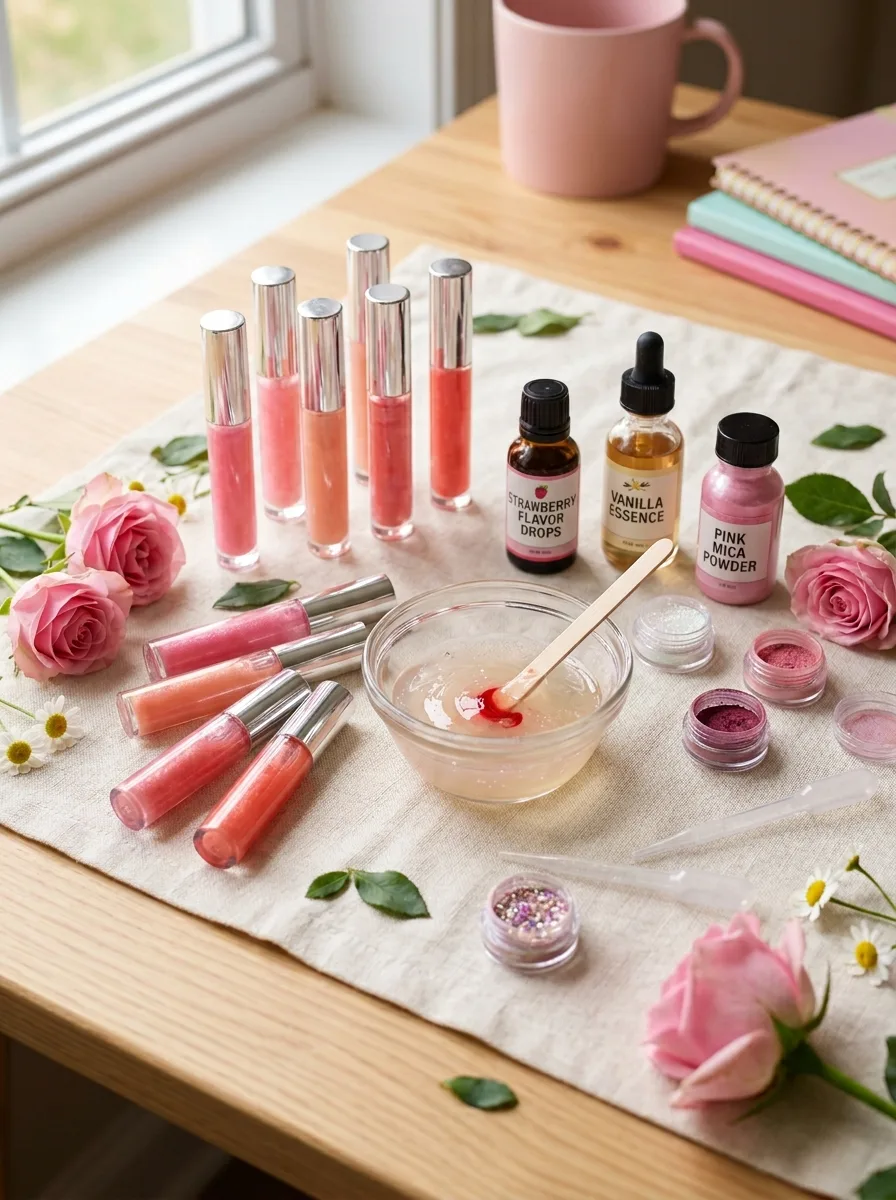
Most simple recipes use a ready-made lip gloss base, or a little beeswax melted into a skin-safe oil, plus a lip-safe colorant and a flavor oil. Mix small batches in a clean cup, fill tubes or pots with a pipette or small funnel, and let them set. Label each one with the date and the ingredients so anyone with an allergy can check.
Good to know: buy colorants and flavor oils sold for lip products. FDA requires color additives in cosmetics to be approved for their intended use, and a color approved for skin is not automatically approved for lips. Craft glitter and candle dye don’t belong in lip gloss, and glosses shouldn’t be shared.
8. Tie Dye Shirts
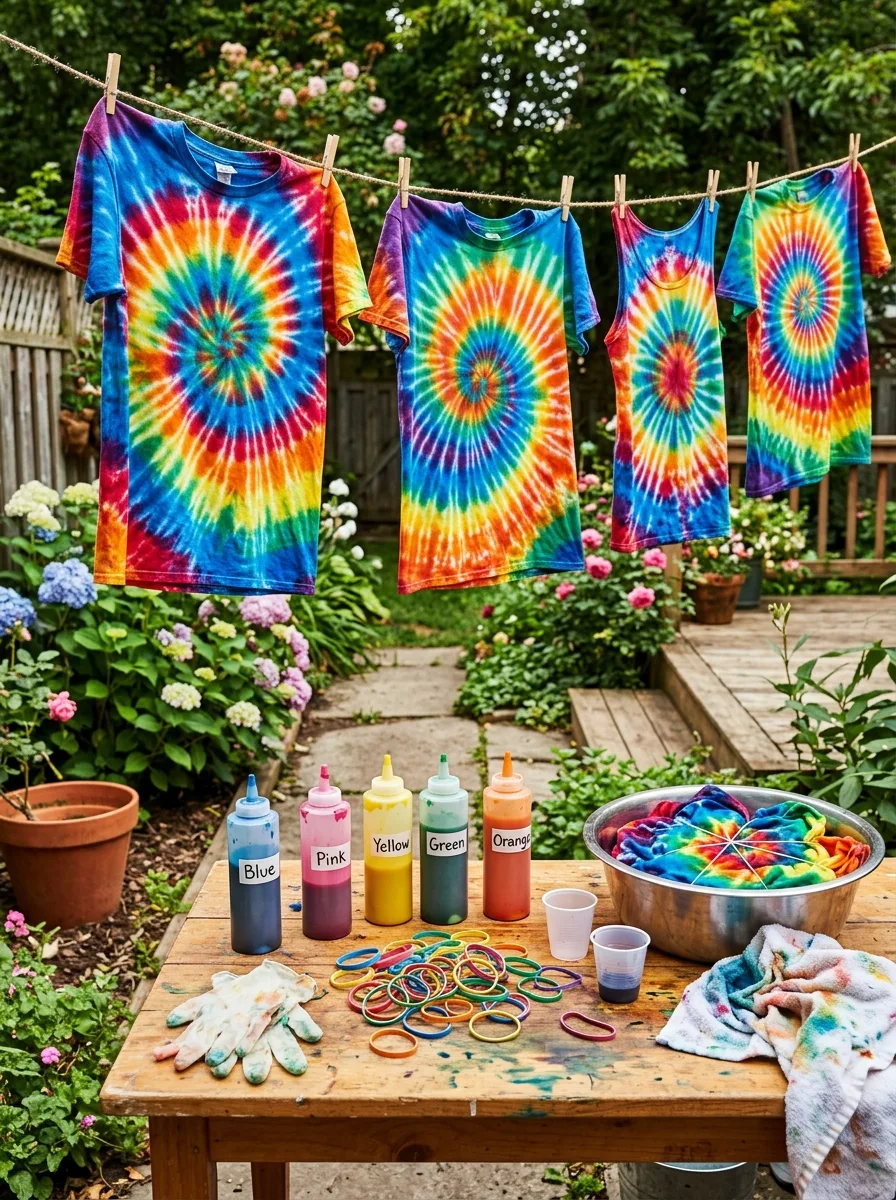
Start with pre-washed cotton or other natural-fiber shirts. Fold, twist or scrunch each one and bind it tightly with rubber bands, then squeeze fiber-reactive dye onto each section until it’s soaked through. Seal the shirt in a plastic bag so it stays damp while the dye sets. Rinse in cold water with the bands on, untie, keep rinsing until the water runs fairly clear, then machine wash.
Good to know: plan for the shirts to go home in bags: Dharma Trading suggests letting the dye sit at least 4 hours and up to 24 for the brightest colors, and longer when it’s cool. Wear gloves throughout, and a dust mask if you mix dye or soda ash from powder.
9. Clay Trinket Dishes
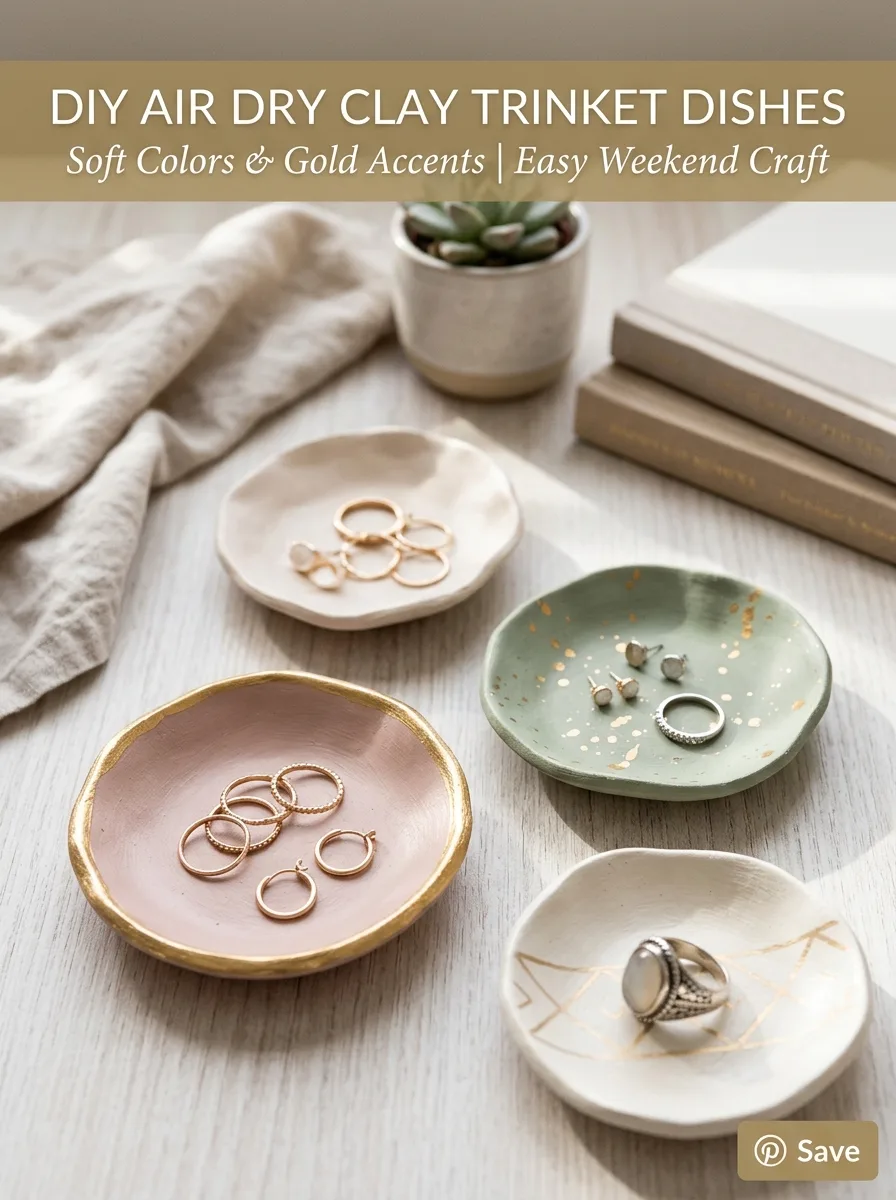
Roll air-dry clay into an even slab, cut a circle or freeform shape, and press in a leaf, lace or stamp for texture. Drape the slab into a small bowl lined with plastic wrap to shape the curve, and smooth the edges with a damp finger. Once the clay is completely dry, paint it with acrylics and finish with a clear varnish.
Good to know: air-dry clay can take a day or more to dry, depending on thickness and humidity, so guests will need to finish their dishes at home. These dishes aren’t waterproof or meant for food, so keep them for rings and keys.
10. DIY Scrunchies
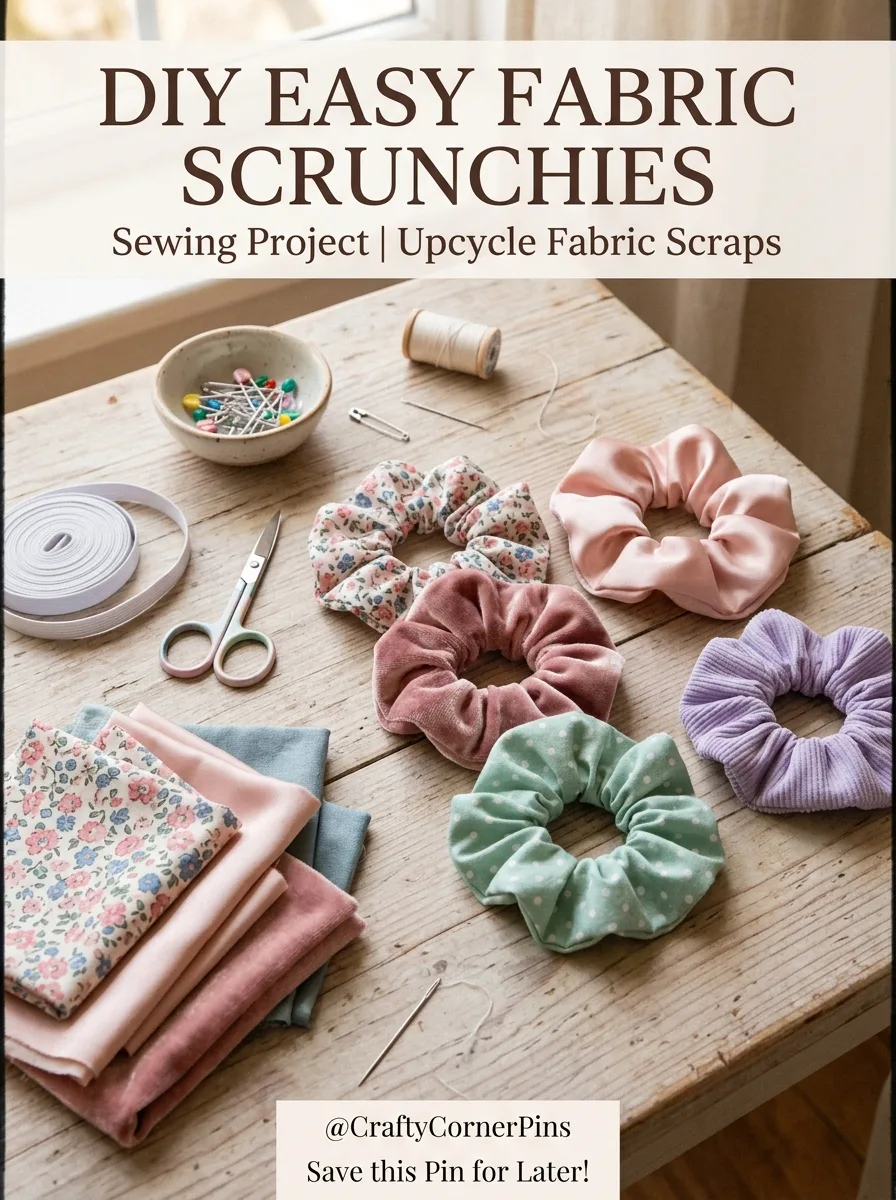
Cut a long rectangle of soft fabric, fold it right sides together lengthwise and sew along the long edge to make a tube. Turn it right side out, thread elastic through with a safety pin, overlap the elastic ends and stitch them securely. Tuck in the raw fabric edges and stitch the opening closed by hand or machine. Cotton, satin and velvet all work.
Good to know: cut the fabric and elastic before guests arrive so the evening is spent sewing, not measuring. Satin and velvet slip while you sew, so pin them well; a simple hand running stitch is enough if no one has a machine.
11. Vision Board Collage

Give everyone a poster board or cork board, a stack of old magazines and catalogs, scissors and glue sticks. Guests cut out words, pictures and colors linked to their goals for the coming year, arrange them before gluing, then glue the background pieces first and work forward. Printed photos, handwritten notes and stickers make each board more personal.
Good to know: ask guests to bring a magazine or two, since mixed titles give everyone more to choose from. Glue sticks wrinkle thin magazine paper less than liquid glue does.
12. Flower Crown Making
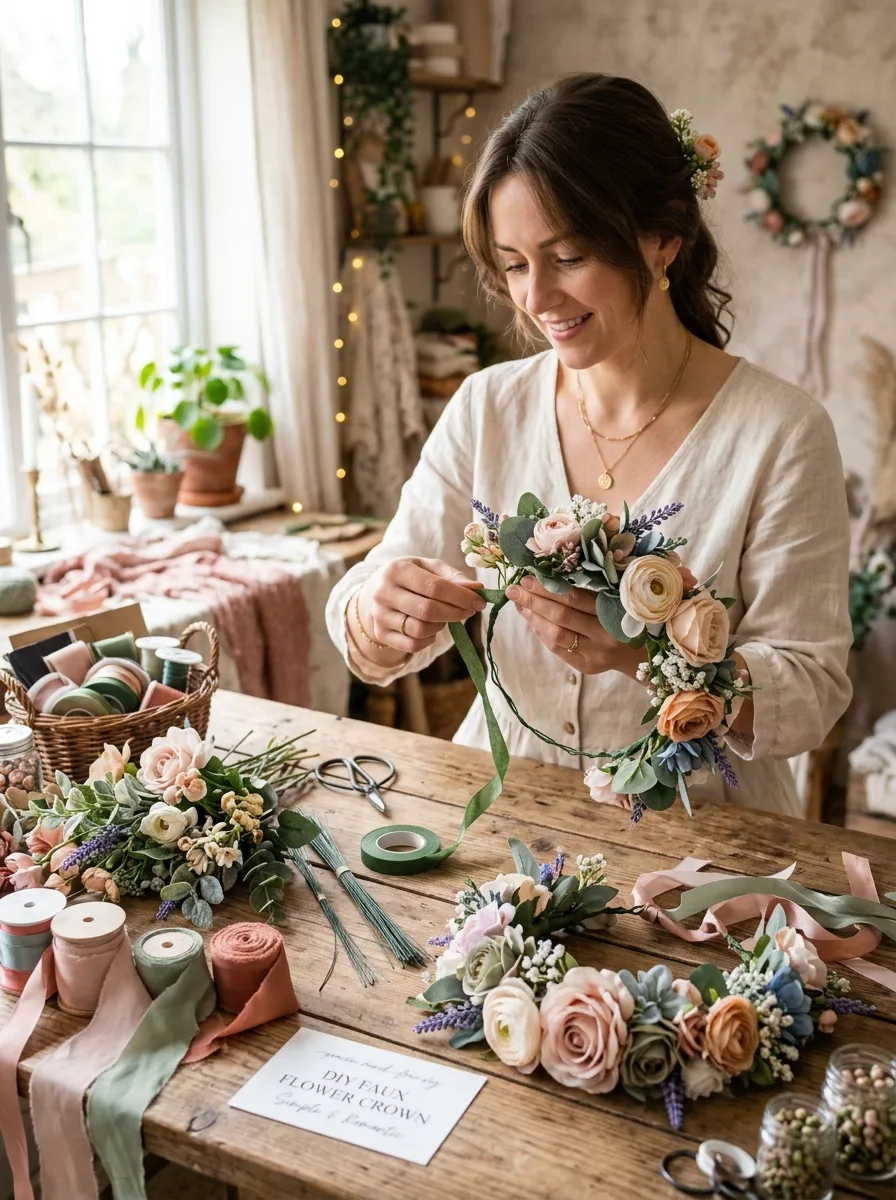
Measure each guest’s head with floral wire, twist the ends into a loop, and wrap the band with floral tape. Cut faux or dried flower stems short, then attach them one at a time with floral tape or thin wire, letting each bloom cover the stem of the one before. Tie ribbons to the loop at the back so the crown can be adjusted.
Good to know: cut wire with wire cutters, not scissors, and fold sharp ends back into the tape so they don’t scratch the scalp.
13. Resin Coasters
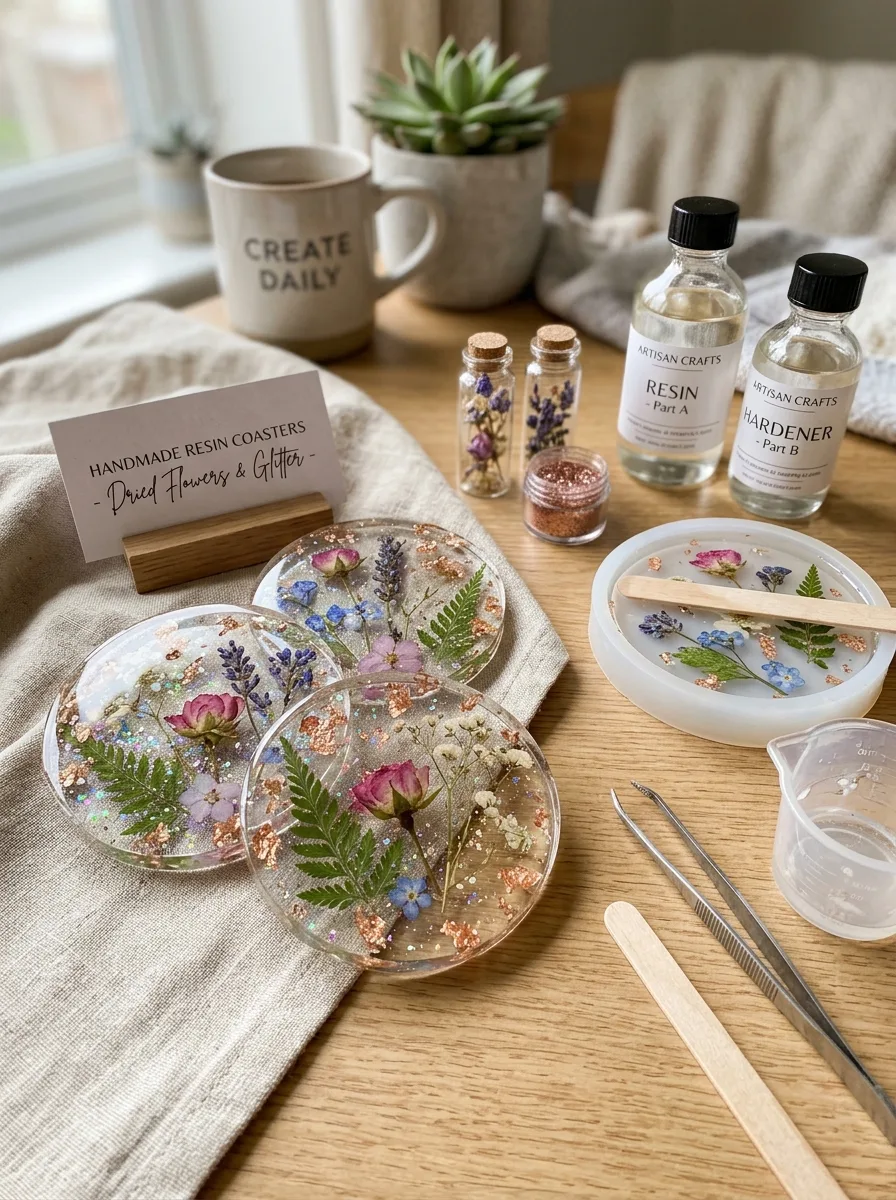
Use a two-part epoxy resin sold for art or coasters, silicone coaster molds and inclusions such as dried flowers, mica powder or glitter. Measure resin and hardener exactly as the label says, stir slowly and thoroughly, pour a thin first layer, add the inclusions and top up. Work on a level, covered surface, remove bubbles the way the maker recommends, and leave the molds undisturbed to cure.
Good to know: wear nitrile gloves and work with good ventilation; resin makers warn that epoxy can cause skin allergies after one exposure or many. Entropy Resins advises never using solvents, even vinegar, to clean epoxy off skin, since they can carry it into the skin. Resin won’t cure in one evening, so plan to hand the coasters out later.
14. Macrame Keychains
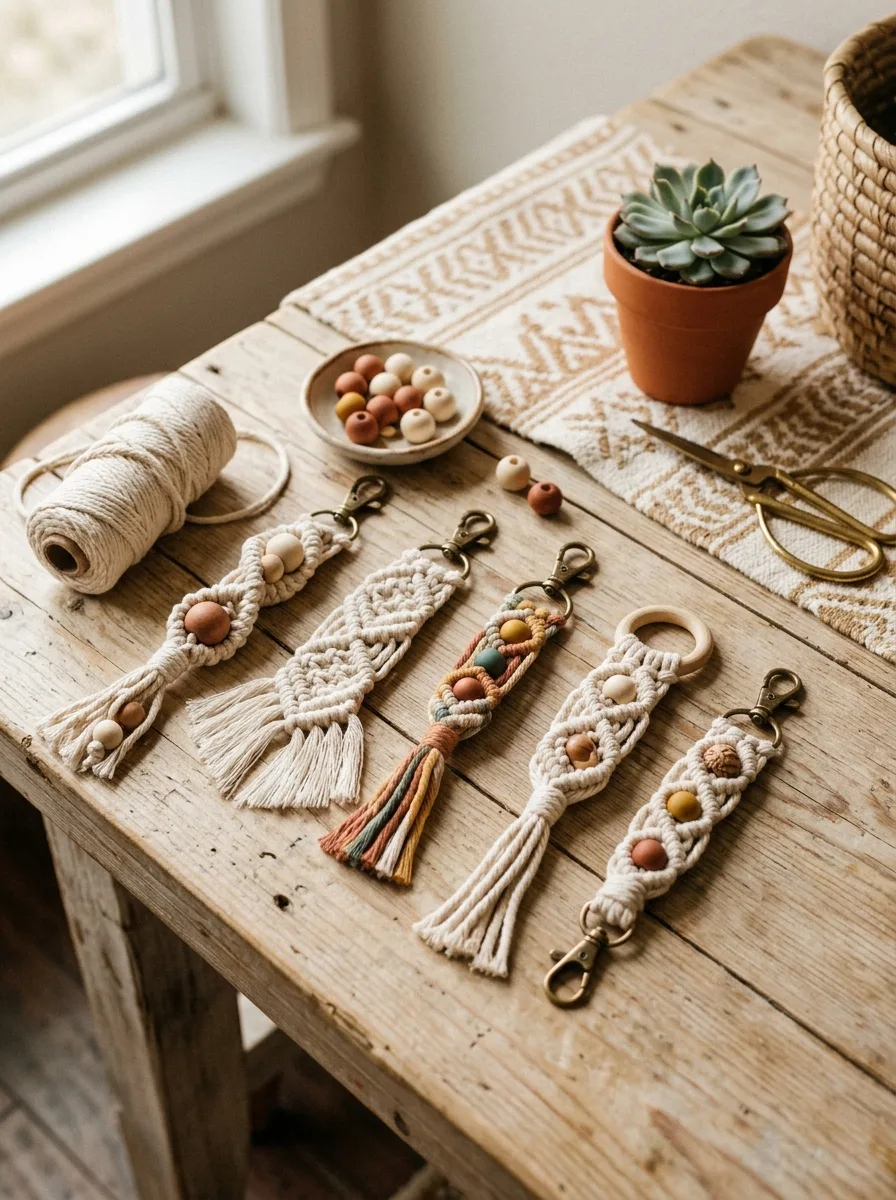
Cut a few lengths of soft macrame cord, fold them in half and attach them to a key ring with a lark’s head knot. Work a few square knots, or a spiral of half knots, down the cords, slide on a wooden bead, and finish with a wrapping knot. Trim the ends and comb them out into a fringe.
Good to know: for flat square knots, alternate the side you start from each time; starting from the same side every time twists the knots into a spiral. Hook the key ring over a clipboard clip so both hands are free.
15. Custom Tote Bag Painting
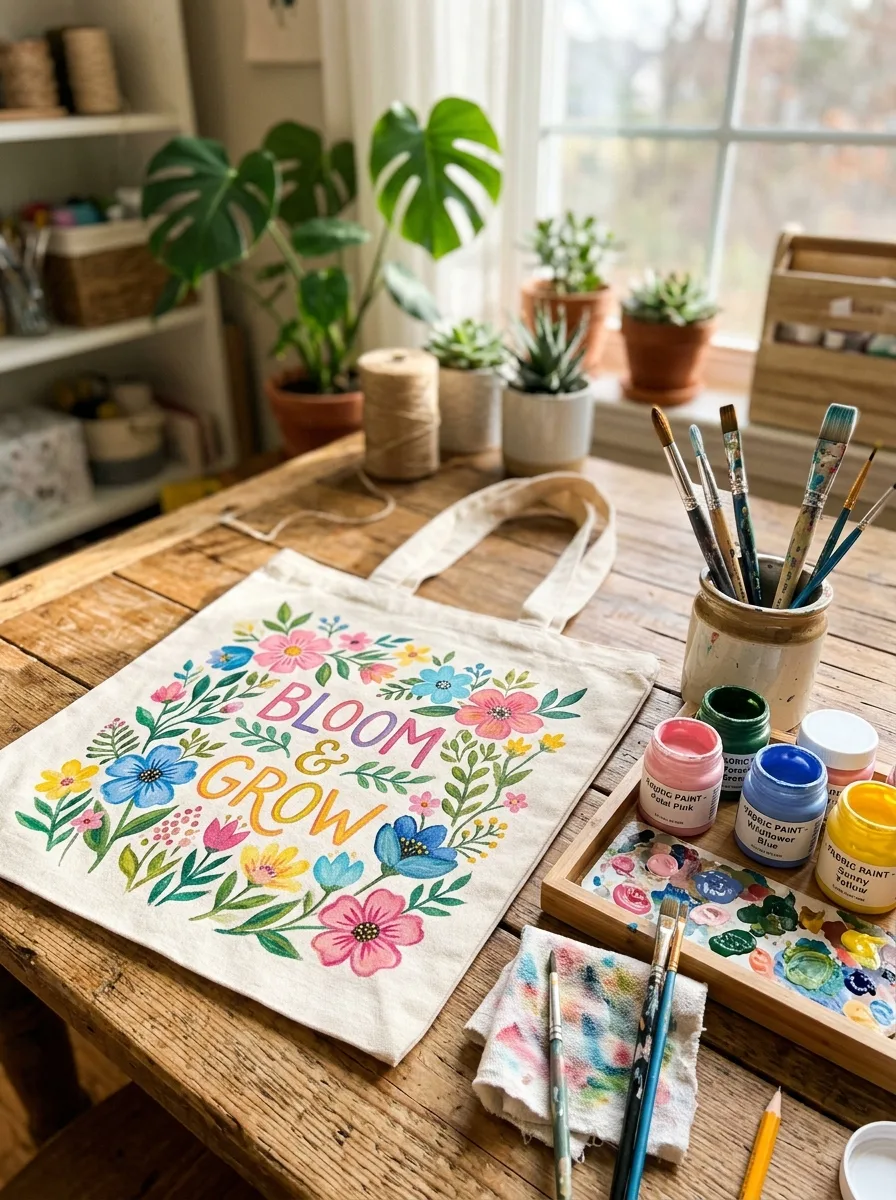
Use a pre-washed cotton canvas tote and slip a piece of cardboard inside so paint doesn’t soak through to the back. Sketch the design lightly in pencil or chalk, then fill it in with fabric paint, fabric markers or acrylic mixed with a fabric medium. Stencils, painter’s-tape stripes and simple lettering are easy for beginners, and these patchwork painting ideas suit a tote well.
Good to know: check the label for heat-setting and washing directions. Some fabric paints need ironing to set, and others need several days before the first wash; skipping that step can make the design fade or peel.
16. Soap Making
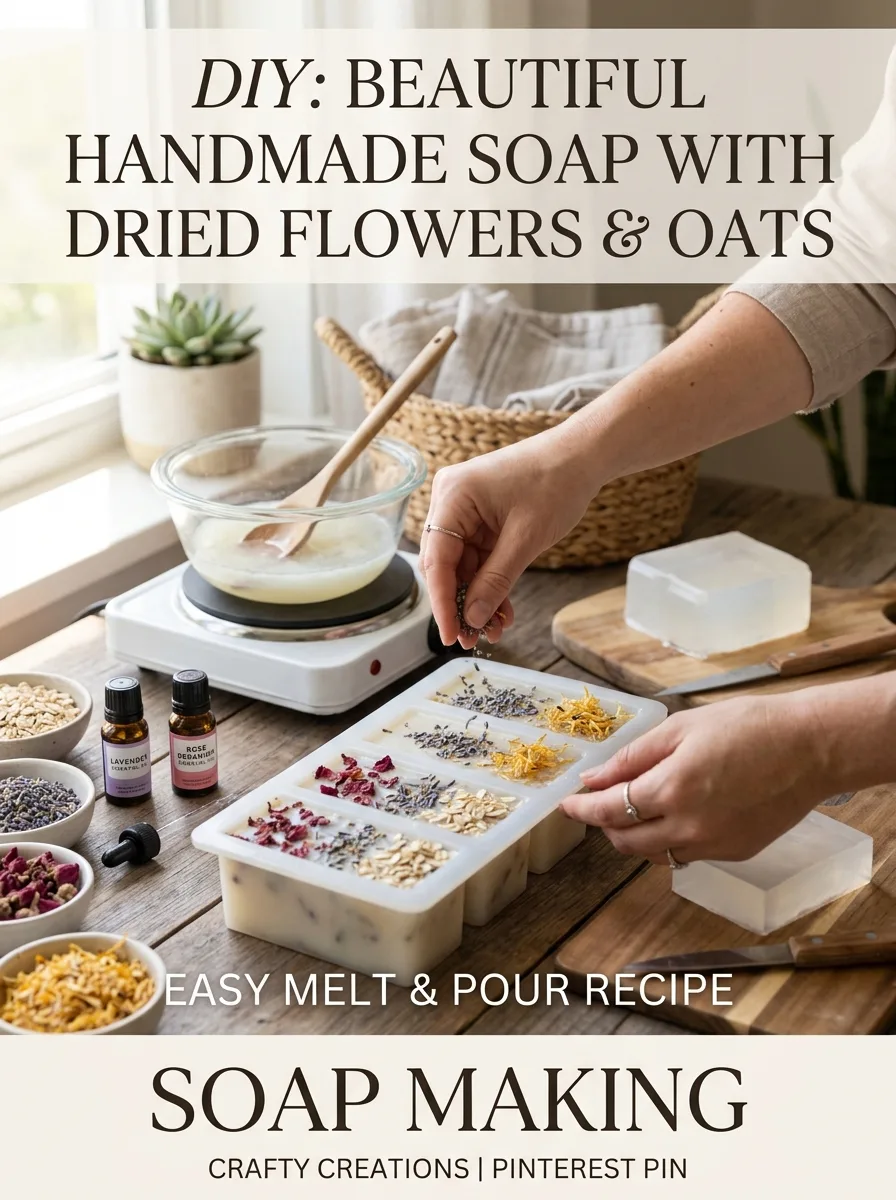
Cut a melt-and-pour soap base into cubes and melt it in a microwave-safe container in short bursts, stirring between each, or in a double boiler. Stir in soap colorant and a fragrance or essential oil made for soap at the rate the supplier gives. Pour into silicone molds, mist the surface with rubbing alcohol to pop bubbles, and unmold once the soap has hardened.
Good to know: melted soap base is hot enough to burn, so use oven mitts and pour it yourself rather than passing hot containers around. Don’t let it boil; soap suppliers note that overheated base can scorch and turn thick and cloudy.
17. Embroidery Hoop Art
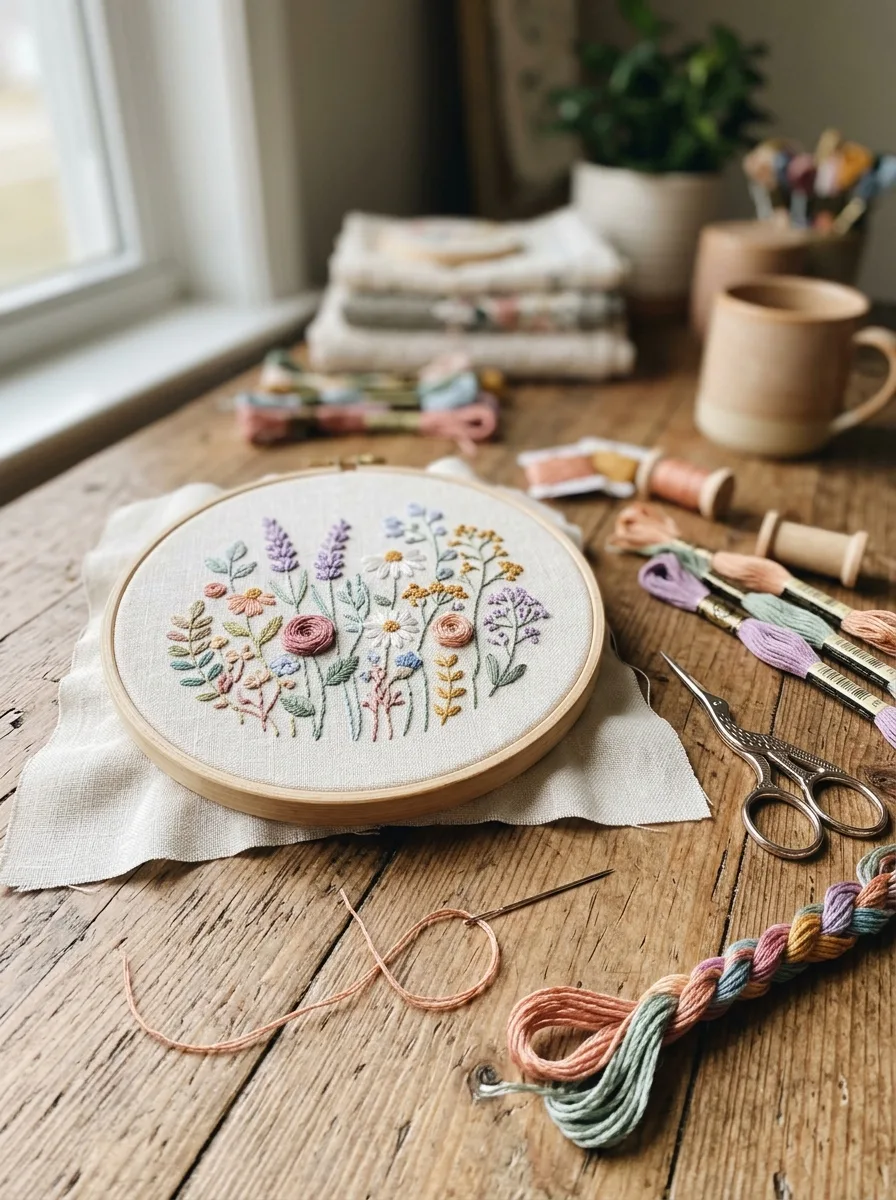
Stretch cotton fabric tight in a wooden hoop, transfer a simple design with a water-soluble pen or by tracing it against a bright window, and stitch with embroidery floss split into two or three strands. Back stitch works for outlines and lettering, satin stitch fills small shapes, and French knots make dots and flower centers. Trim the fabric at the back and the hoop becomes the frame.
Good to know: keep the fabric drum-tight so stitches don’t pucker, and use a needle with an eye big enough for the floss. Pre-printed patterns help guests who have never stitched.
18. Mini Terrarium Making
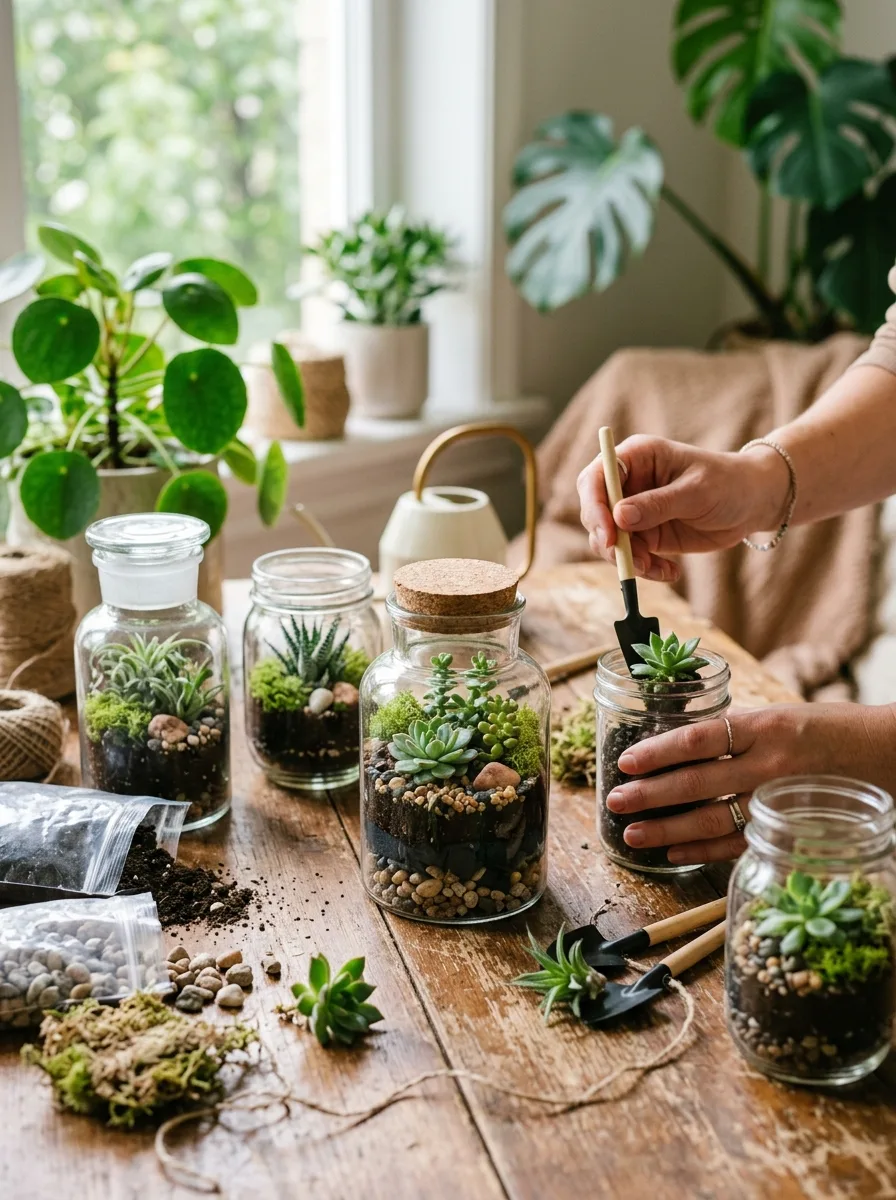
Choose the plants first, because they decide the container. Succulents and cacti need an open container, gritty cactus soil and bright light; moss, ferns and other plants that like humidity suit a jar with a lid. Add a layer of gravel for drainage, a thin layer of activated charcoal if you like, then the soil, plants, and decorations such as stones or small figures.
Good to know: don’t put succulents and moss together in a sealed jar. Texas A&M AgriLife Extension advises keeping terrariums open for succulents and closed only for tropical plants, and closed jars do best out of hot direct sun.
19. Mosaic Tile Coasters
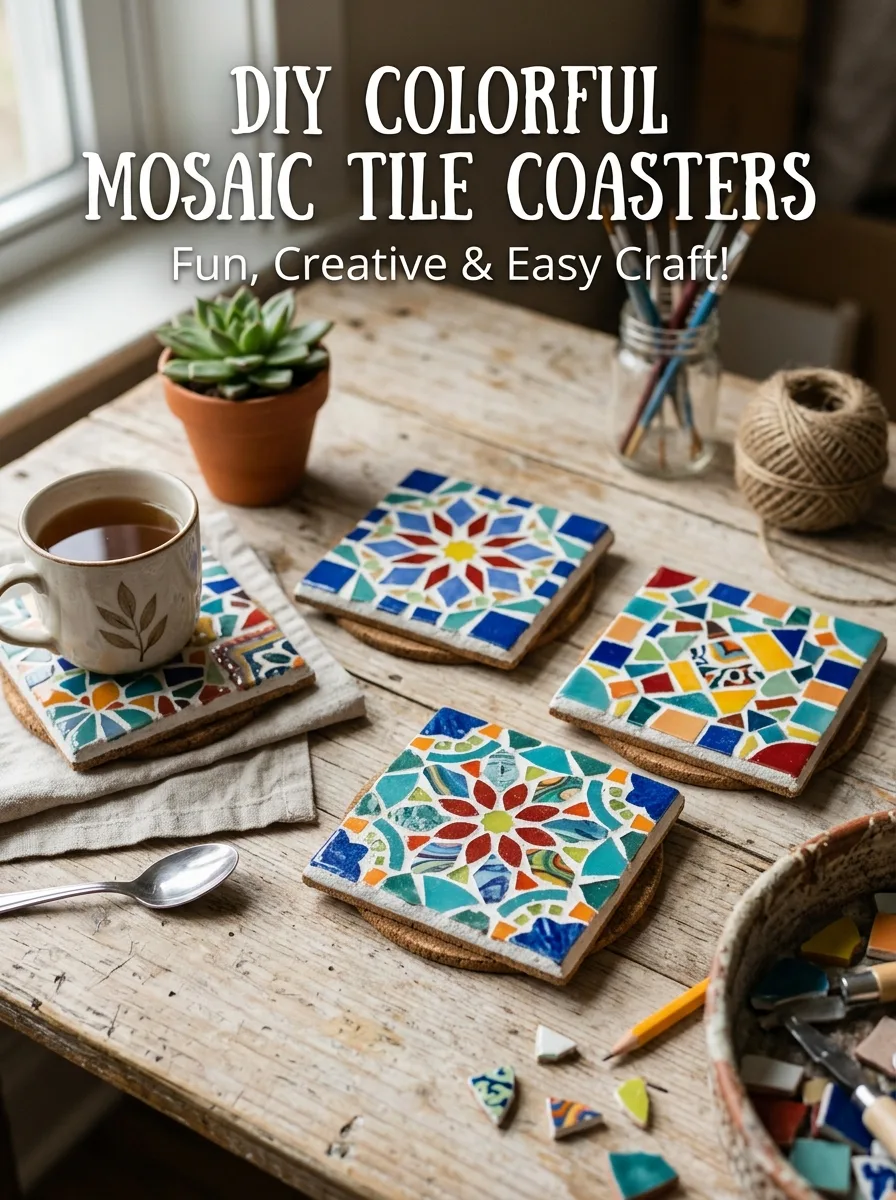
Arrange small glass or ceramic tiles on a cork-backed or plain ceramic tile base, leaving small even gaps, and glue them down with tile adhesive or a strong craft glue. Once the glue is dry, spread grout over the top with a rubber float, pressing it into the gaps. Wipe off the excess with a damp sponge and buff away the haze as the grout firms up.
Good to know: wear gloves when mixing and spreading cement-based grout and avoid breathing the dry powder; grout safety data sheets list skin and eye irritation and crystalline silica dust. Wear safety glasses if anyone cuts tiles with nippers.
20. Beaded Wine Charms
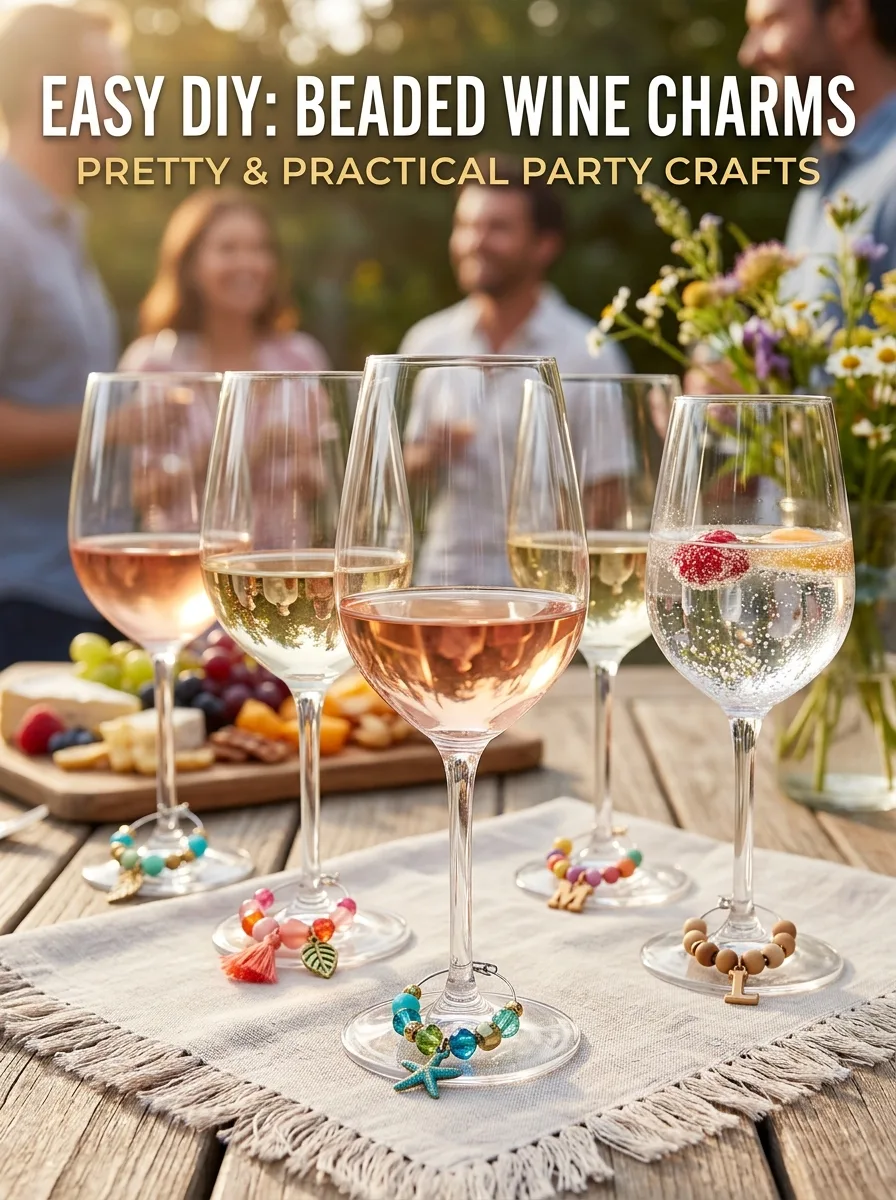
Use wine charm hoops, which have a small catch at one end that hooks over the stem. Thread on a few beads in each guest’s colors, add a small charm if you like, and close or bend the end so the beads stay on. Make every charm different so glasses are easy to tell apart, and make a spare set for future parties.
Good to know: bend in or file any sharp wire ends. Loose beads are a choking hazard for small children and pets, so collect them at the end of the night.
21. Pressed Flower Frames
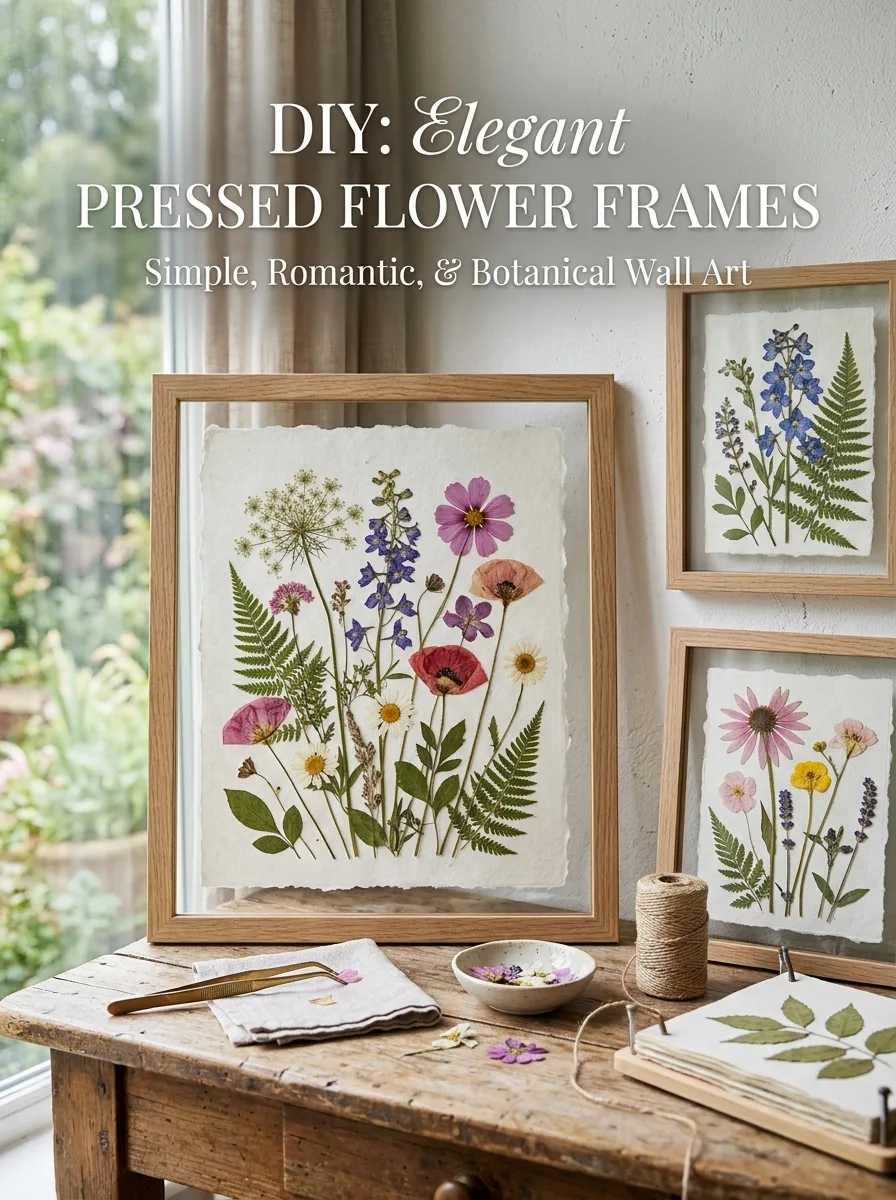
Press flowers ahead of time between sheets of absorbent paper inside a heavy book. Flat blooms such as violets, daisies and single-petal roses, plus ferns, press best. At the party, arrange them on cardstock or between the two panes of a floating glass frame, fix them with tiny dots of glue applied with a toothpick, and close the frame.
Good to know: start pressing early. University of Maryland Extension suggests checking the flowers after a week and allowing two to three weeks for them to dry completely. Avoid paper towels, whose texture can print onto the petals.
22. Custom Phone Case Decorating
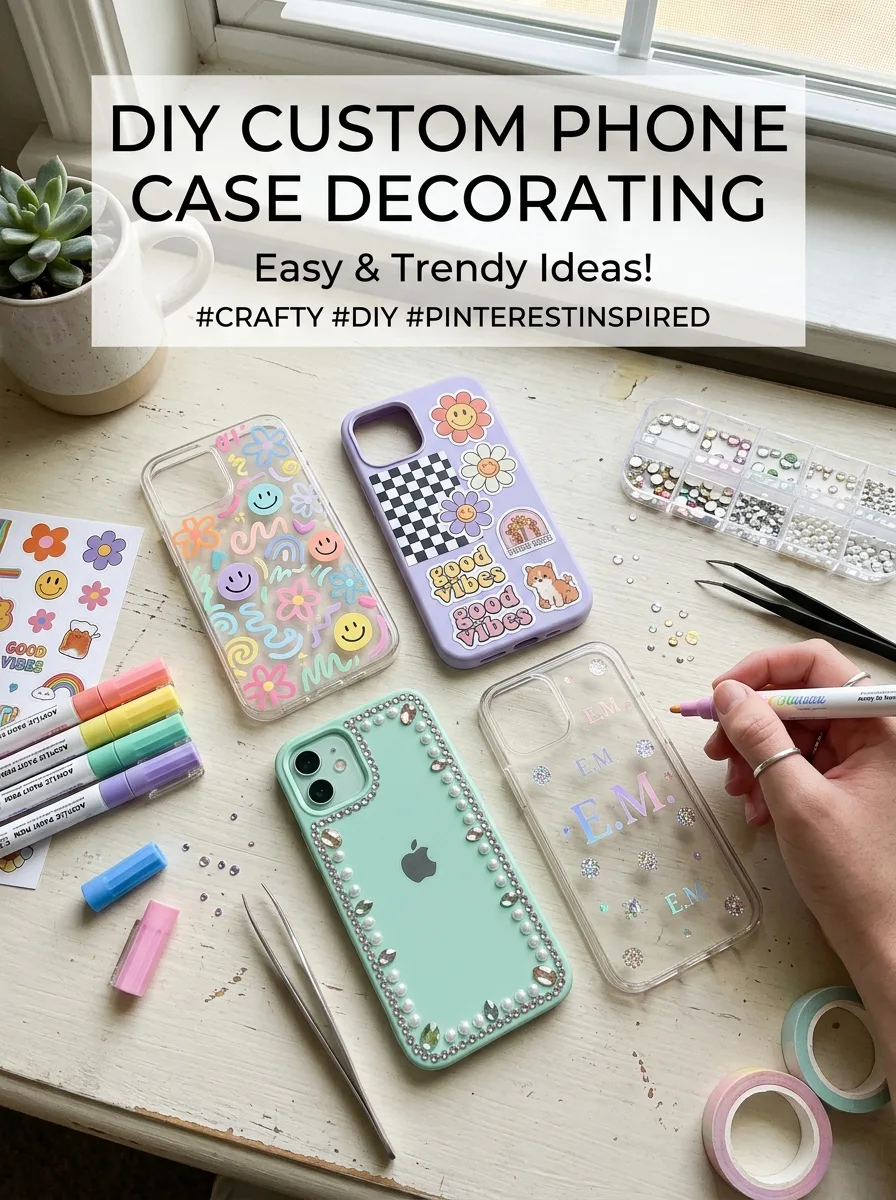
Start with a clear or plain case and take the phone out first. Sketch the design lightly, then decorate with paint pens, stickers, pressed flowers or flat gems. Keep thick embellishments away from the camera opening, buttons and the edges where the case flexes. If your paint pens need a topcoat, use a thin clear coat made for plastic and let it dry fully.
Good to know: some strong craft adhesives used for gems give off solvent fumes, so use them with a window open and wait the full cure time on the label before putting the phone back in.
23. Mini Wreath Making
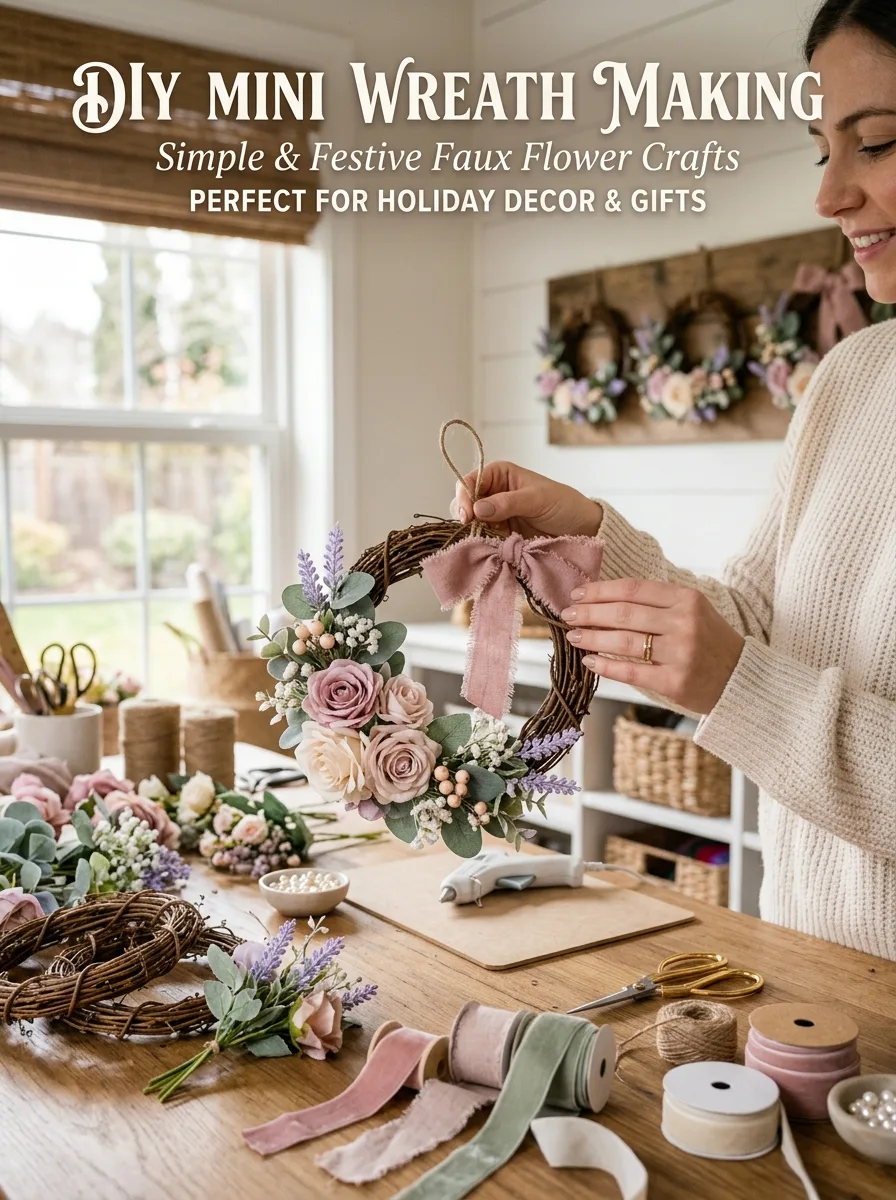
Wrap a small grapevine, wooden or wire hoop with ribbon, or leave it bare. Attach faux flowers, eucalyptus or other greenery in a cluster on one side with hot glue or floral wire, pointing the stems in the same direction for a neat look. Finish with a small bow and a ribbon loop for hanging. Keeping the design to one side means everyone finishes in an evening.
Good to know: hot glue burns quickly, and low-temperature glue guns can still burn. If glue gets on skin, run cool, not cold, water over it, which is the Mayo Clinic’s first step for minor burns.
Common mistakes to avoid
- Adding dried flowers, herbs or wood to candle wax where it can reach the flame.
- Leaving melting wax or soap unattended, or putting water on a wax fire.
- Using kitchen pots, spoons or baking sheets for wax, resin or clay, then cooking with them.
- Painting the rim of a wine glass, or calling painted, resin or clay pieces food safe when the maker doesn’t say so.
- Putting craft glitter, candle dye or other colors not made for cosmetics into lip gloss or bath bombs.
- Choosing resin or air-dry clay for a one-night party without a plan for curing and pickup.
Girls’ night craft FAQs
What are the easiest girls’ night crafts for beginners?
Friendship bracelets, vision boards, flower crowns, wine charms and sip-and-paint canvases need no heat and little experience, and everyone can finish them in one evening.
Which crafts need the most safety care?
Candles and melt-and-pour soap involve hot liquids, polymer clay needs careful baking with ventilation, and resin calls for gloves and good airflow. Bath bombs and lip gloss are cosmetics, so use ingredients and colors sold for that use.
Are homemade candles safe to burn?
Use a wick sized for the jar and wax, keep botanicals out of the wax, and follow NFPA’s candle advice: keep candles at least 12 inches from anything that can burn, and blow them out before leaving the room or going to sleep.
Can you drink from a painted wine glass?
Yes, if the paint stays well below the rim and is cured exactly as the label directs. Plaid recommends leaving the top 3/4 inch of the glass unpainted so drinks and lips don’t touch the paint.


